Cardboard Chair
Final.
Designing and constructing a full scale chair from cardboard only. No fixings, glue or screws. The chair must hold the weight of an average human while balancing structural integrity with considered aesthetics.
Ideation Practice
Developing a quick ideation process through two stages: rough idea generation followed by refined development sketches with human scale and annotations.
Part 1 · Rough Ideas
 Rough Ideas 1
Warming Up
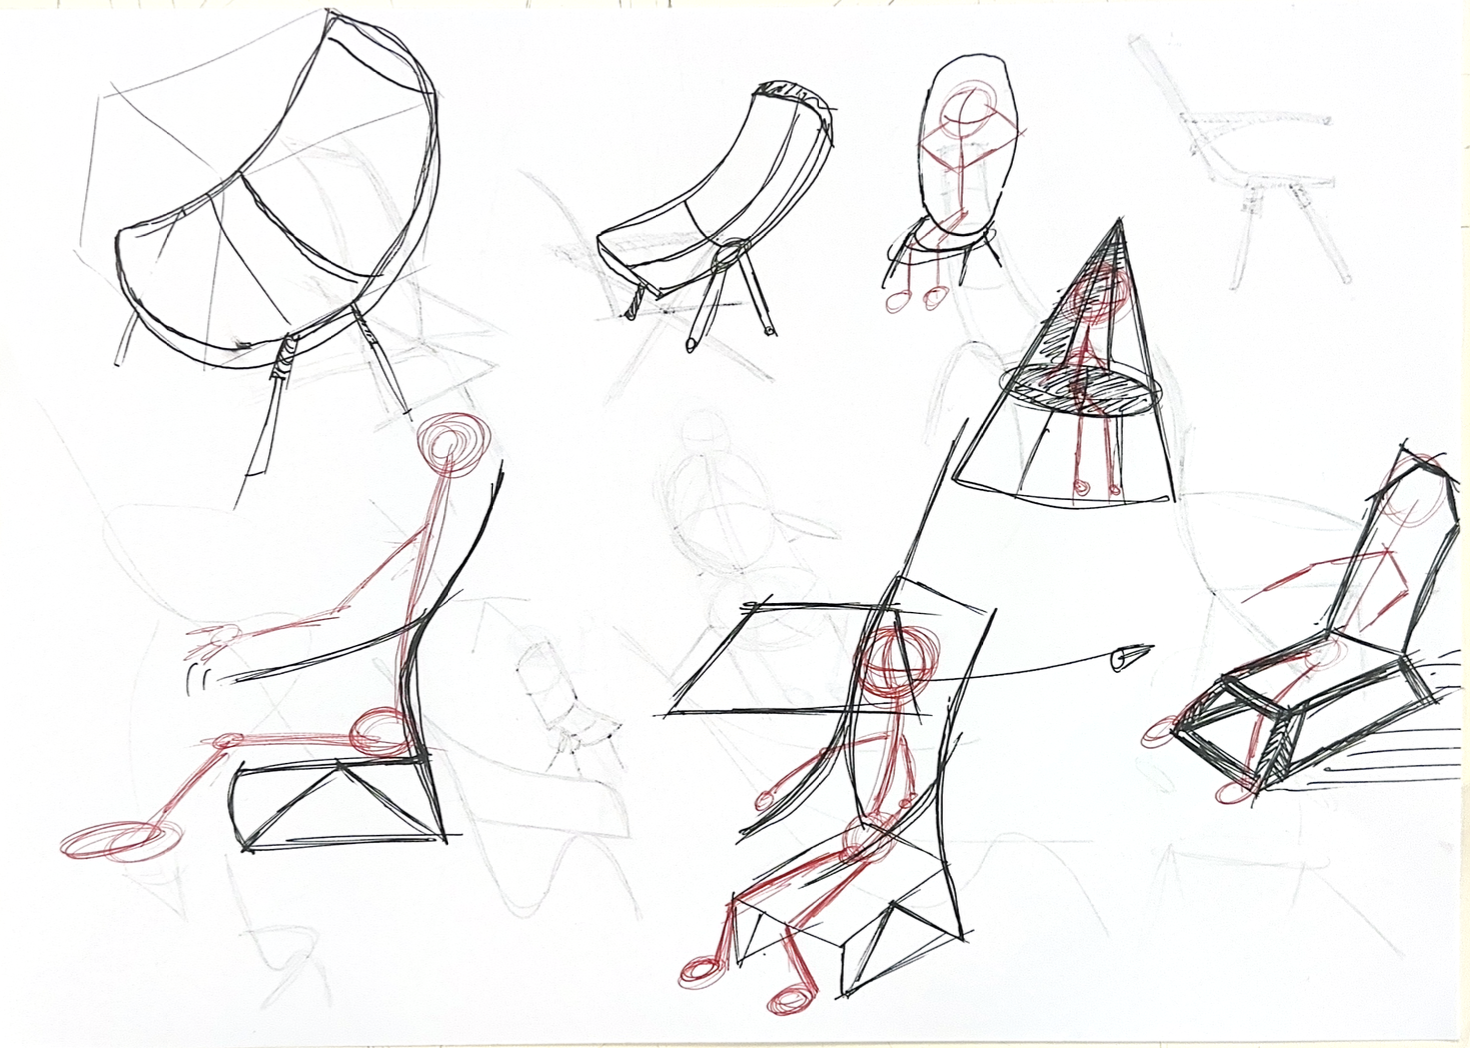
Firstly, I conducted a whole page of warmups, drawing parallel lines, ellipses, random shapes and 3D volumes. It was important to warm up first, as otherwise I feel too much like a perfectionist and need to get the rough sketching style loosened up in both my head and hands.
Finding a Process
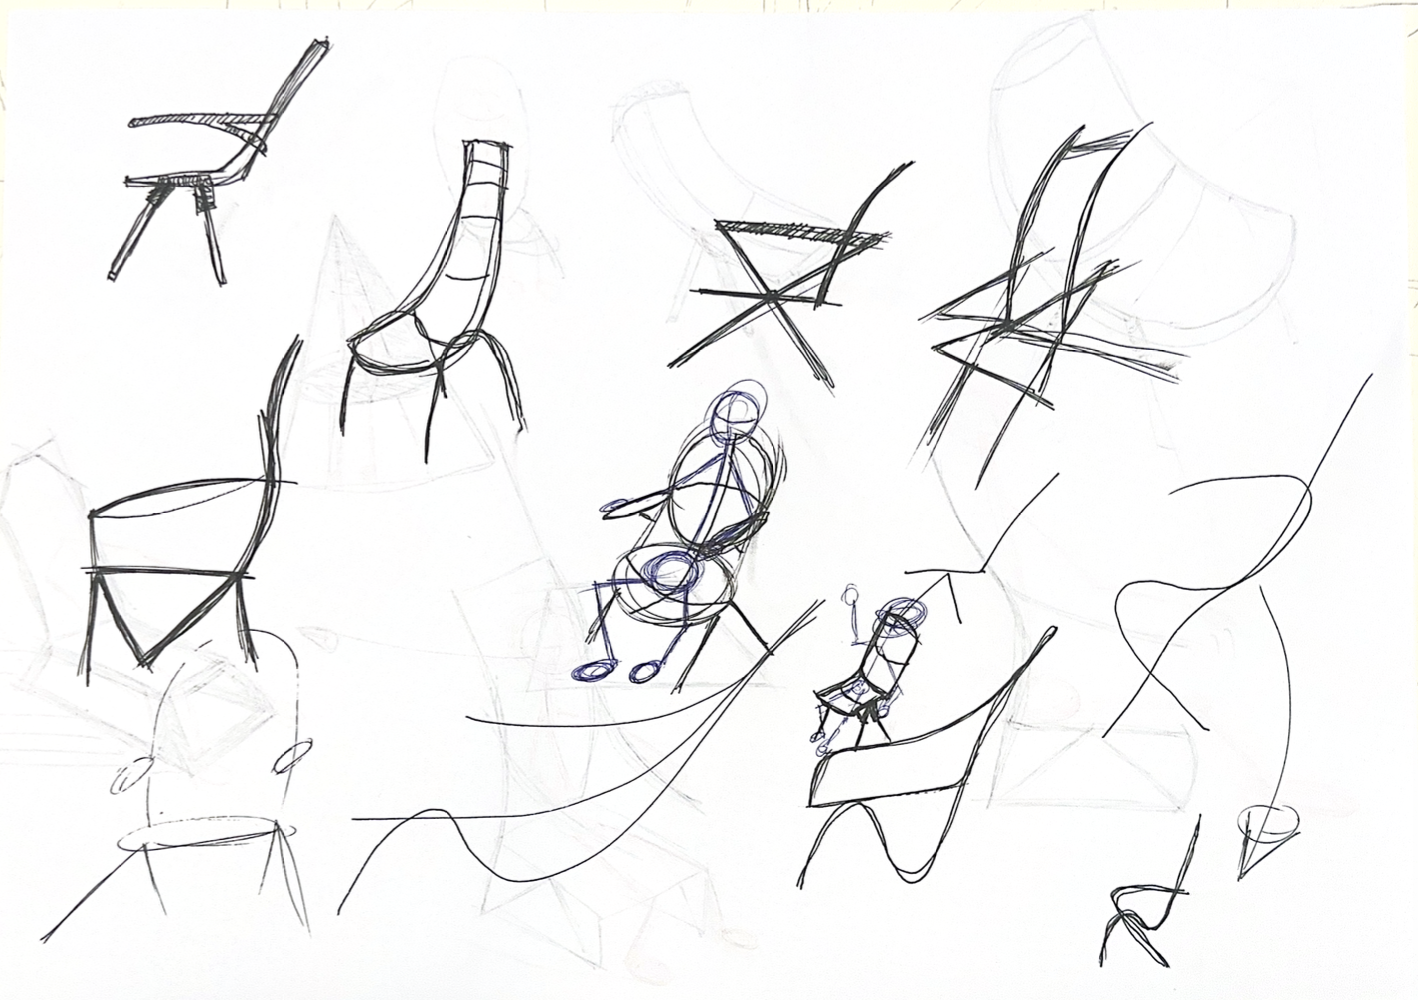
When first starting to sketch, I struggled with getting stuck into perspective 3/4 views. To get my ideas down more easily, I used orthographic side views instead, as they still conveyed the chair form well. A chair's main shape is largely defined by its side profile, so it was a perfect place to start. I then used those orthographic sketches to develop rough 3/4 views of the same chair. Having that 2D profile helped me understand my ideas visually on paper, making it easier to think through volume and scale.
Developing Ideas
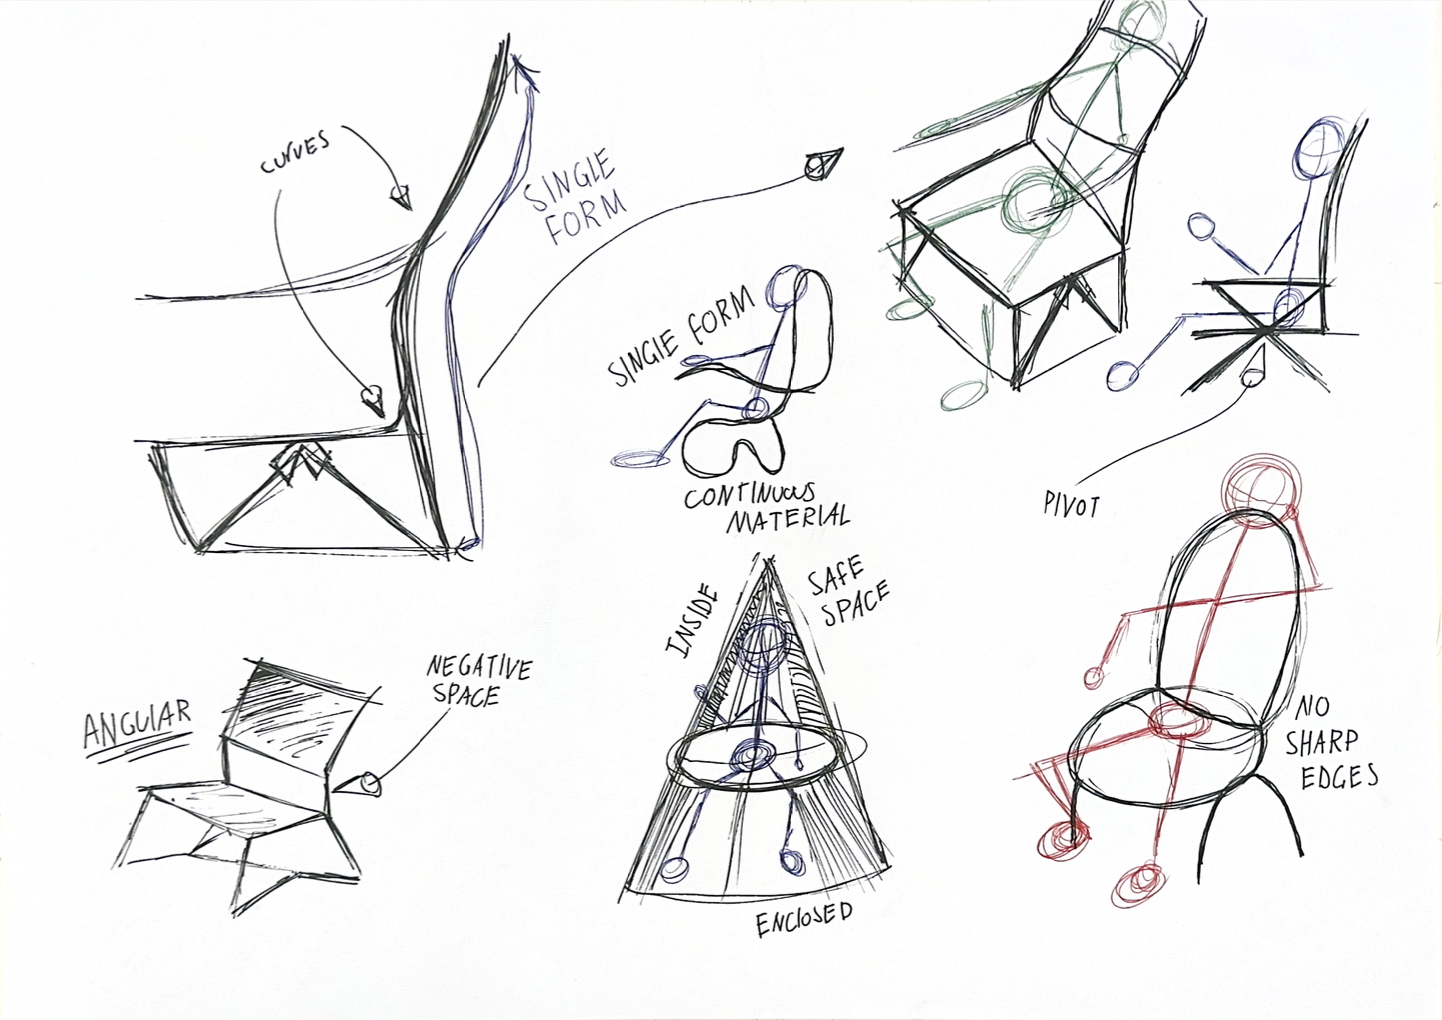
Once I had a few ideas on a page and knew I liked some of them, I introduced a new sheet of paper and redrew the stronger ideas larger and with more detail. I included human scale and annotations to view my ideas more clearly than just a rough sketchy image.
 Rough Ideas 2
 Developing Ideas
Chair Ideation
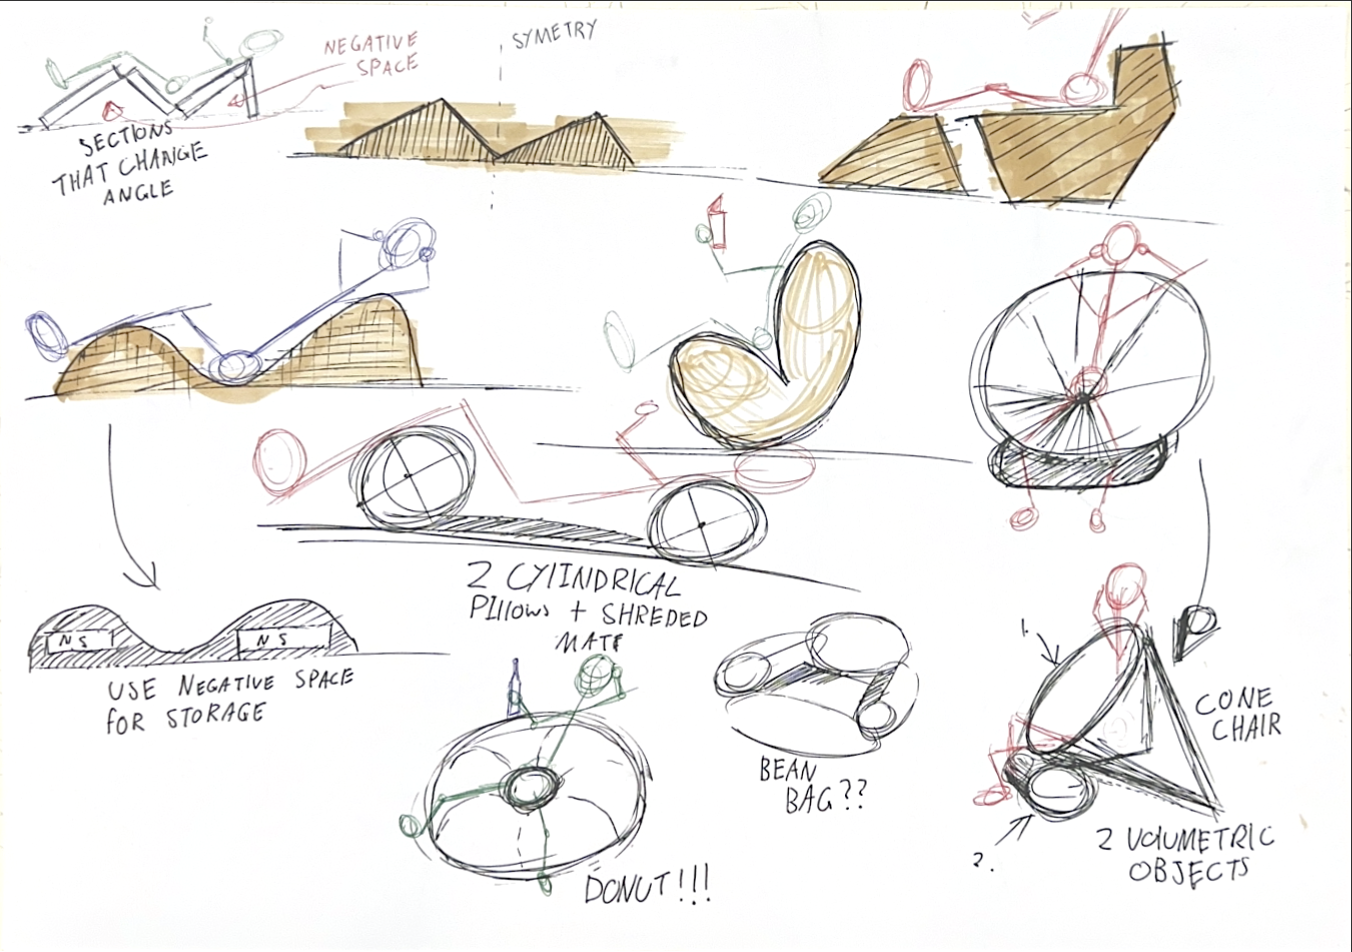
Rapid ideation sketches for the cardboard chair, drawing on material research, ergonomic analysis and typology study to generate a broad range of design directions.
 Ideation Page 1
Sketching Process
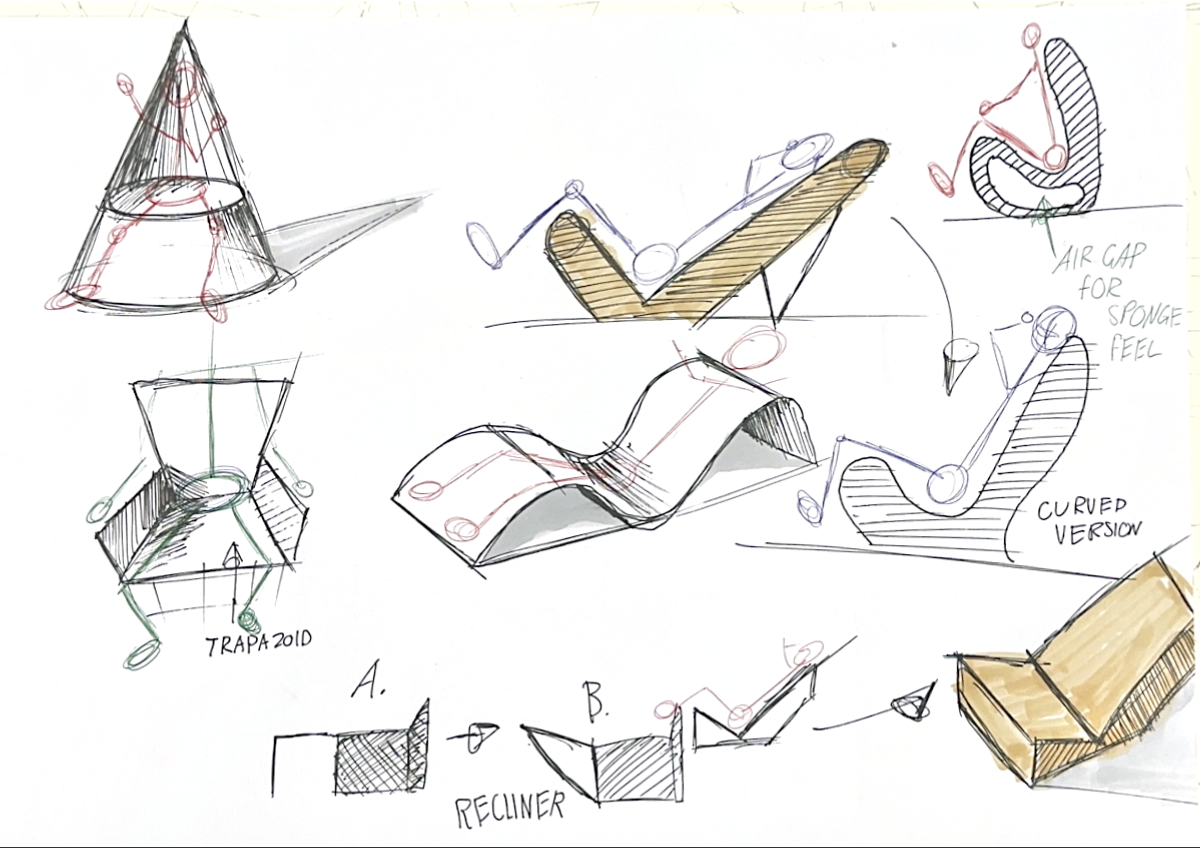
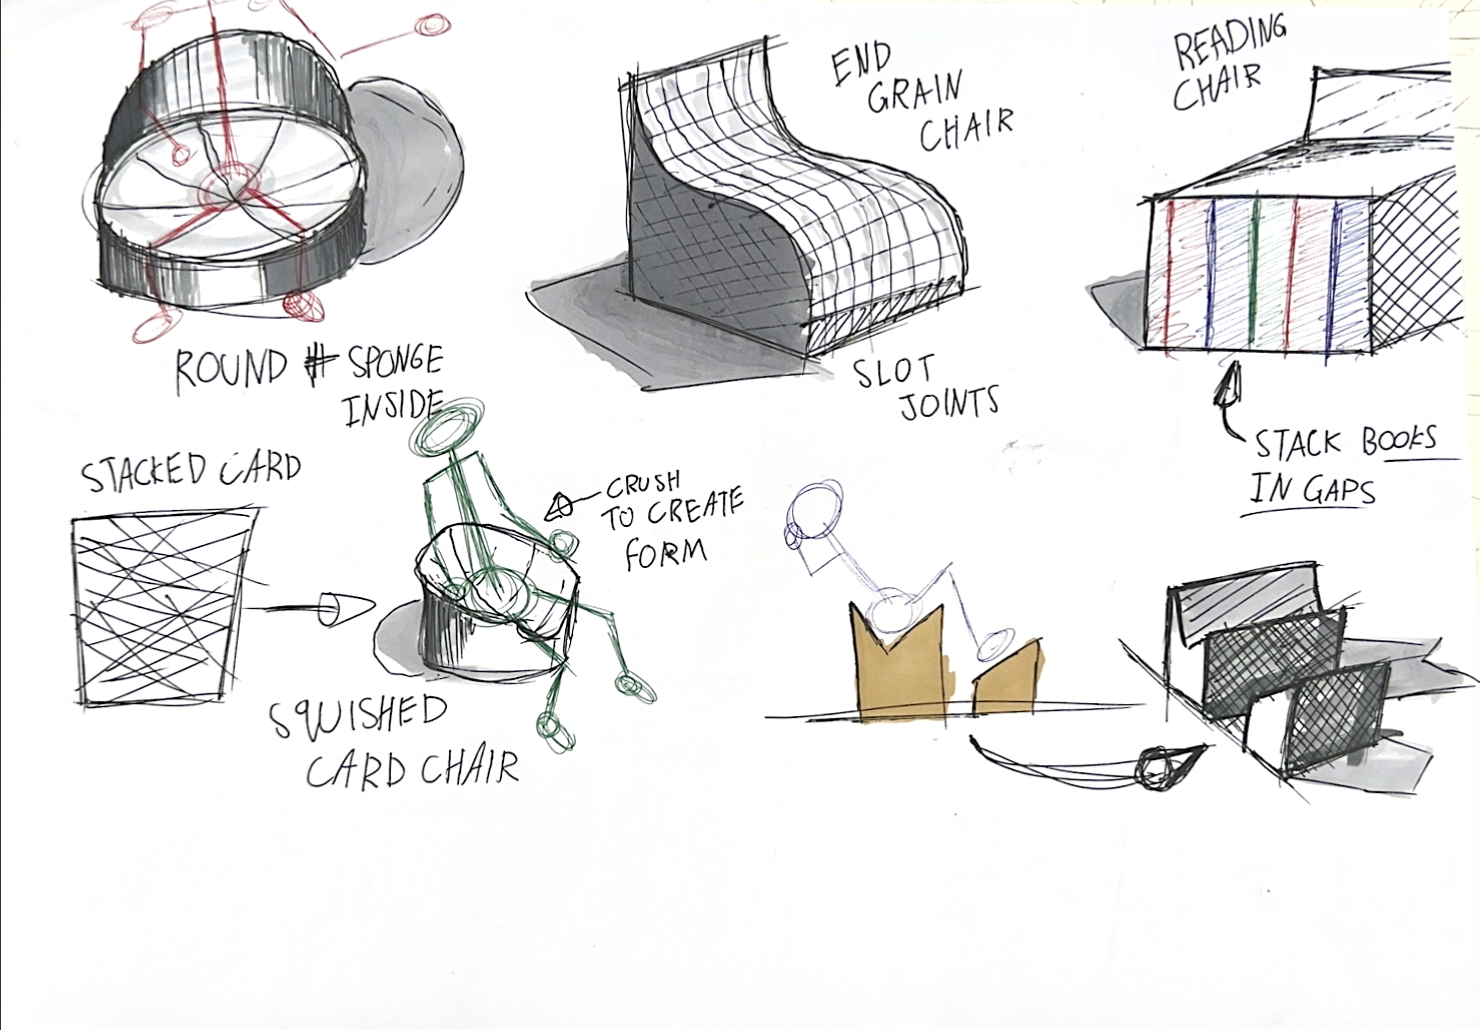
During this process I found major improvement in my sketching abilities. I felt more confident the longer I drew, finding the right connection between my ideas and the paper. The use of stick figures was extremely helpful, not only to me, but to others viewing the ideas, as they could also visually understand my thought process.
Colour & Contrast
It was also helpful to add Copic marker colour to some of the ideas to further show how they might look made from cardboard. This added more visual interest to the sketches and allowed them to be distinguished from one another. Additionally, using different colours for the human models allowed the person to be contrasted from the chair, so they did not feel lost within the sketch or cause the human lines to blend with the chair lines.
 Ideation Page 2
 Ideation Page 3
Concept Pages
Three concept directions selected from the ideation phase, each exploring a different approach to form, structure and comfort in cardboard.
Selected Ideations
Concept 01
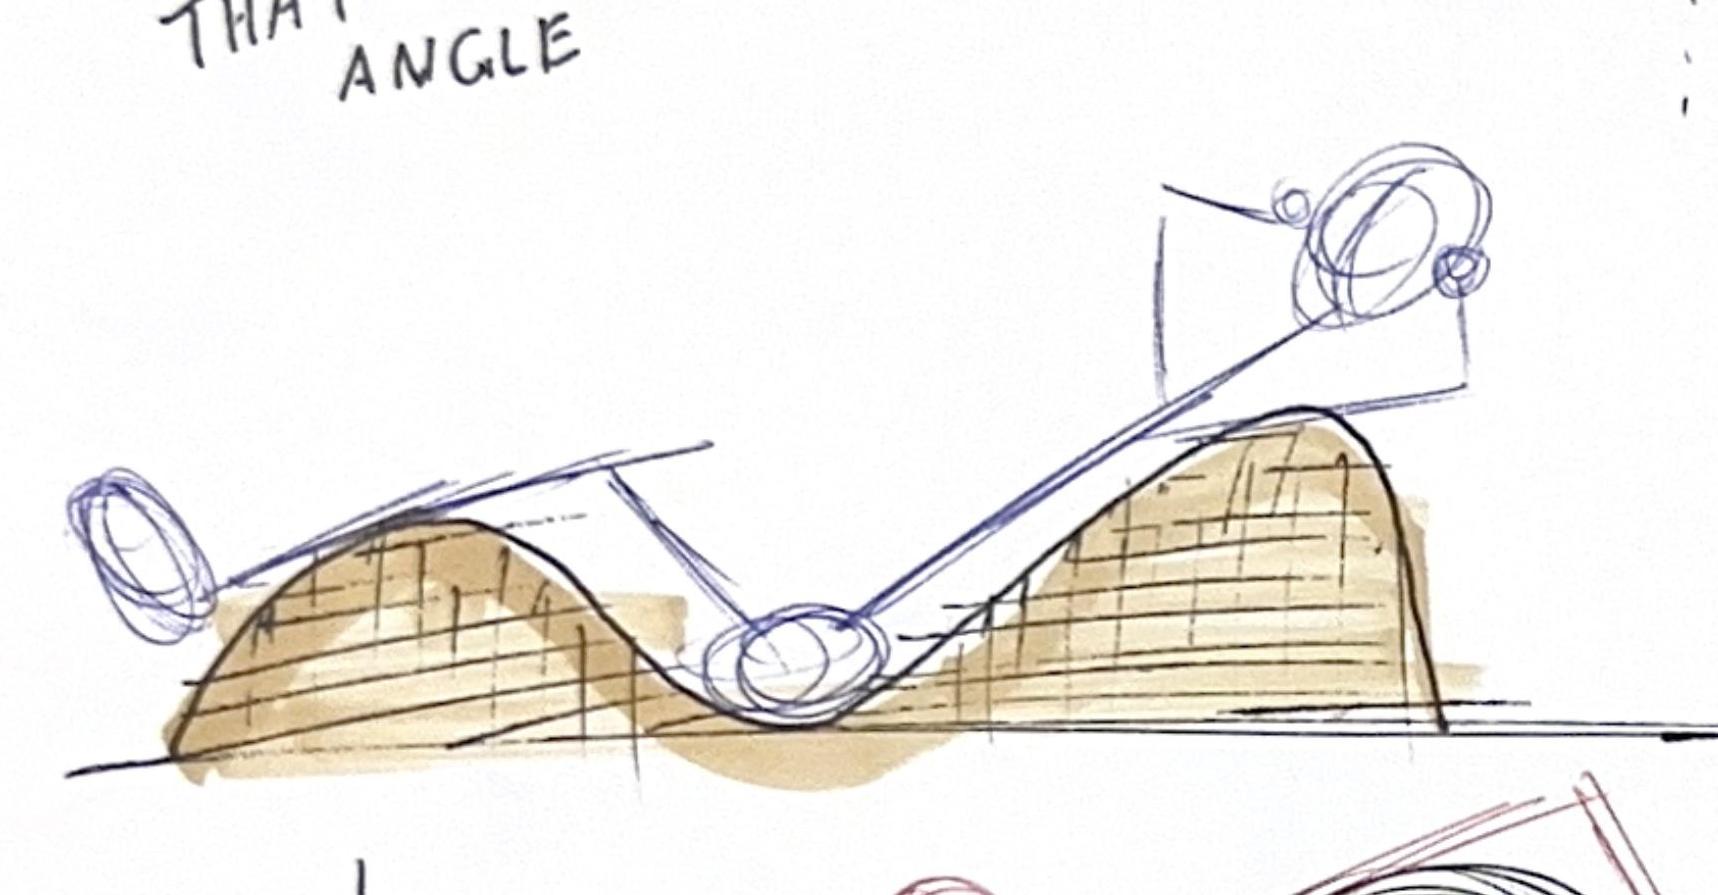
Wavey Chair
I chose this concept as a possibility due to its continuous form design and relaxation style. I personally love to sit in these types of chairs and felt it translated well into a cardboard structure.
Concept 02
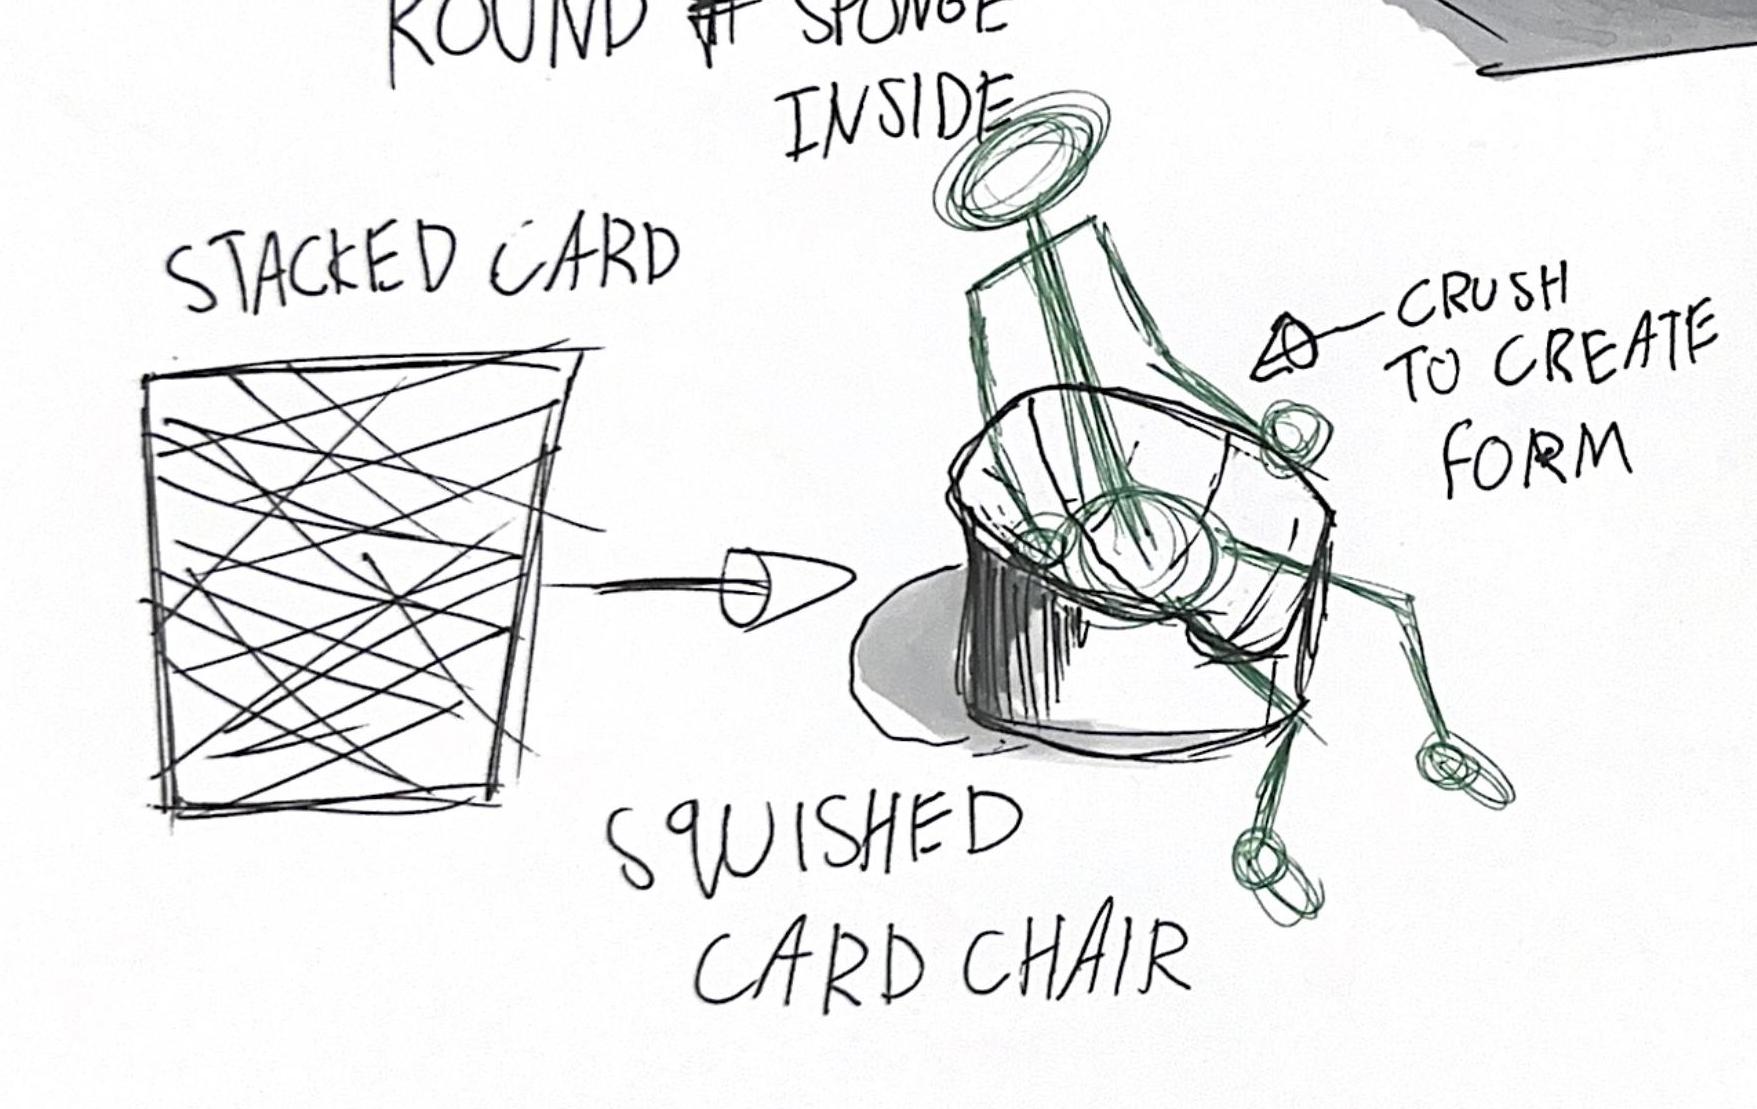
Squished Chair
This chair utilises the properties of cardboard to its advantage. If executed properly, the organic molding qualities of the material could make this chair comfortable for a large demographic.
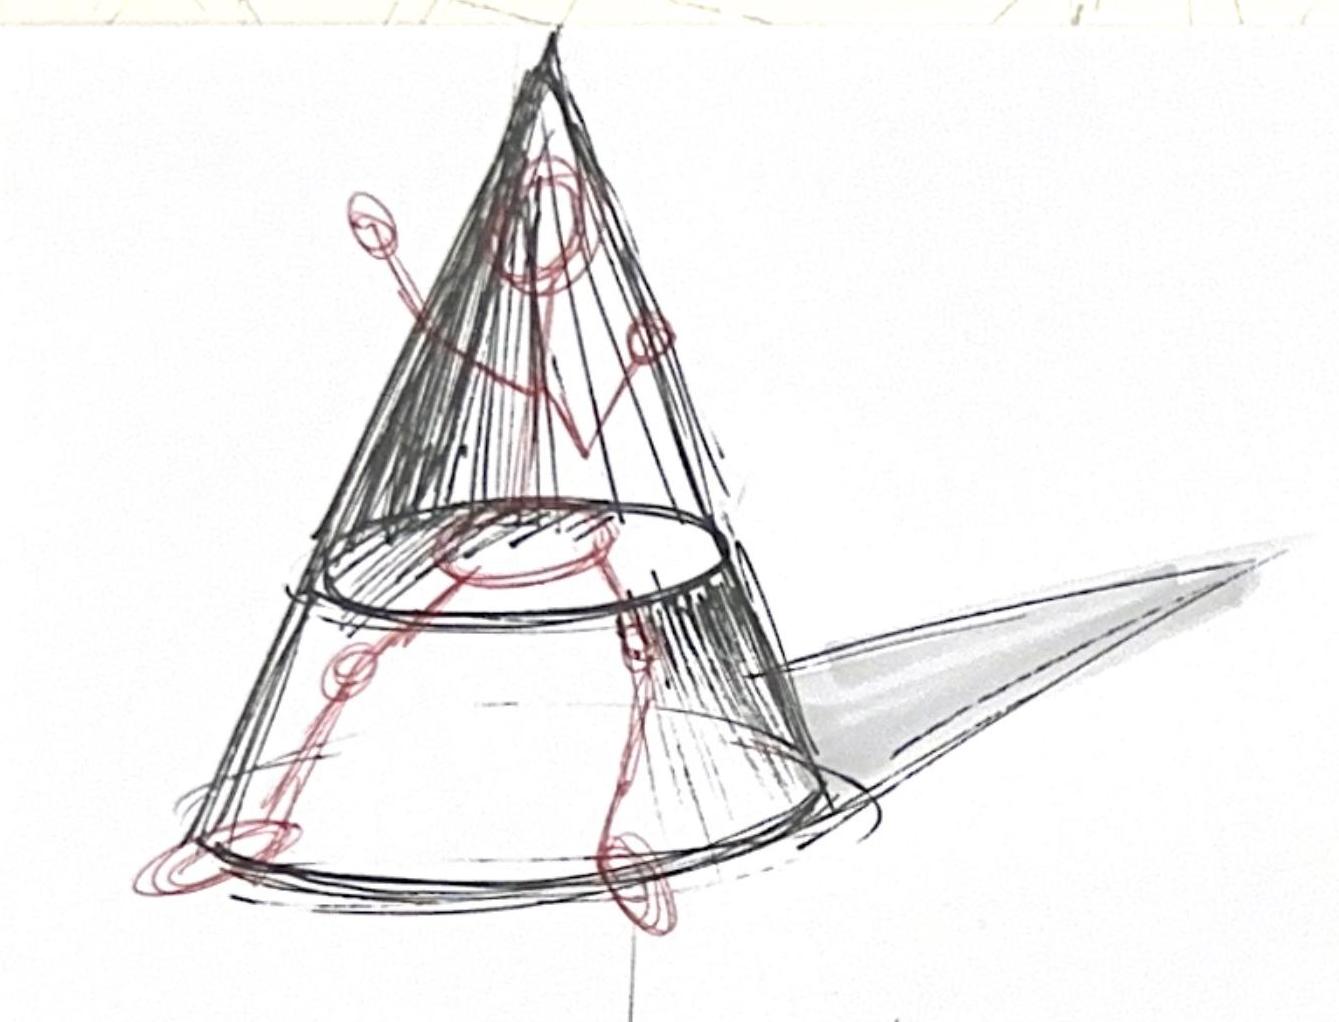
Concept 03
Cone Chair
The cone chair is aesthetically simple and unique. Having this cone form around you makes you feel supported, and the warped cone shape would be achieved with cardboard to a standard equal to any other material.
Final Concept Pages
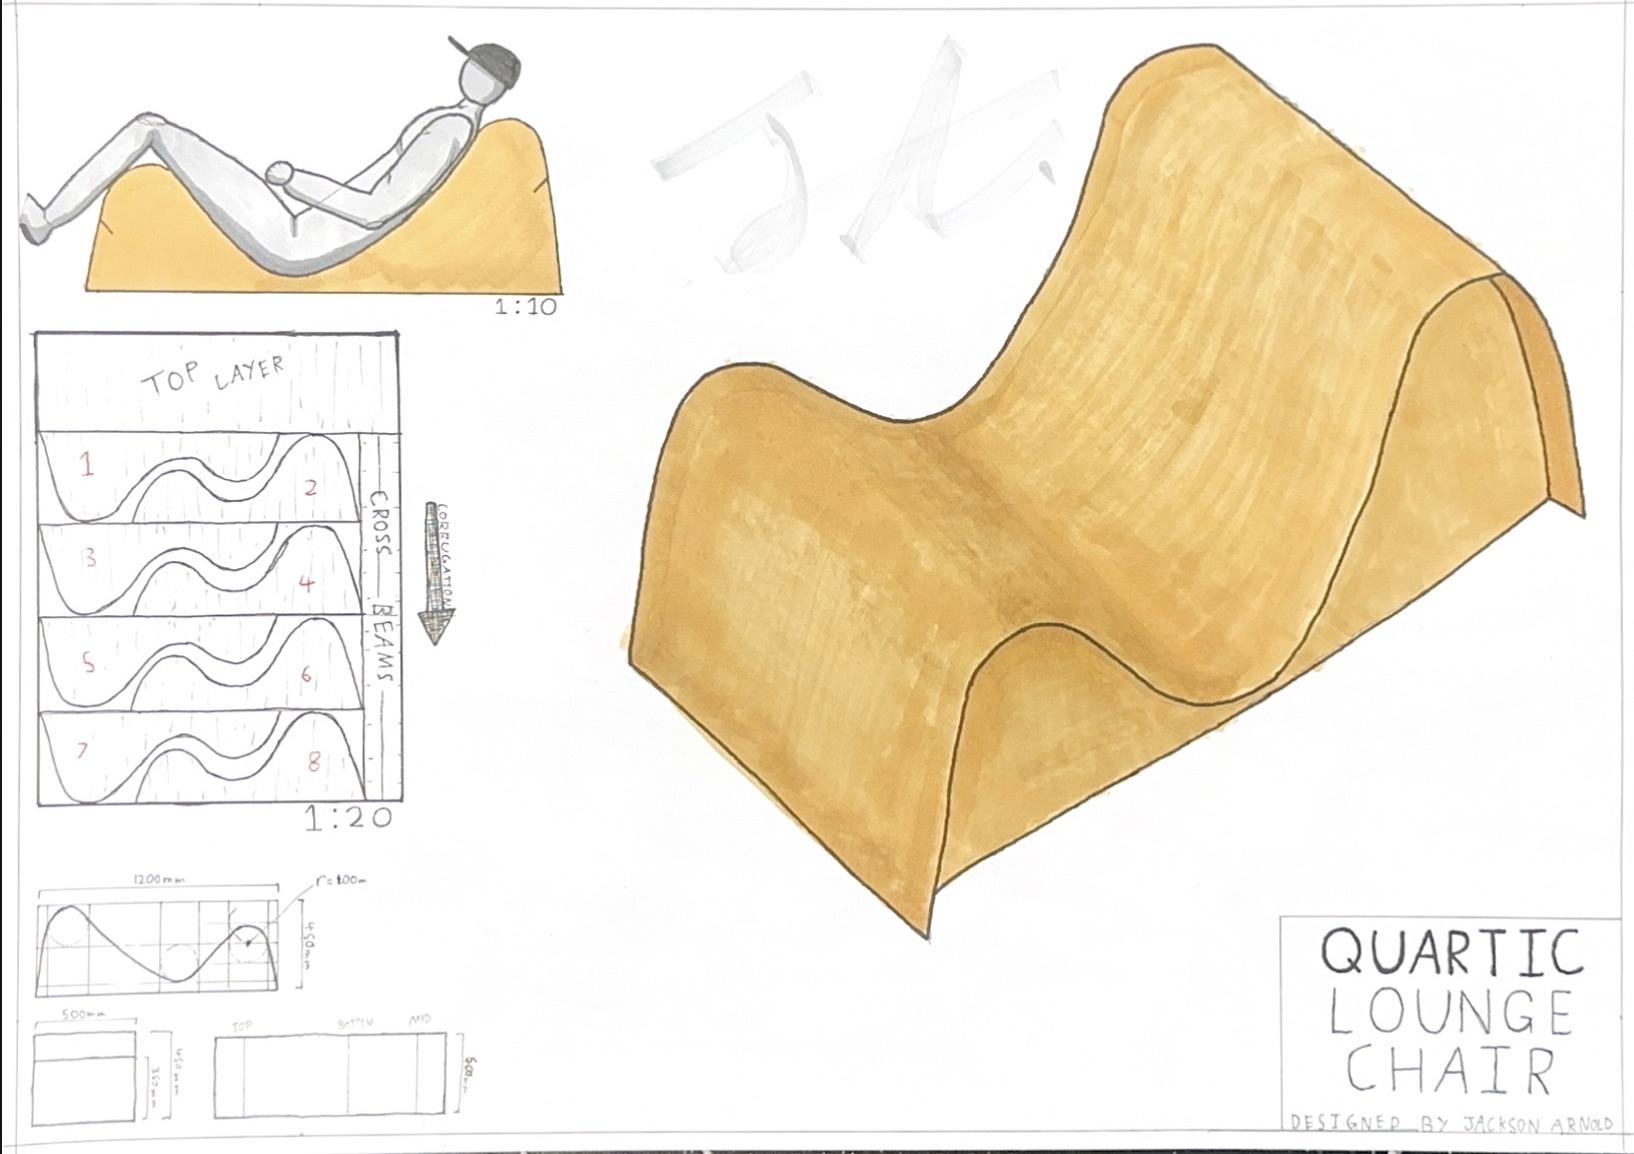
Concept Page 01
Quartic Chair
Derived from my Wavey Chair ideation sketch, the Quartic Chair became a strong concept to create from cardboard due to its seamless form, flowing over two humps. I decided to rename it the Quartic Chair as it feels more professional, and is a fitting word to represent this unique shape.
The interior of the chair is to be constructed from end-grain uprights, connected by cross beams with a continuous sheet over the top.
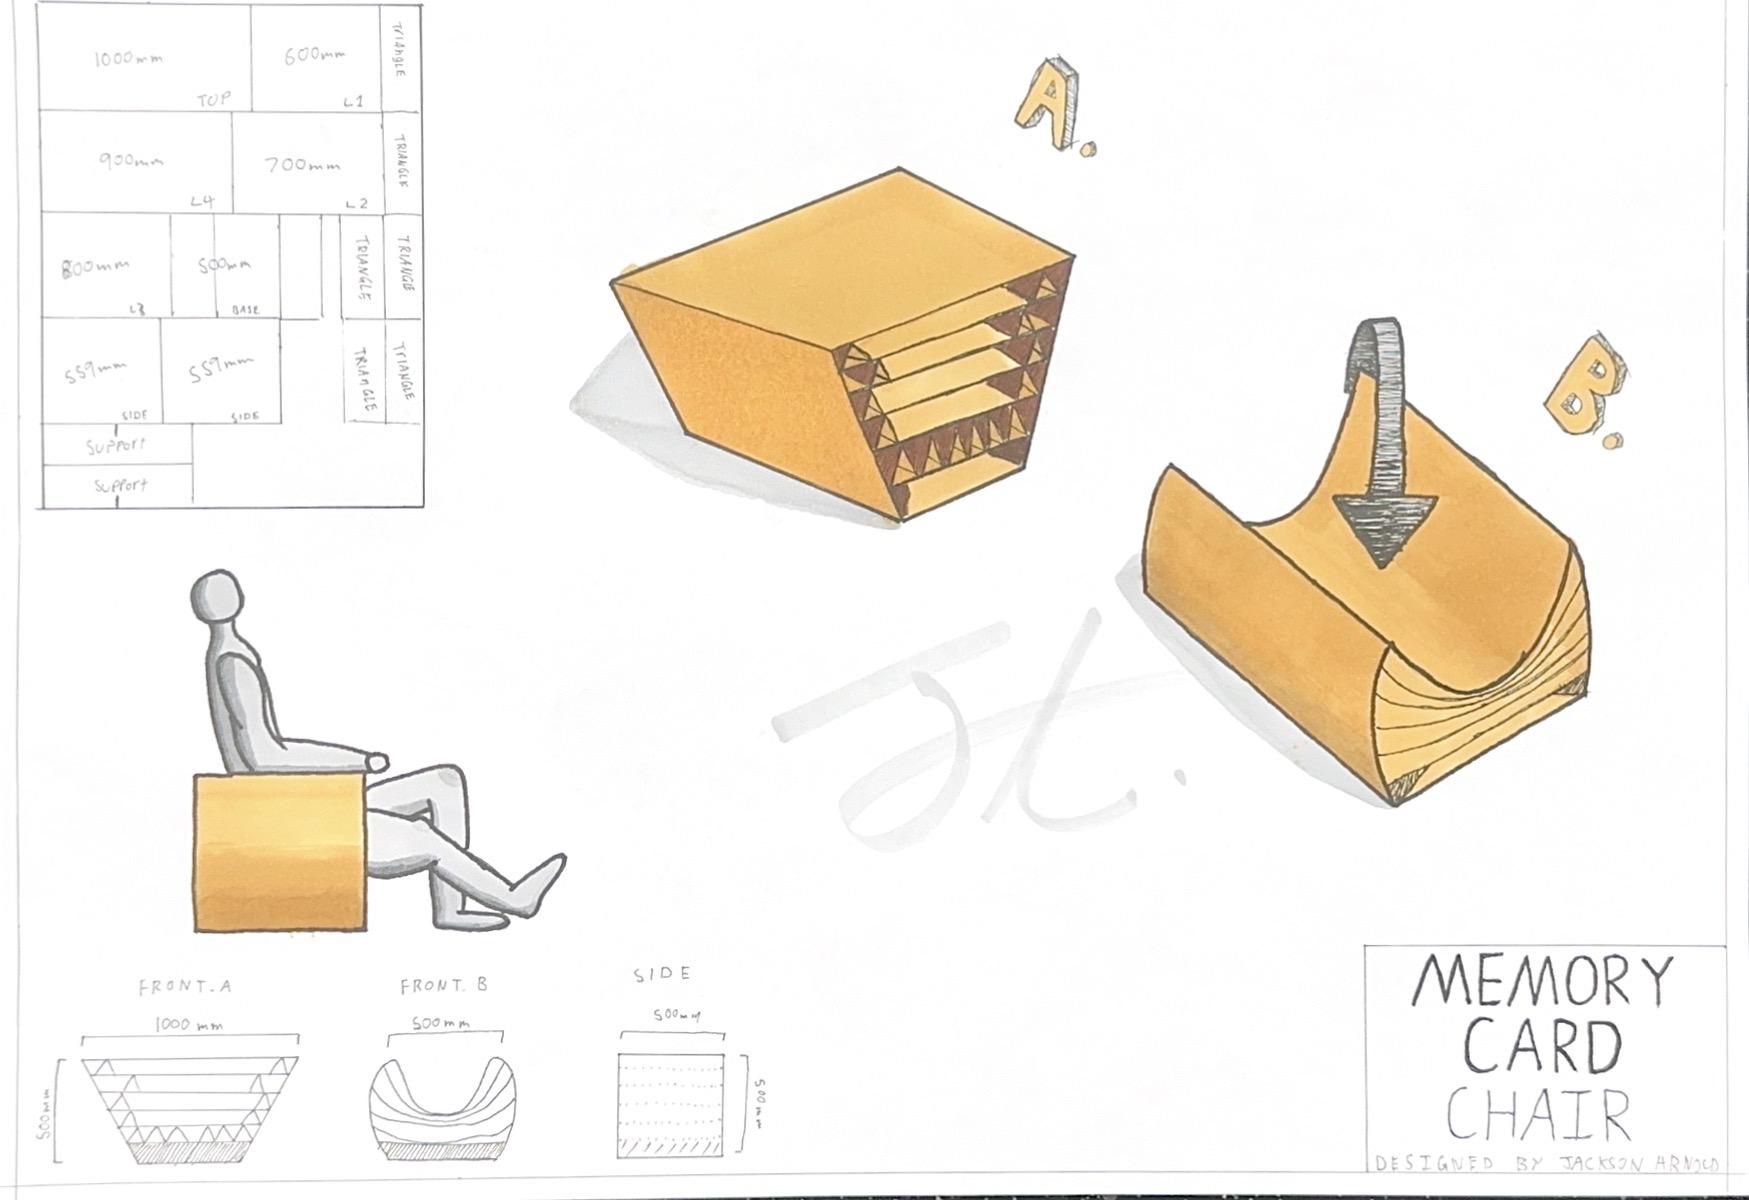
Concept Page 02
Memory Card Chair
Just like memory foam, this chair tries to mimic that feeling and material function. Utilising layers of cardboard and air, a sponge-like softness and compactness can be achieved, making this one of my most unique ideations.
This concept may or may not work at scale, and will need to be decided through testing on 1:5 scale models. If executed well, this chair could become extremely comfortable for anyone, as the form molds around you.
The initial stage A shows the construction of the chair, and stage B is an estimate of how the chair will form when a person interacts with it.
Scale Models
1:5 scale models of my top 2 concepts. Scale models help me understand the scale compared to a human figure, proportions, anthropometrics, and construction design before taking it to 1:1 scale.
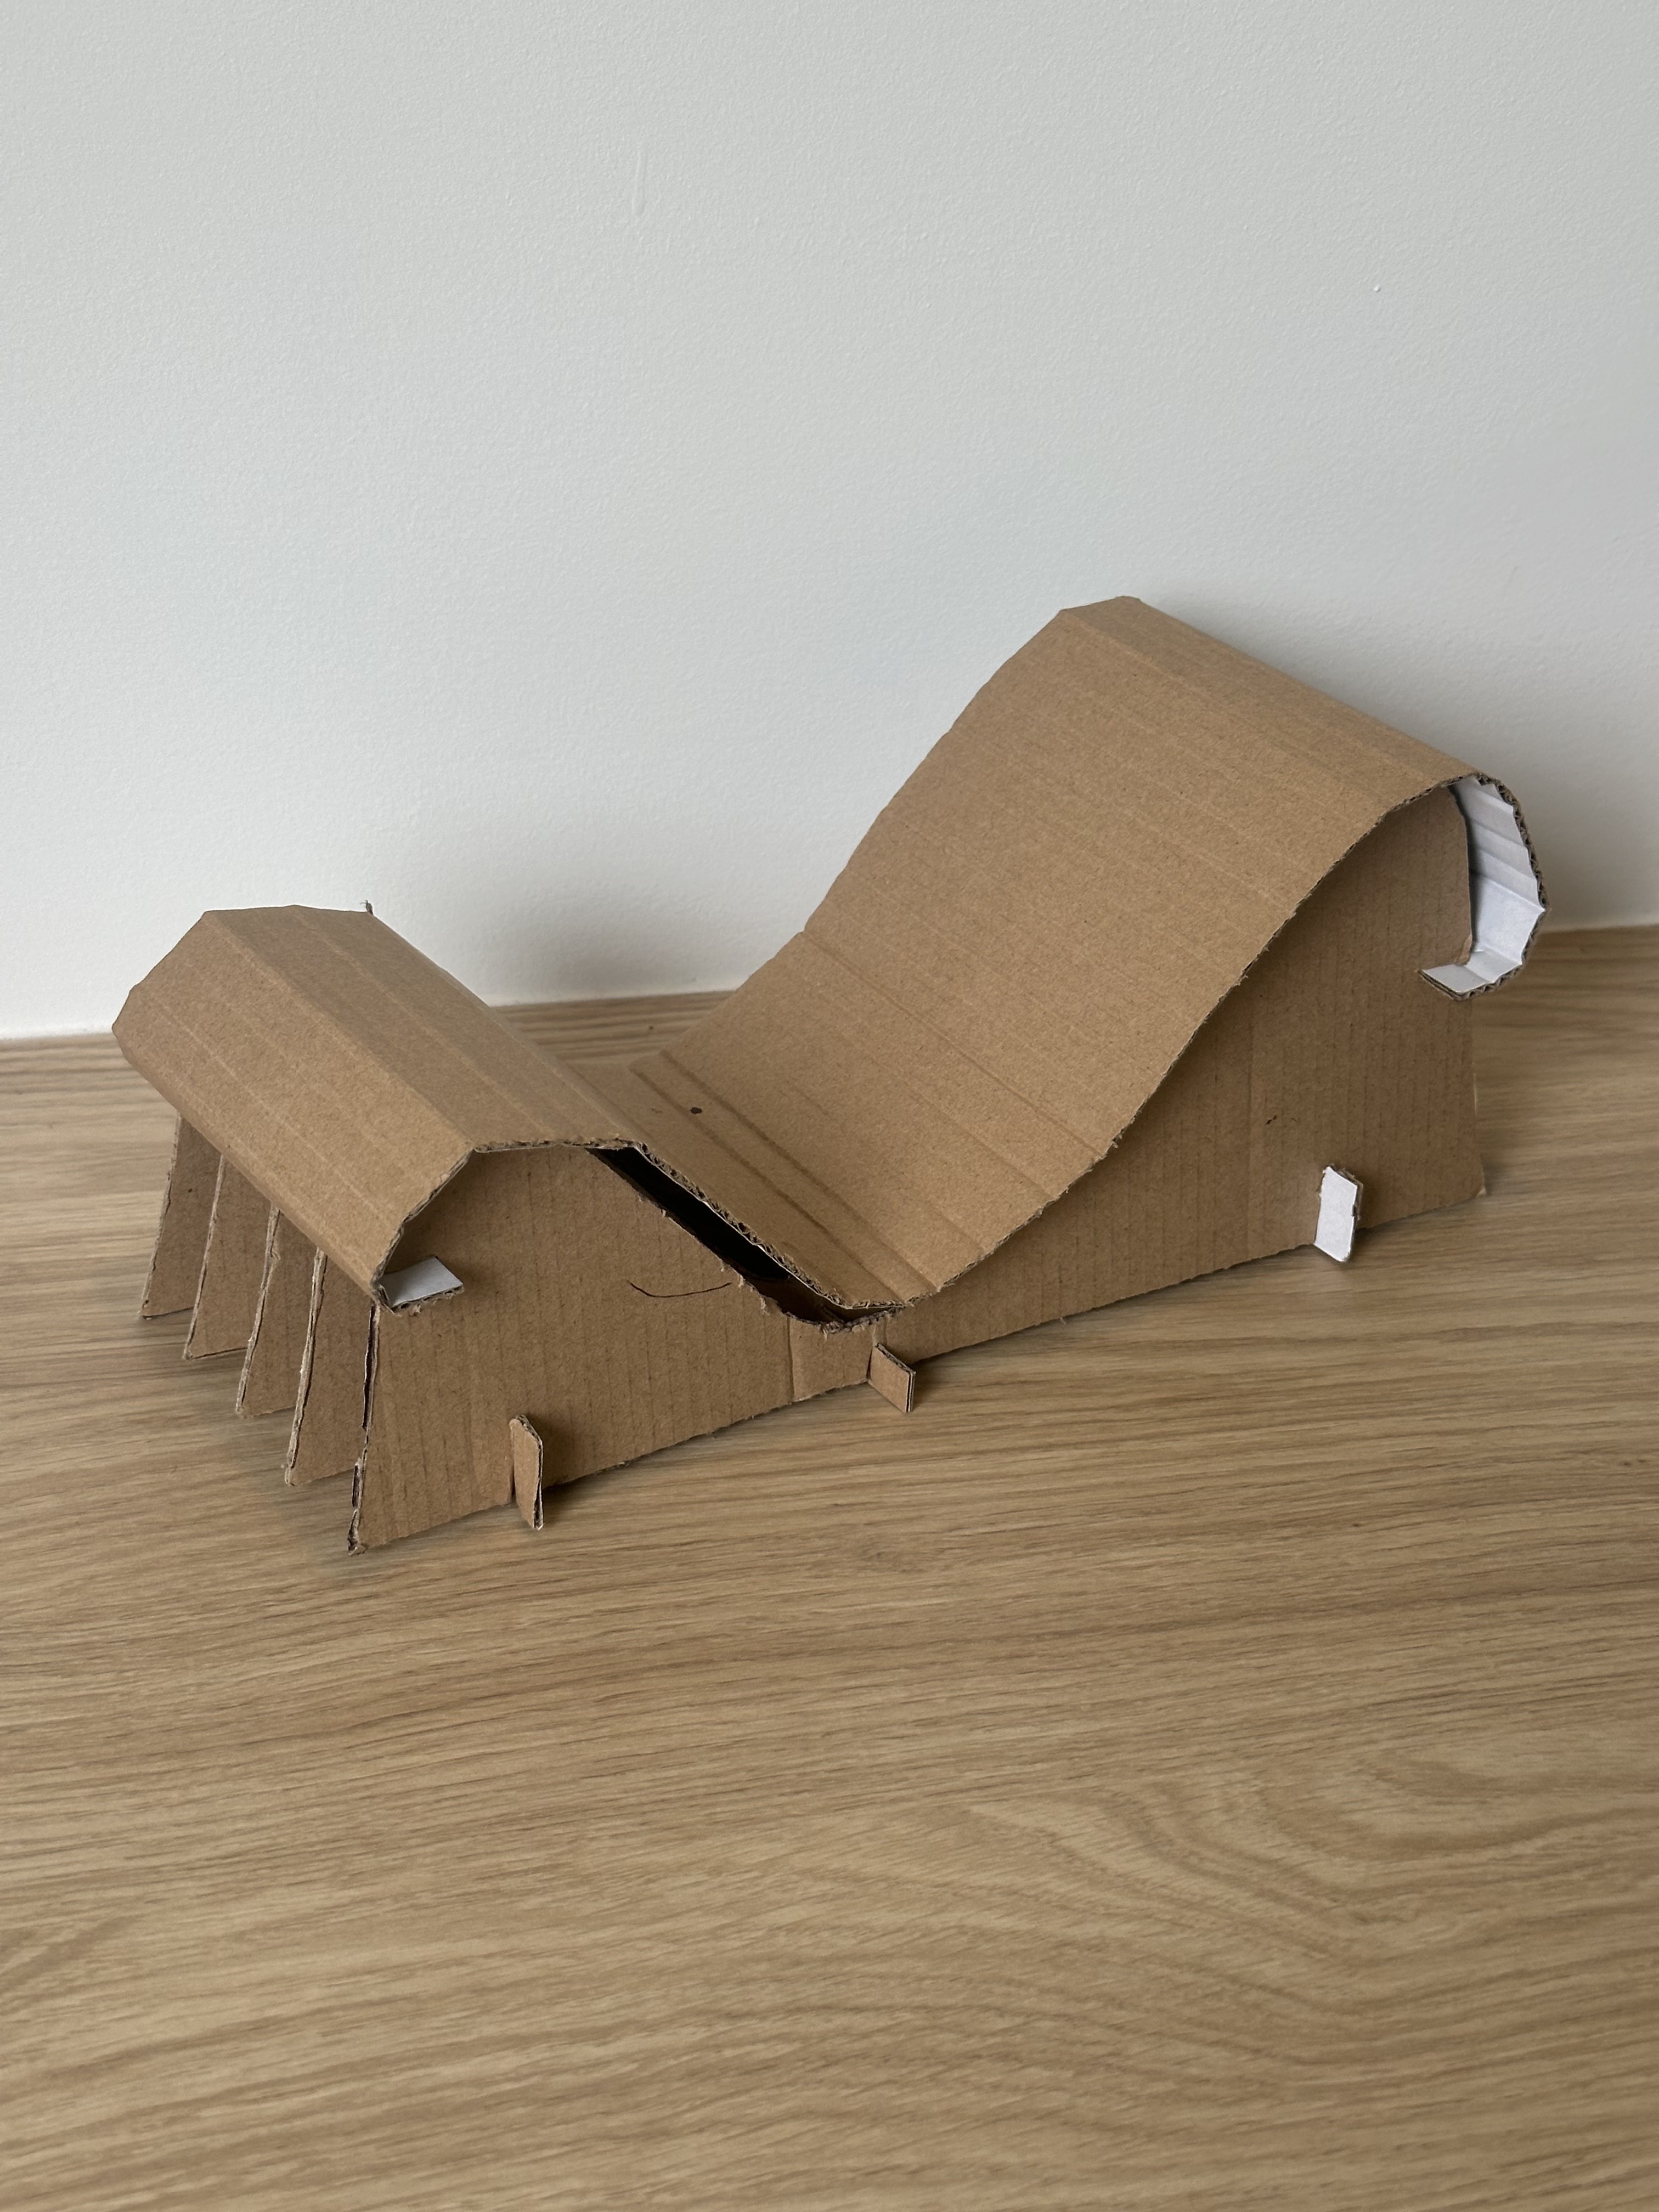
Model 01
Quartic Chair
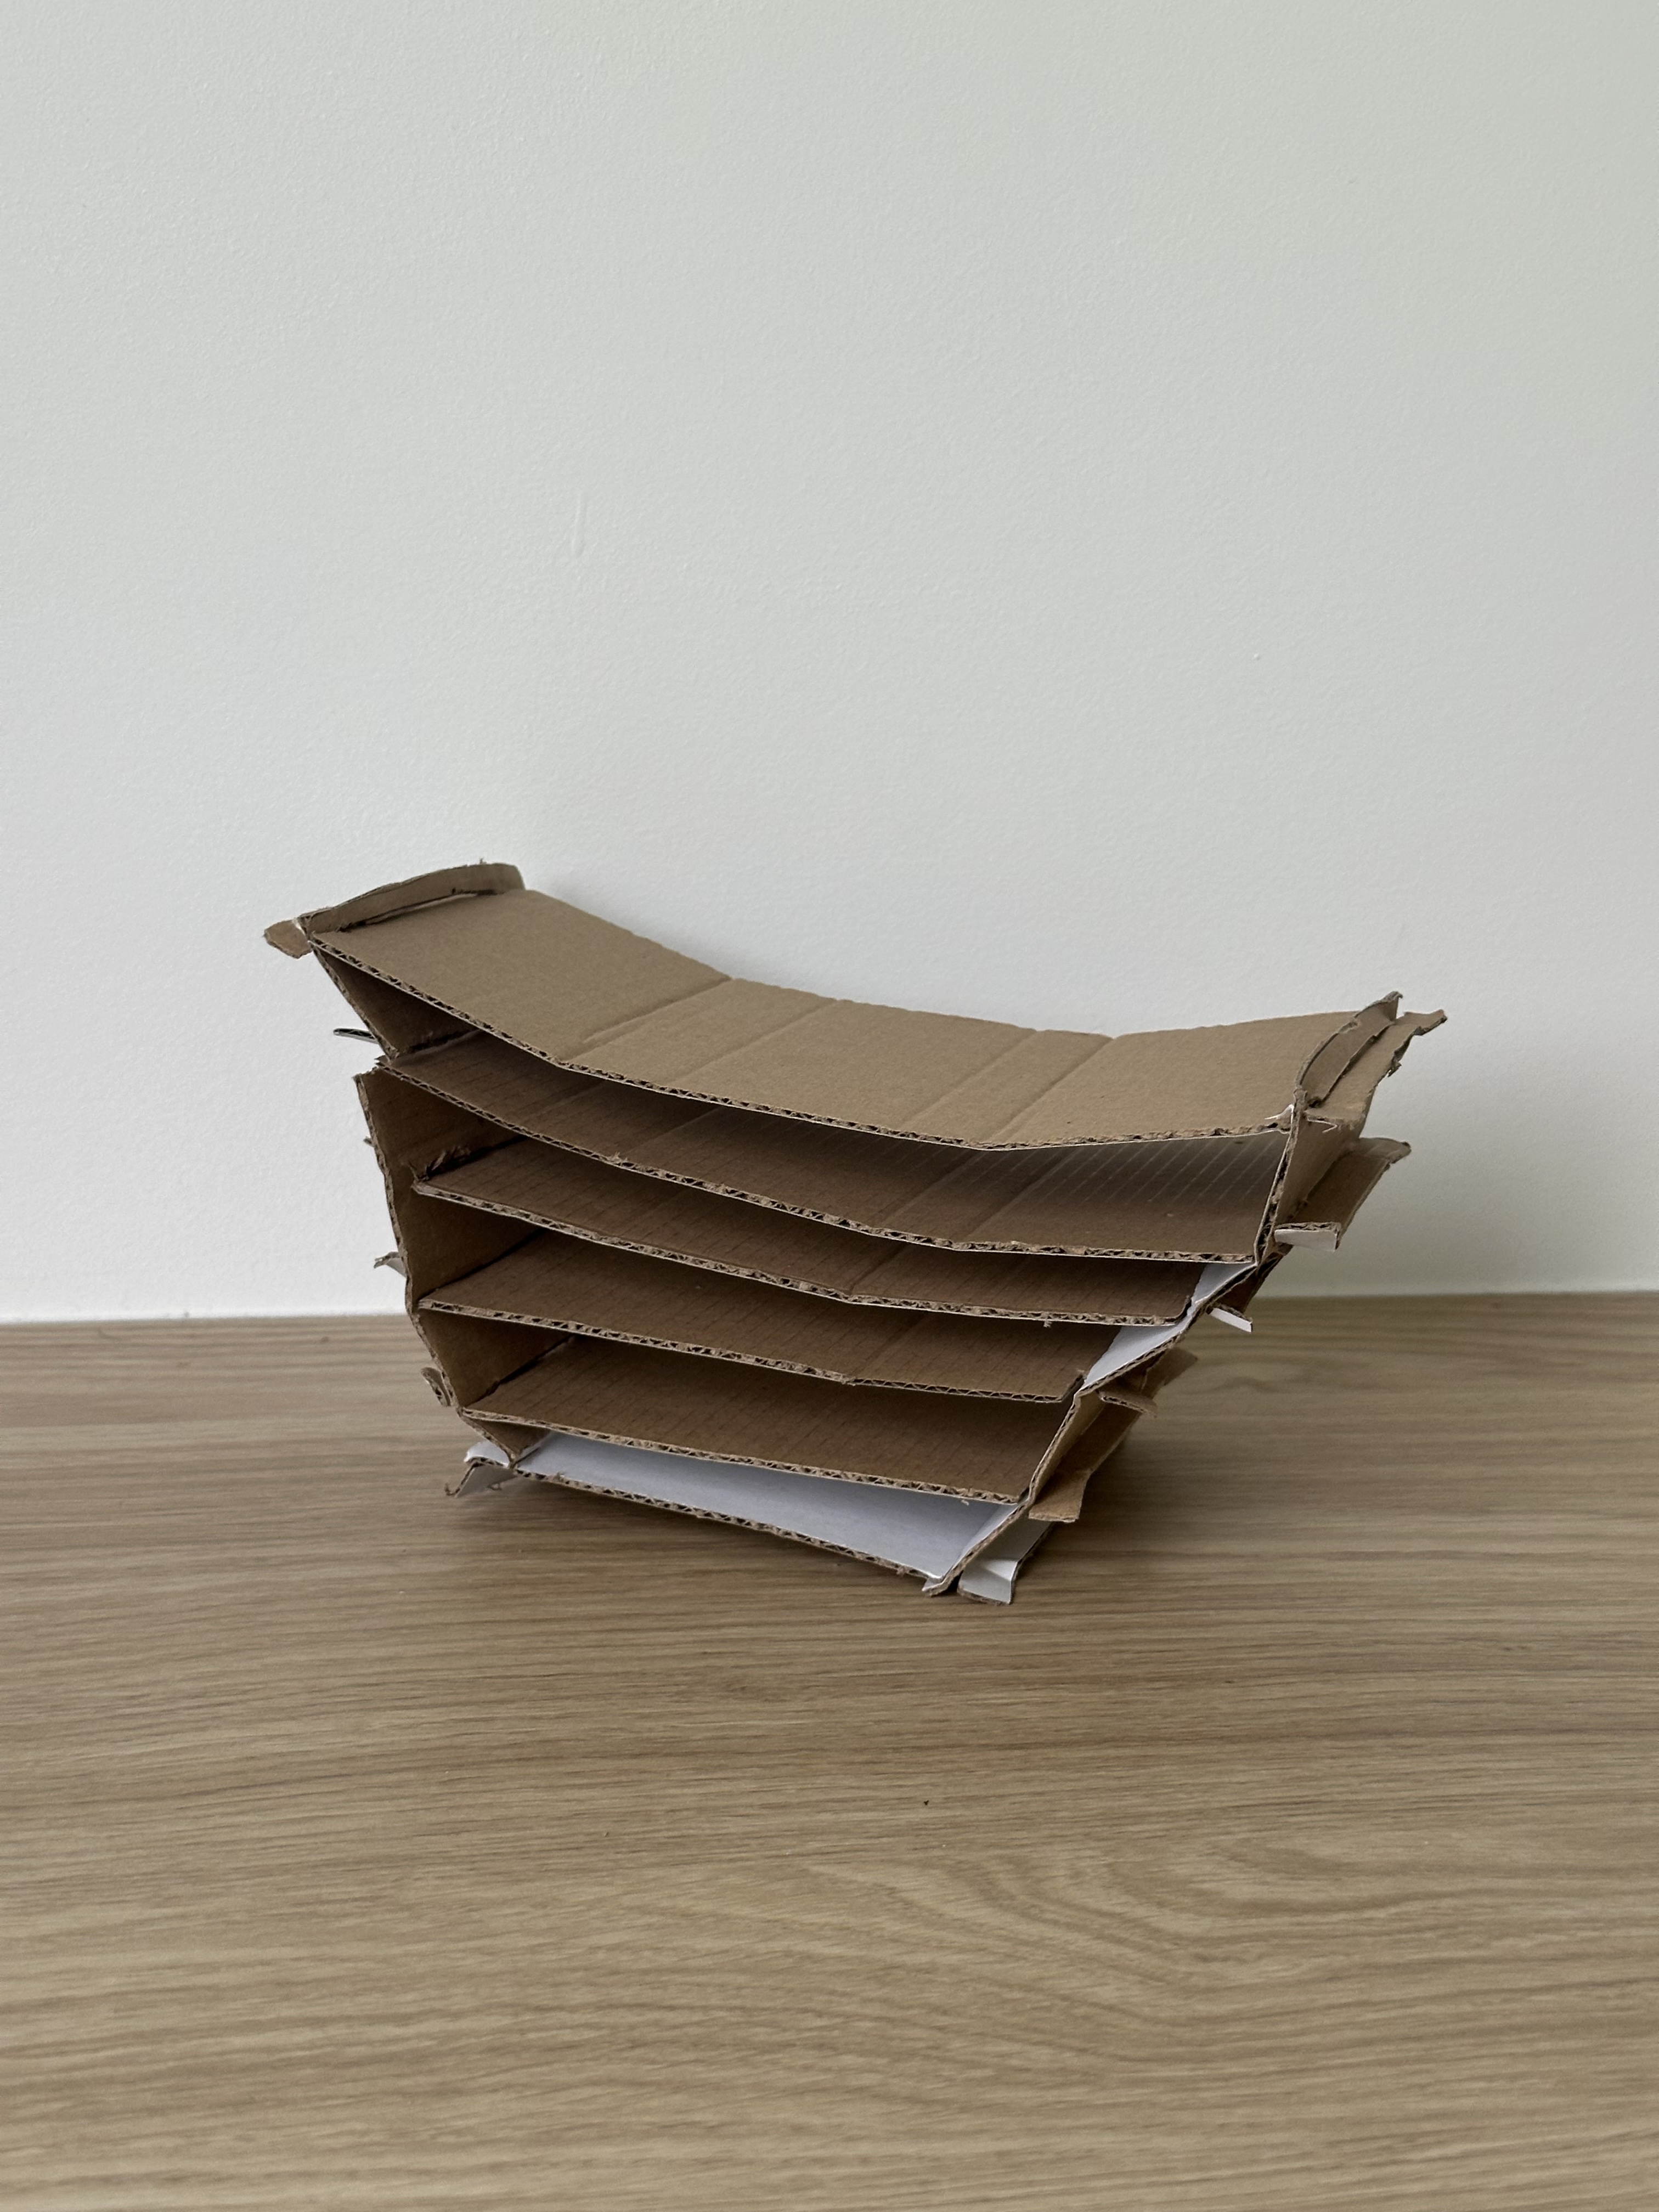
The physical concept of this chair turned out perfectly to what I was imagining. I found that the sheet laid over the top perfectly covers the main contact points with anyone sitting in the chair.
The use of 3 base horizontal supports and the 2 from the sheet helps lock and secure all vertical supports strongly.
The main problem with this model is that where the sheet touches the lowest part of the dip, the rigidity in the cardboard causes it to spring up, like a bridge between both peaks. It folds back down when force is applied and when holding it there for a bit it can hold for a little while, however this will need to be fixed in place with the actual model as it's a bad aesthetic.
To do that, a simple tab and pin going through the sides of the sheet will help hold it down but also not include too much visual distraction to the continuous form.
Overall, this is a very solid and achievable chair with minimal errors in the construction.
Model 02
Memory Card Chair
The concept was executed perfectly. The movement that is conveyed when force is applied to the centre perfectly wraps the sides up and into the middle, helping mold around the person sitting inside.
The use of internal supports between the layers on the edges helps guide that movement by allowing more compression in the middle and less on the edges. This ultimately stops the whole thing squishing like a spring, and turning it into more of a claw; pinching both sides into the middle.
Additionally, having a cross support at the base air layer raises you off the floor if you completely compress the chair to its base. This helps you feel like you're actually sitting above ground rather than on the floor.
The one downside with this model is its aesthetics, mainly because of how technical it is and how hard that is to perfectly create at small scale. However I believe if made in full size, the looks will improve due to it not being so tedious at small scales.
Development
The development of the 1:1 cardboard chair — from first cuts through to a finished structure.
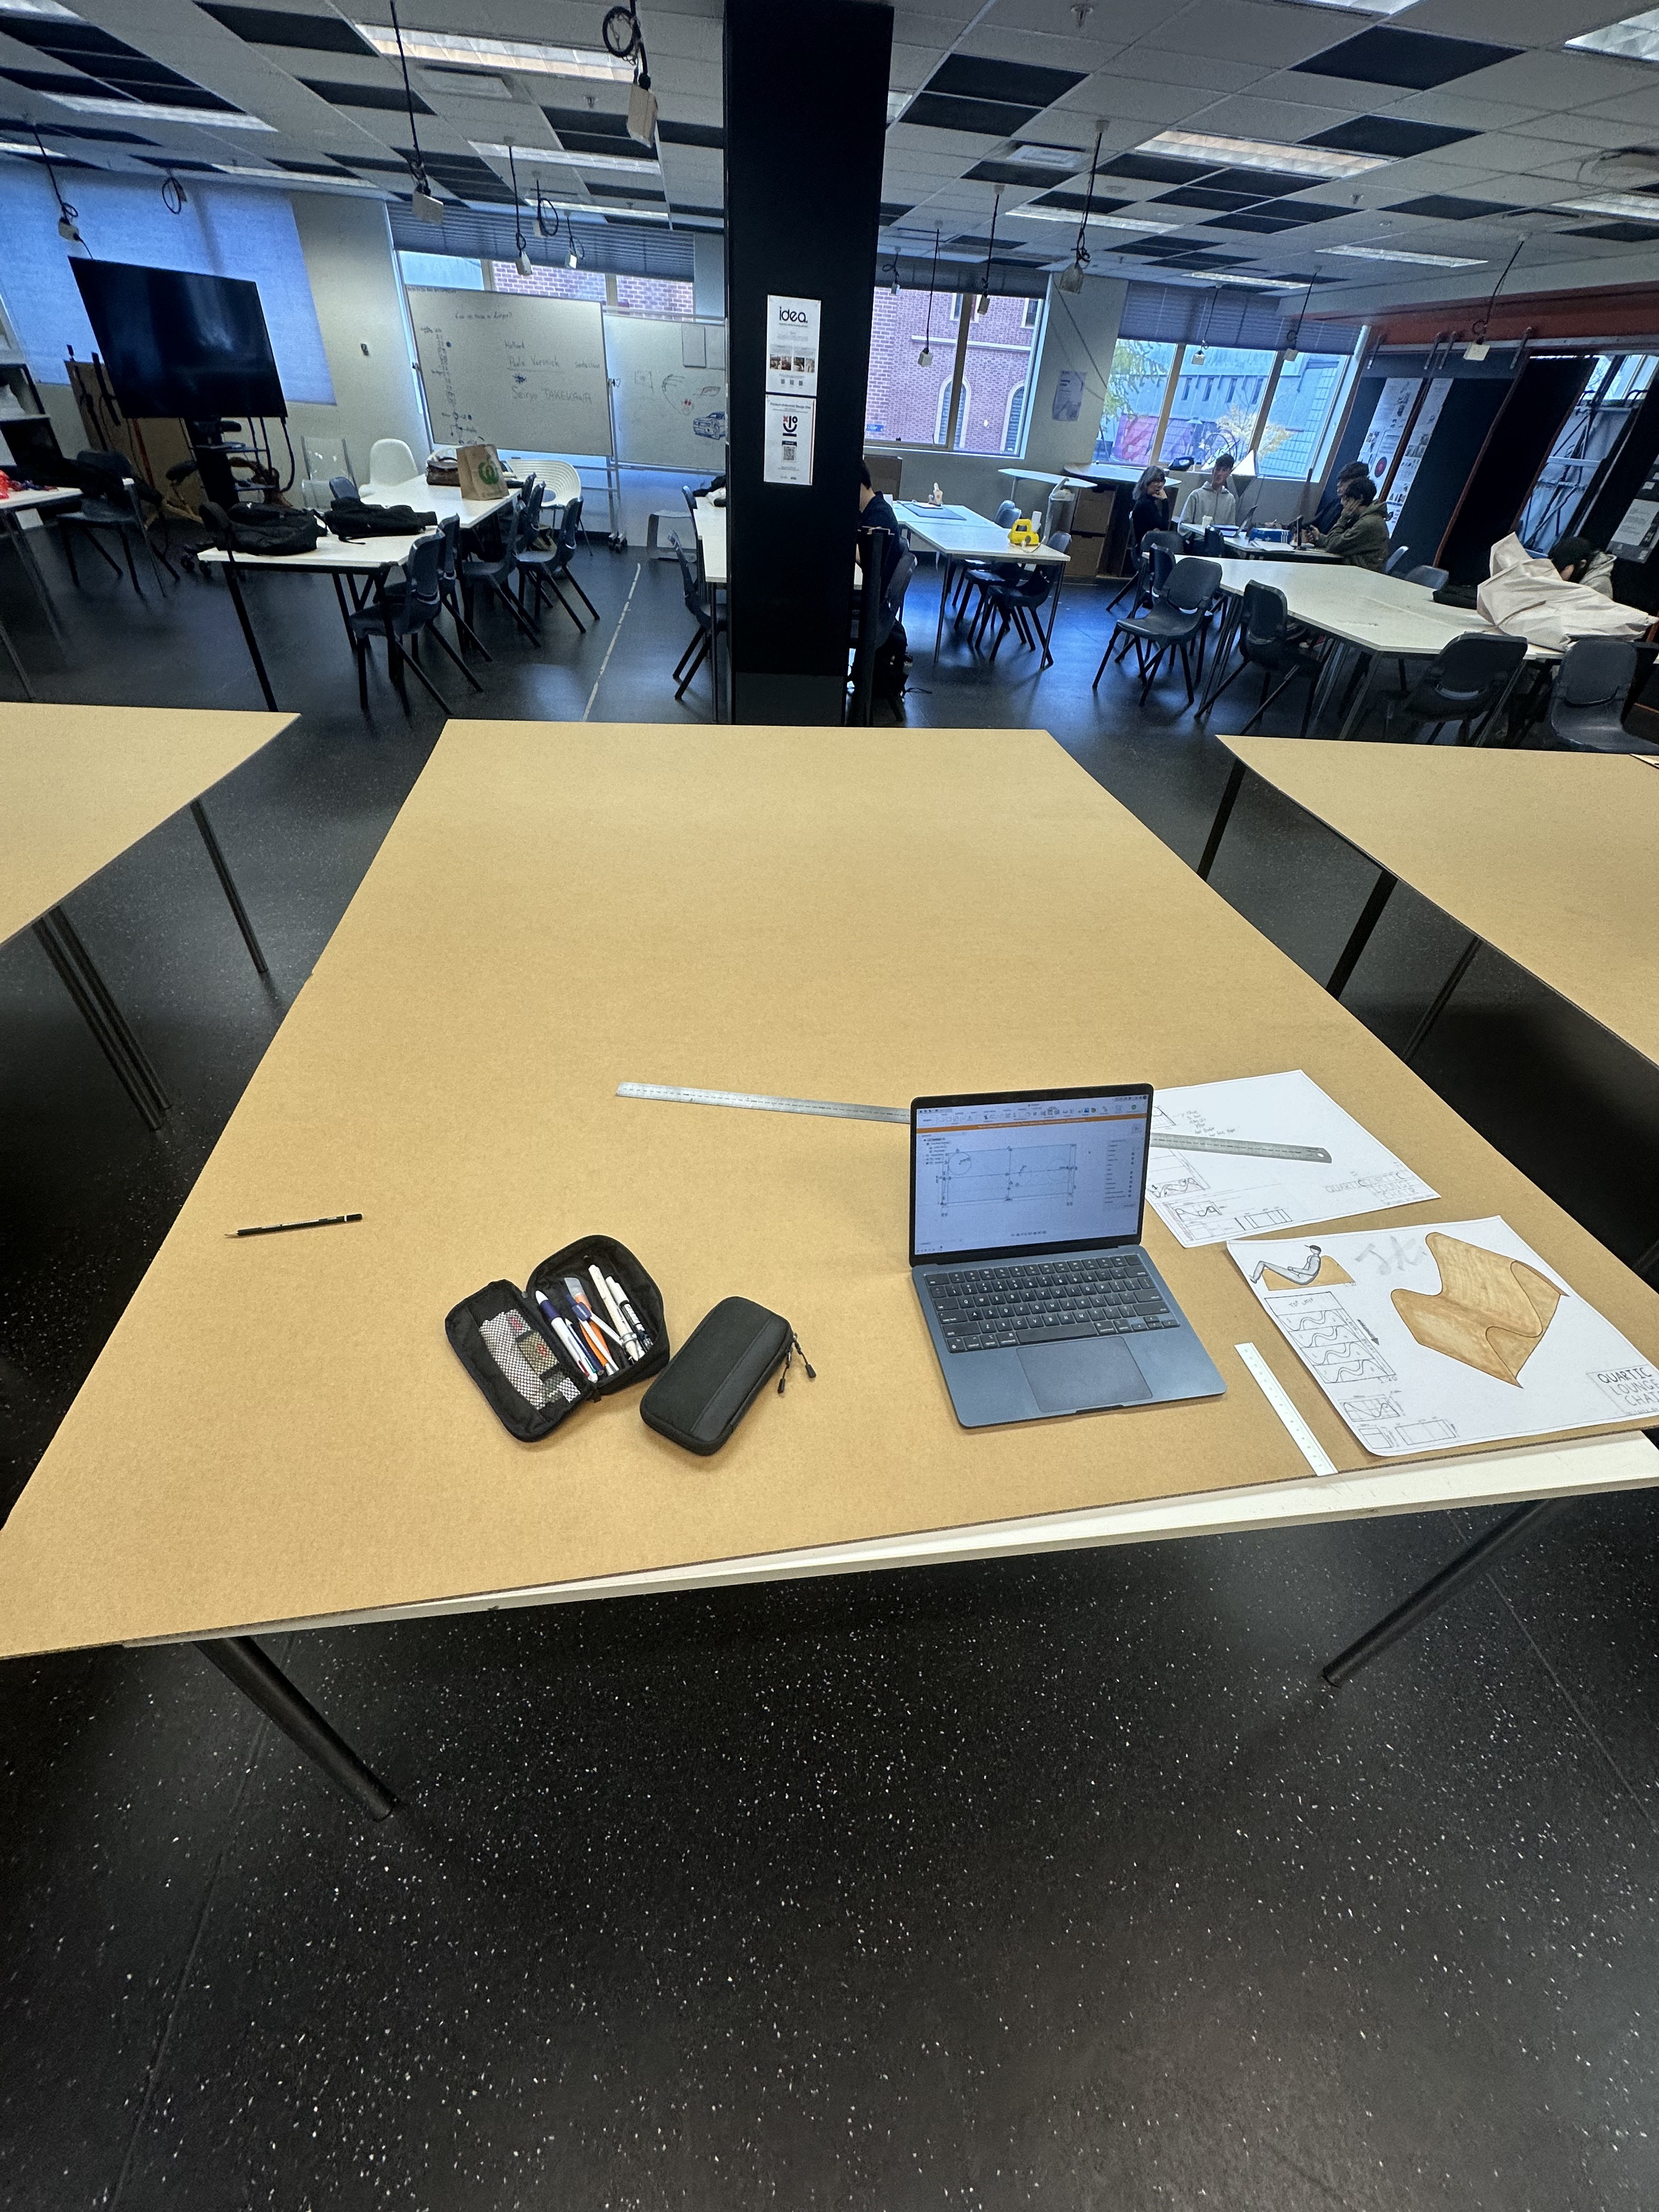
Initial setup, figuring out 1:1 dimensions using CAD and planning where the sketches will go on the sheet, referring to the small scale plan.
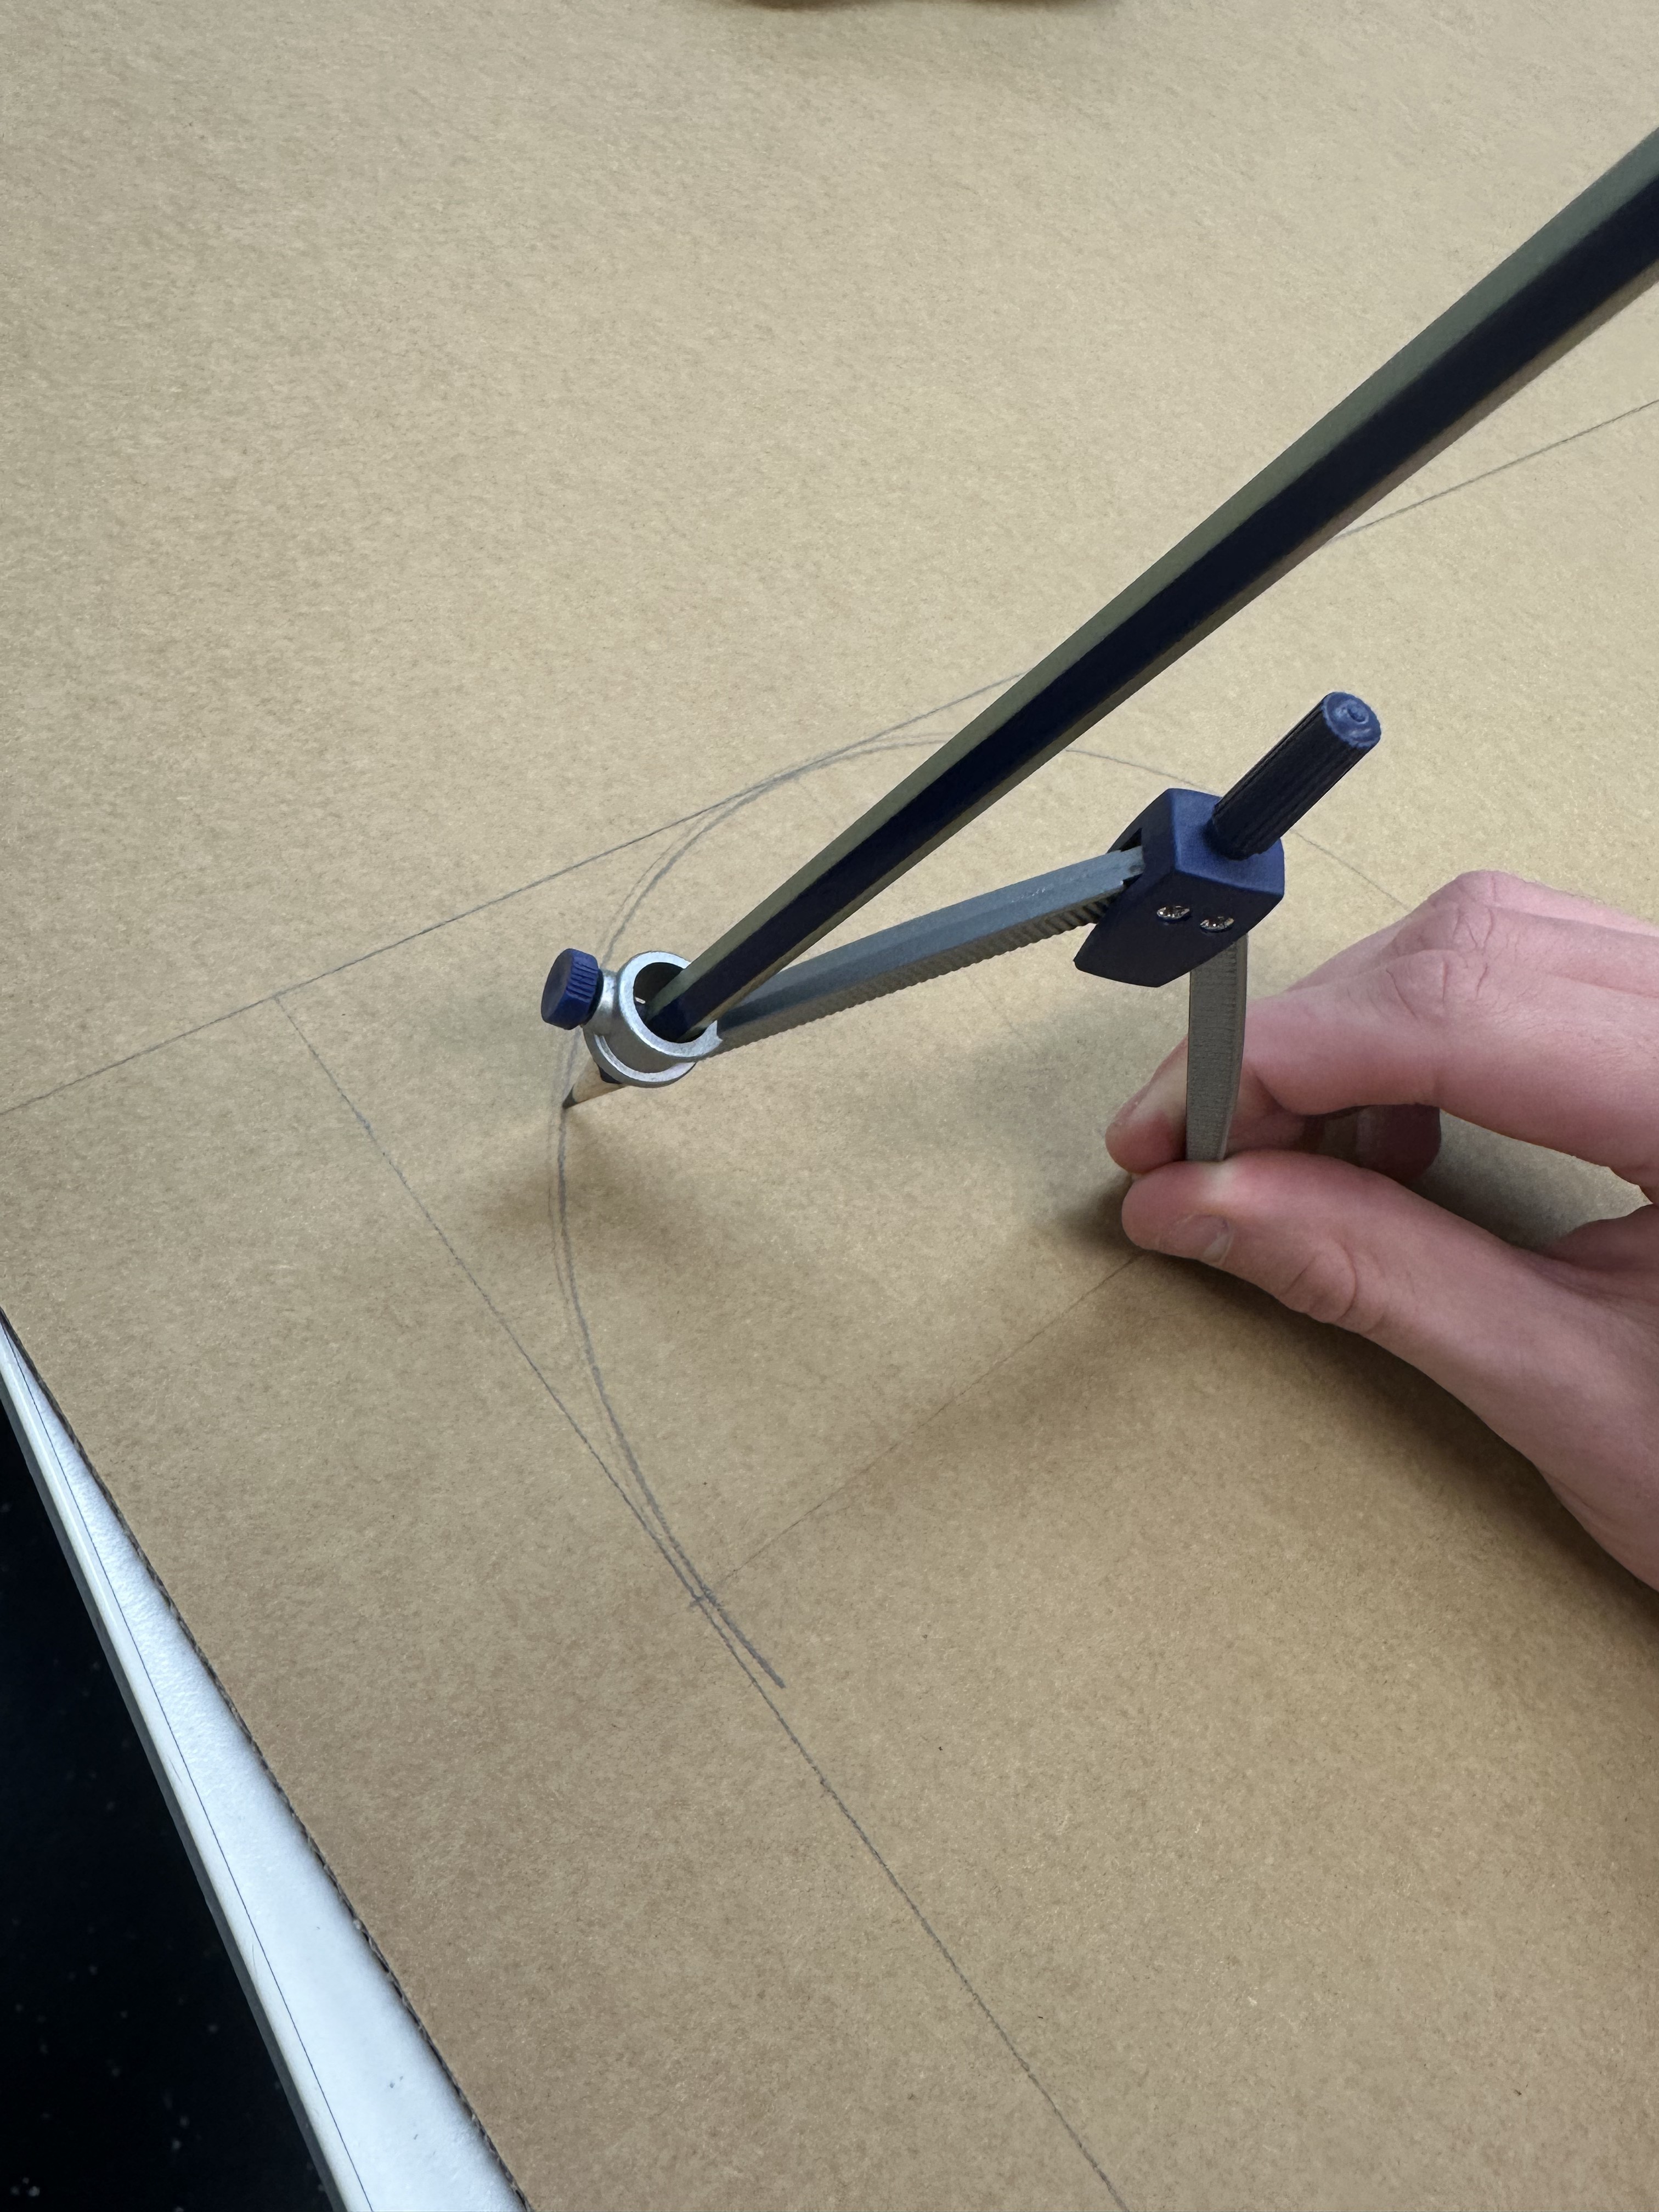
Sketching the first 2D profile, compass for 200mm diameter curves on the peaks, 1m ruler for the long straight lines.
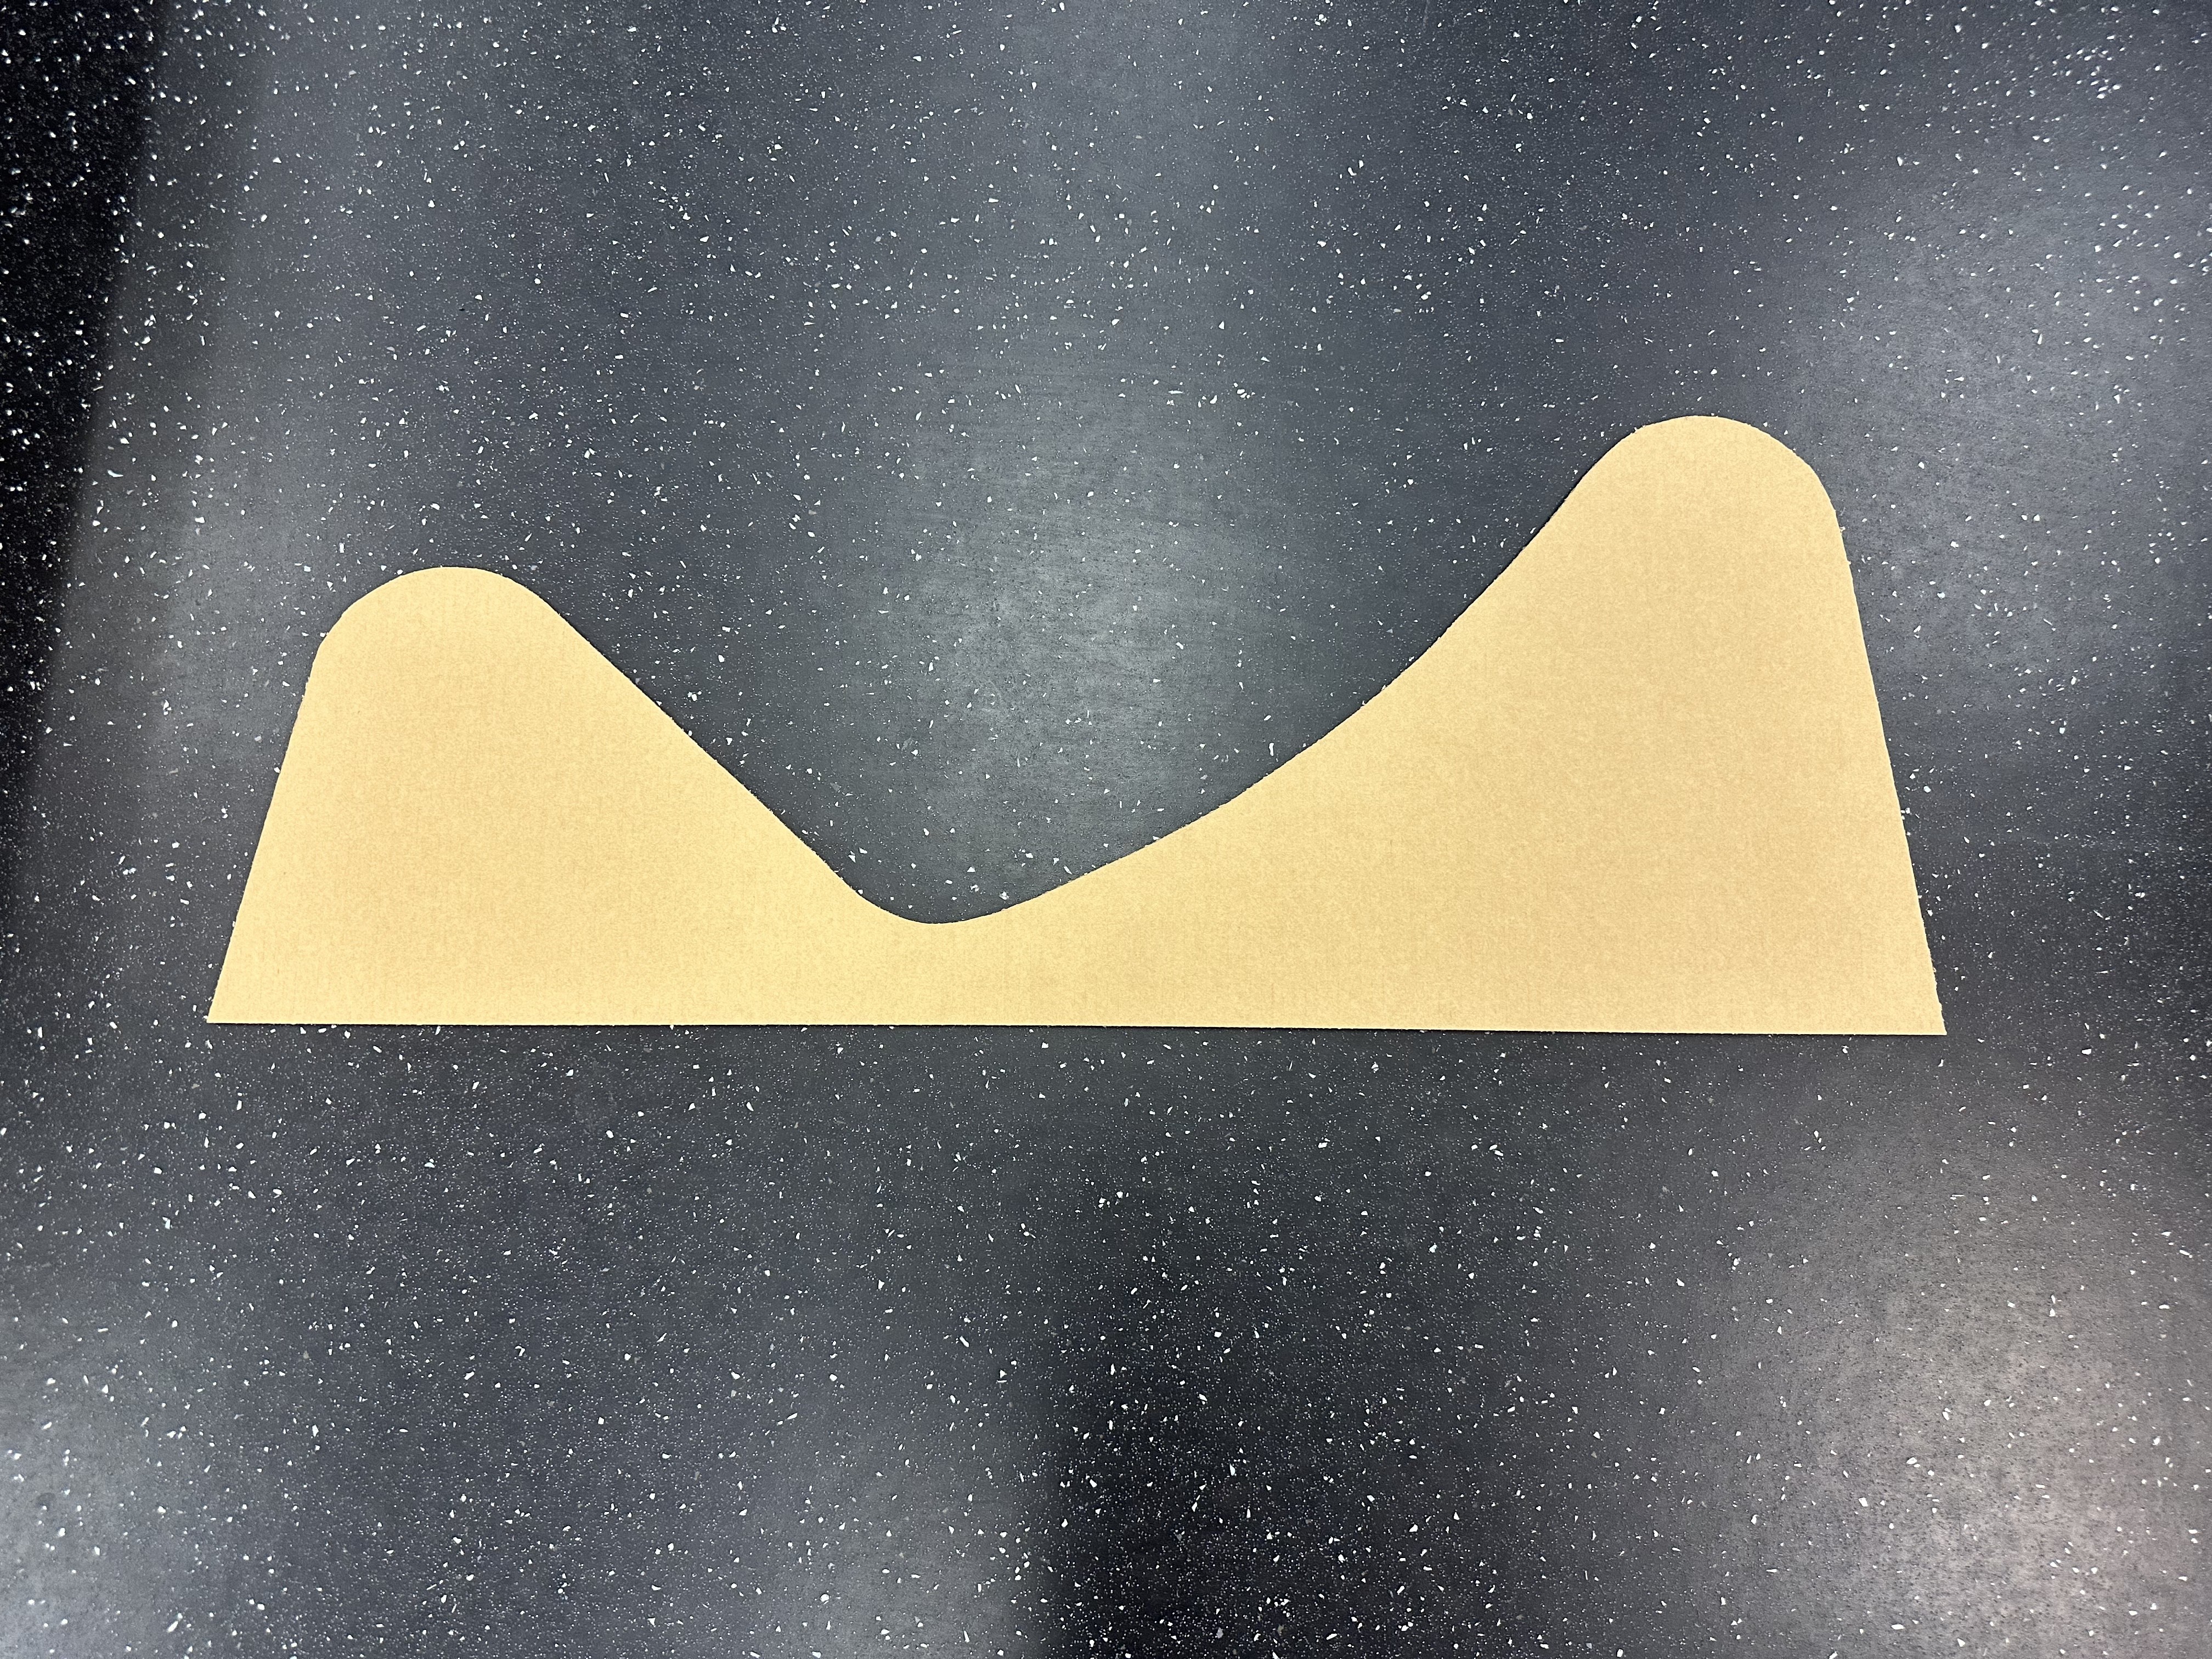
First template cut out, used for tracing the remaining 7 sections.
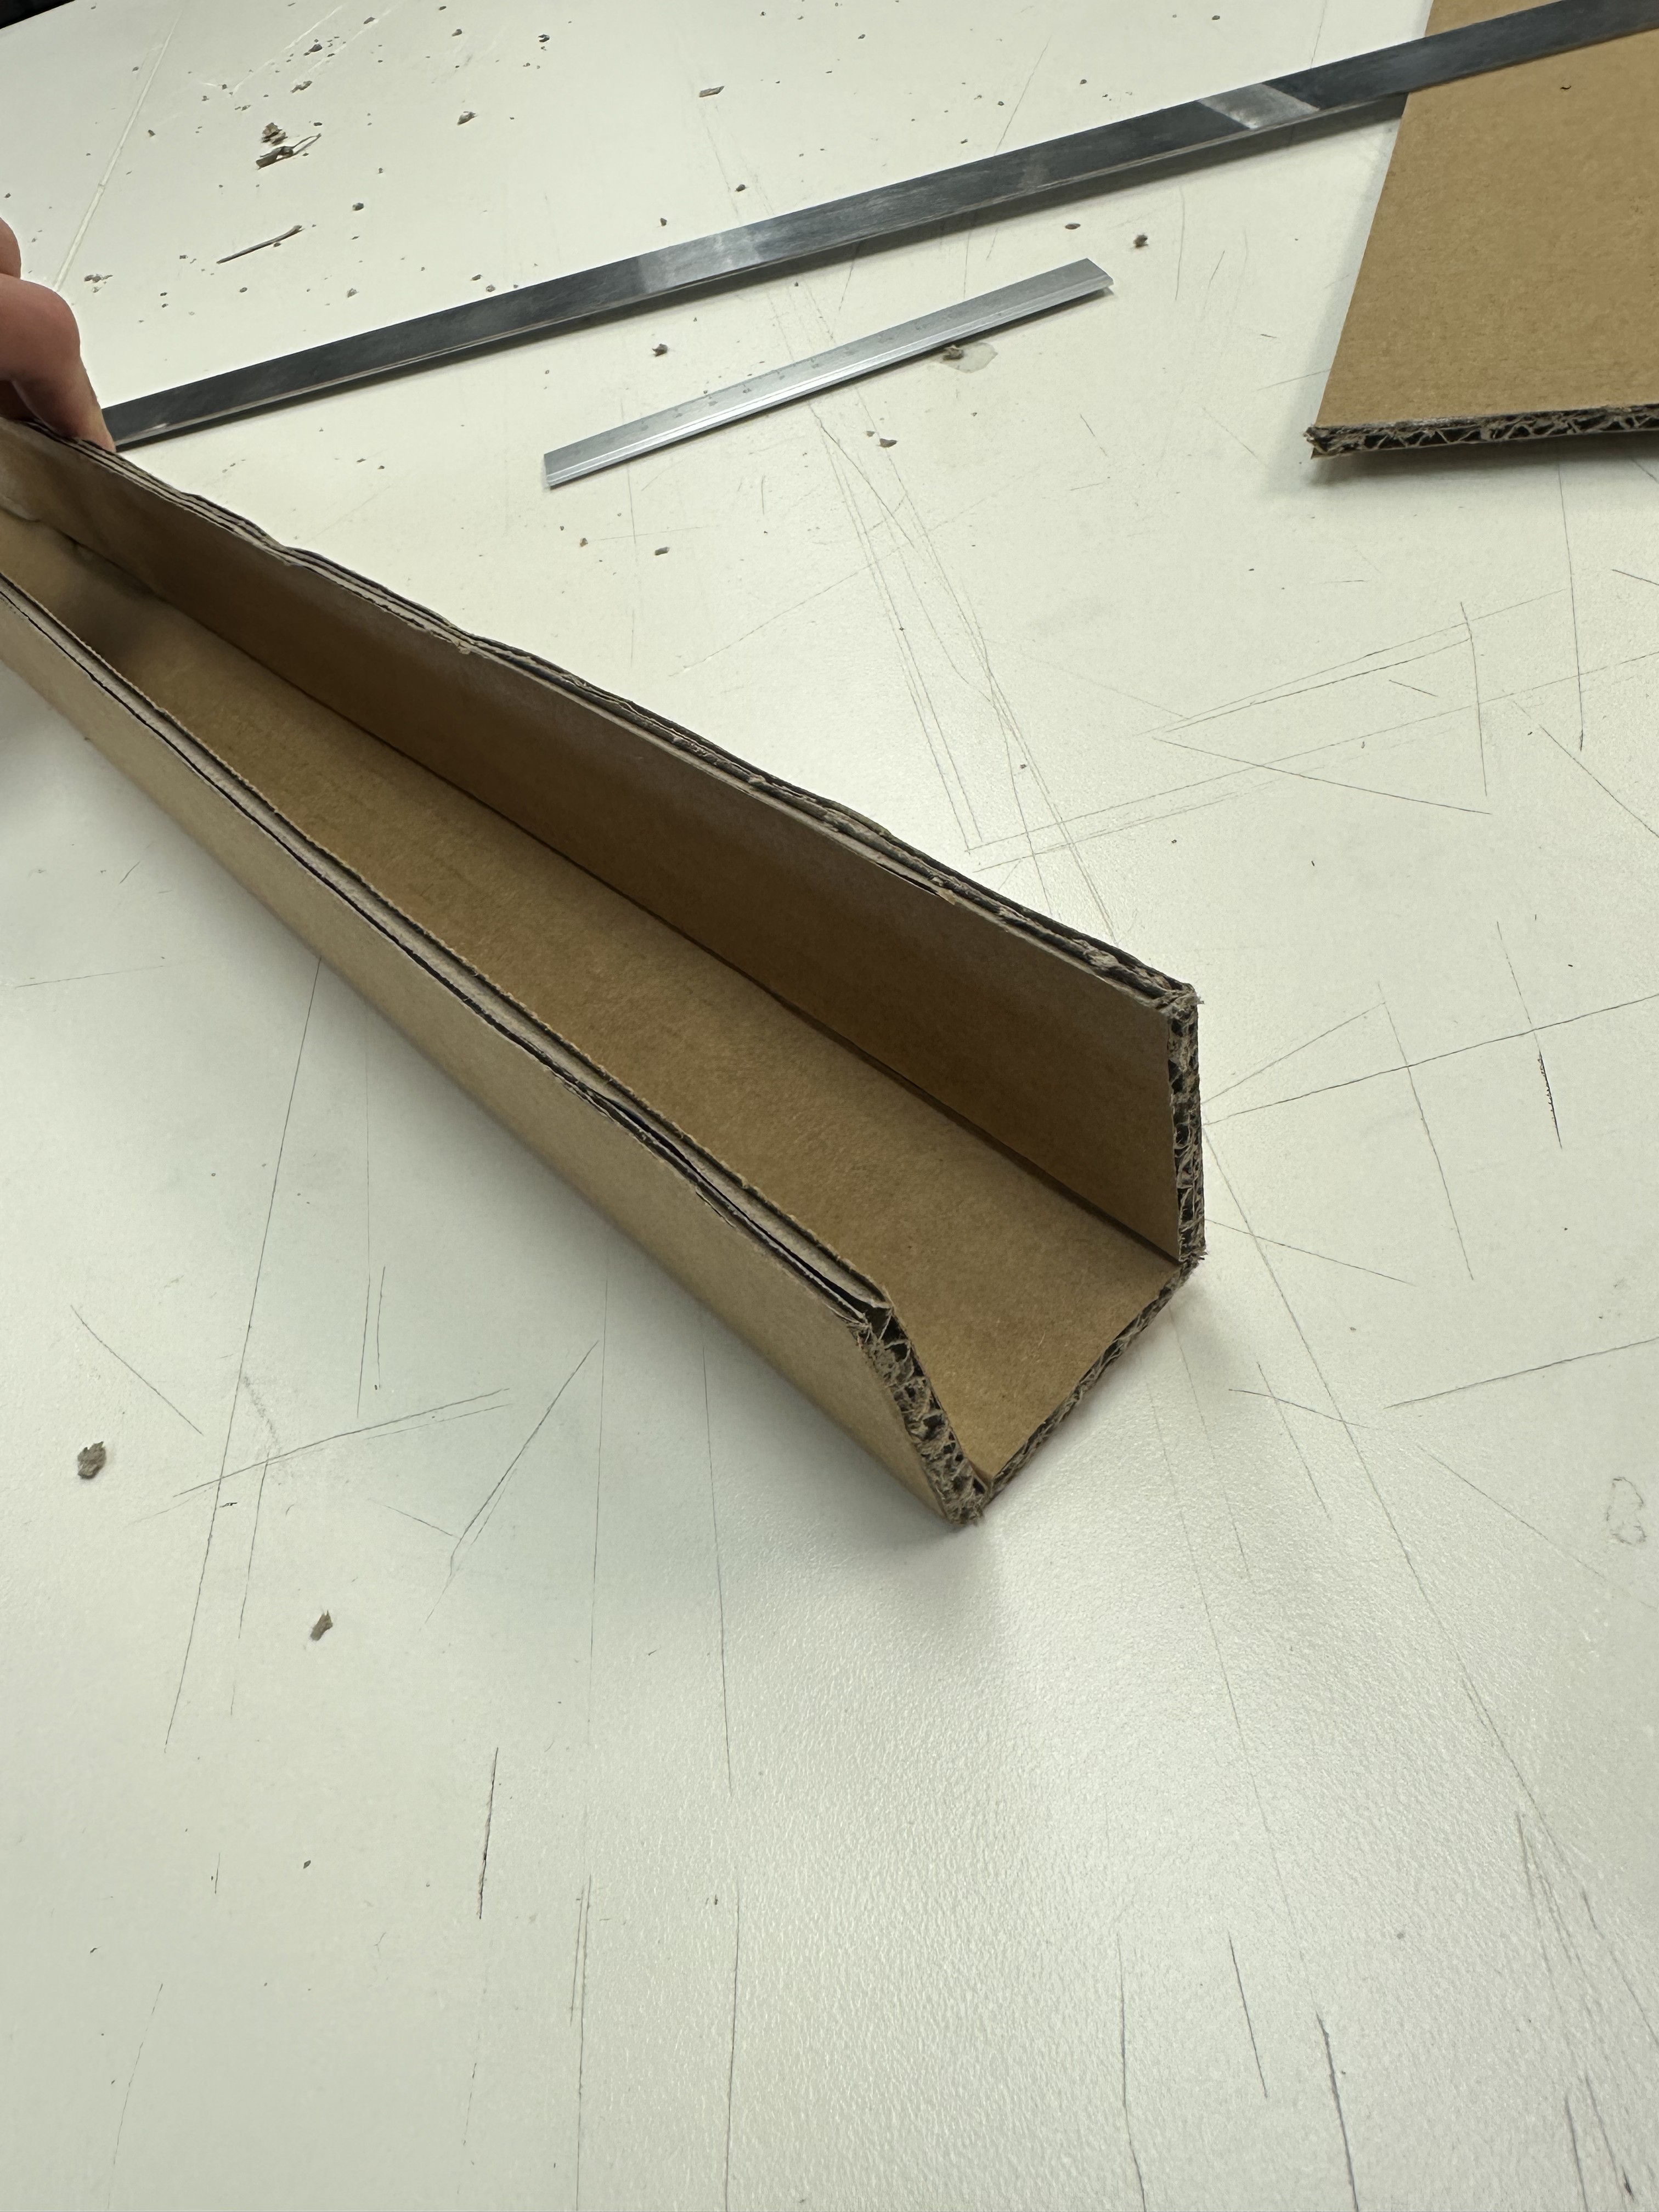
A C section, 500mm long with 50mm sides, 3 made for the front, back and middle of the base. Shallow grooves cut along each fold to help bend the cardboard cleanly.
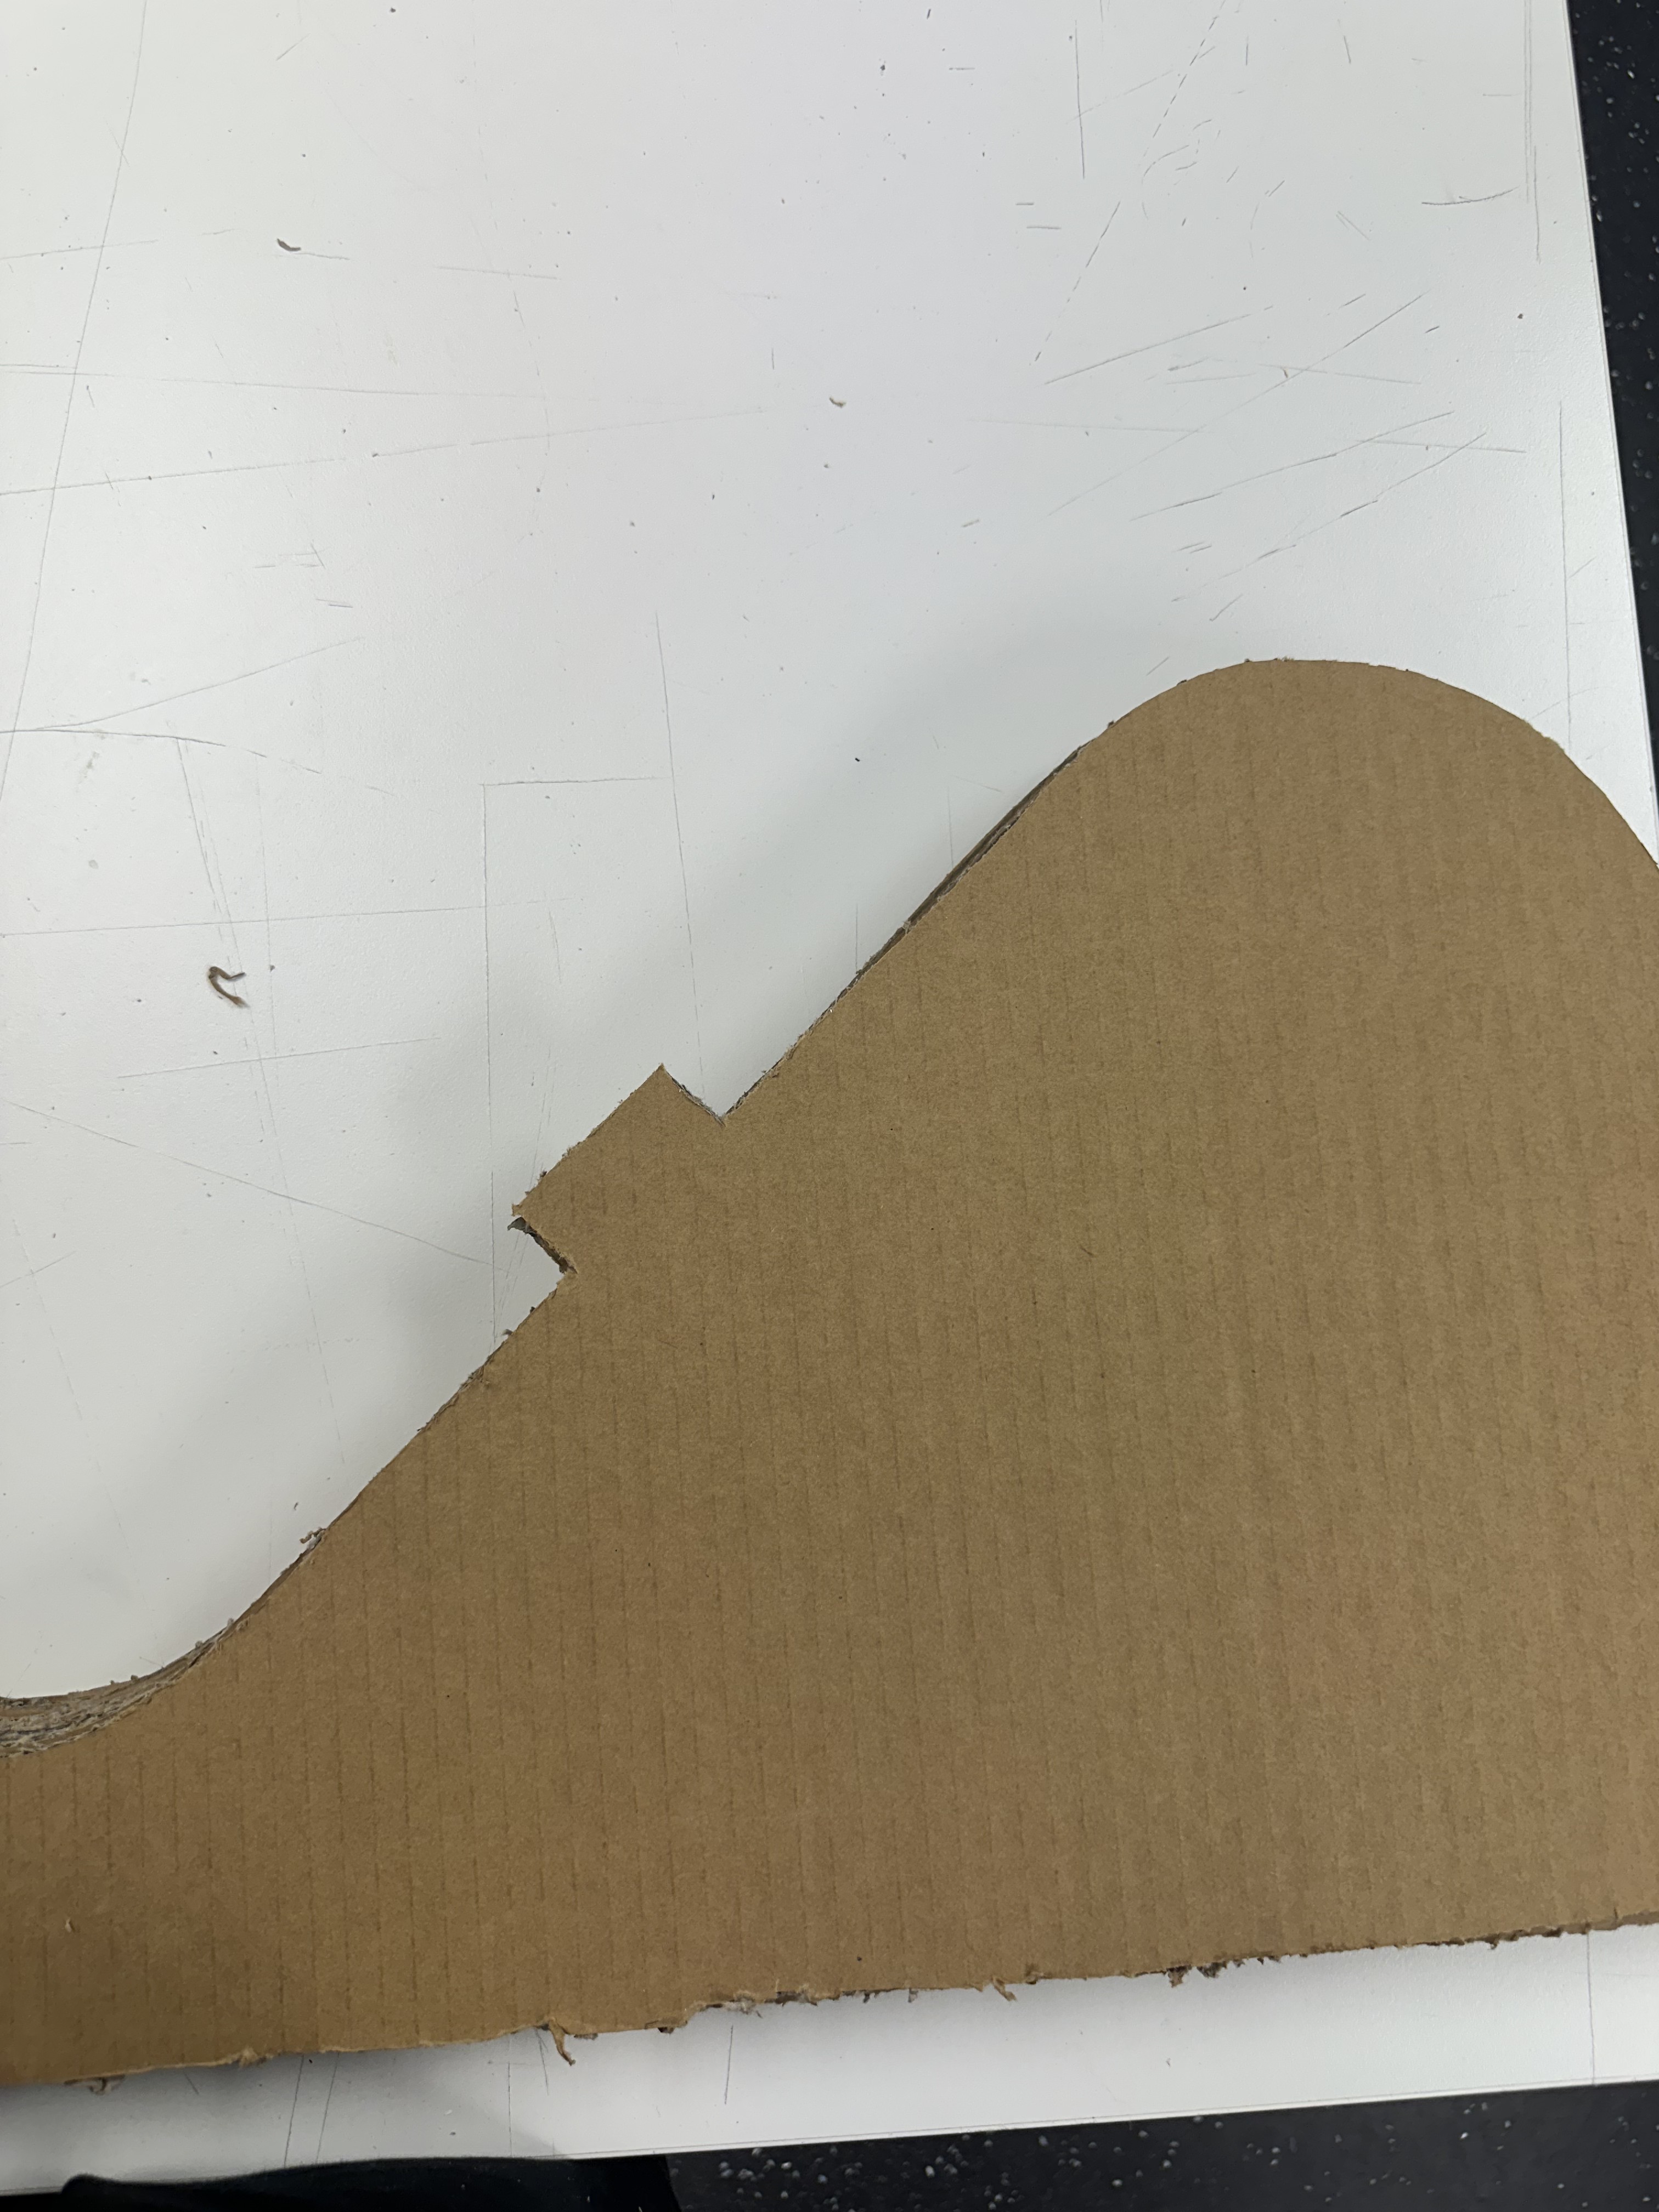
The last 2 sections have tabs near the lowest point of the curve to hold the top sheet in place.
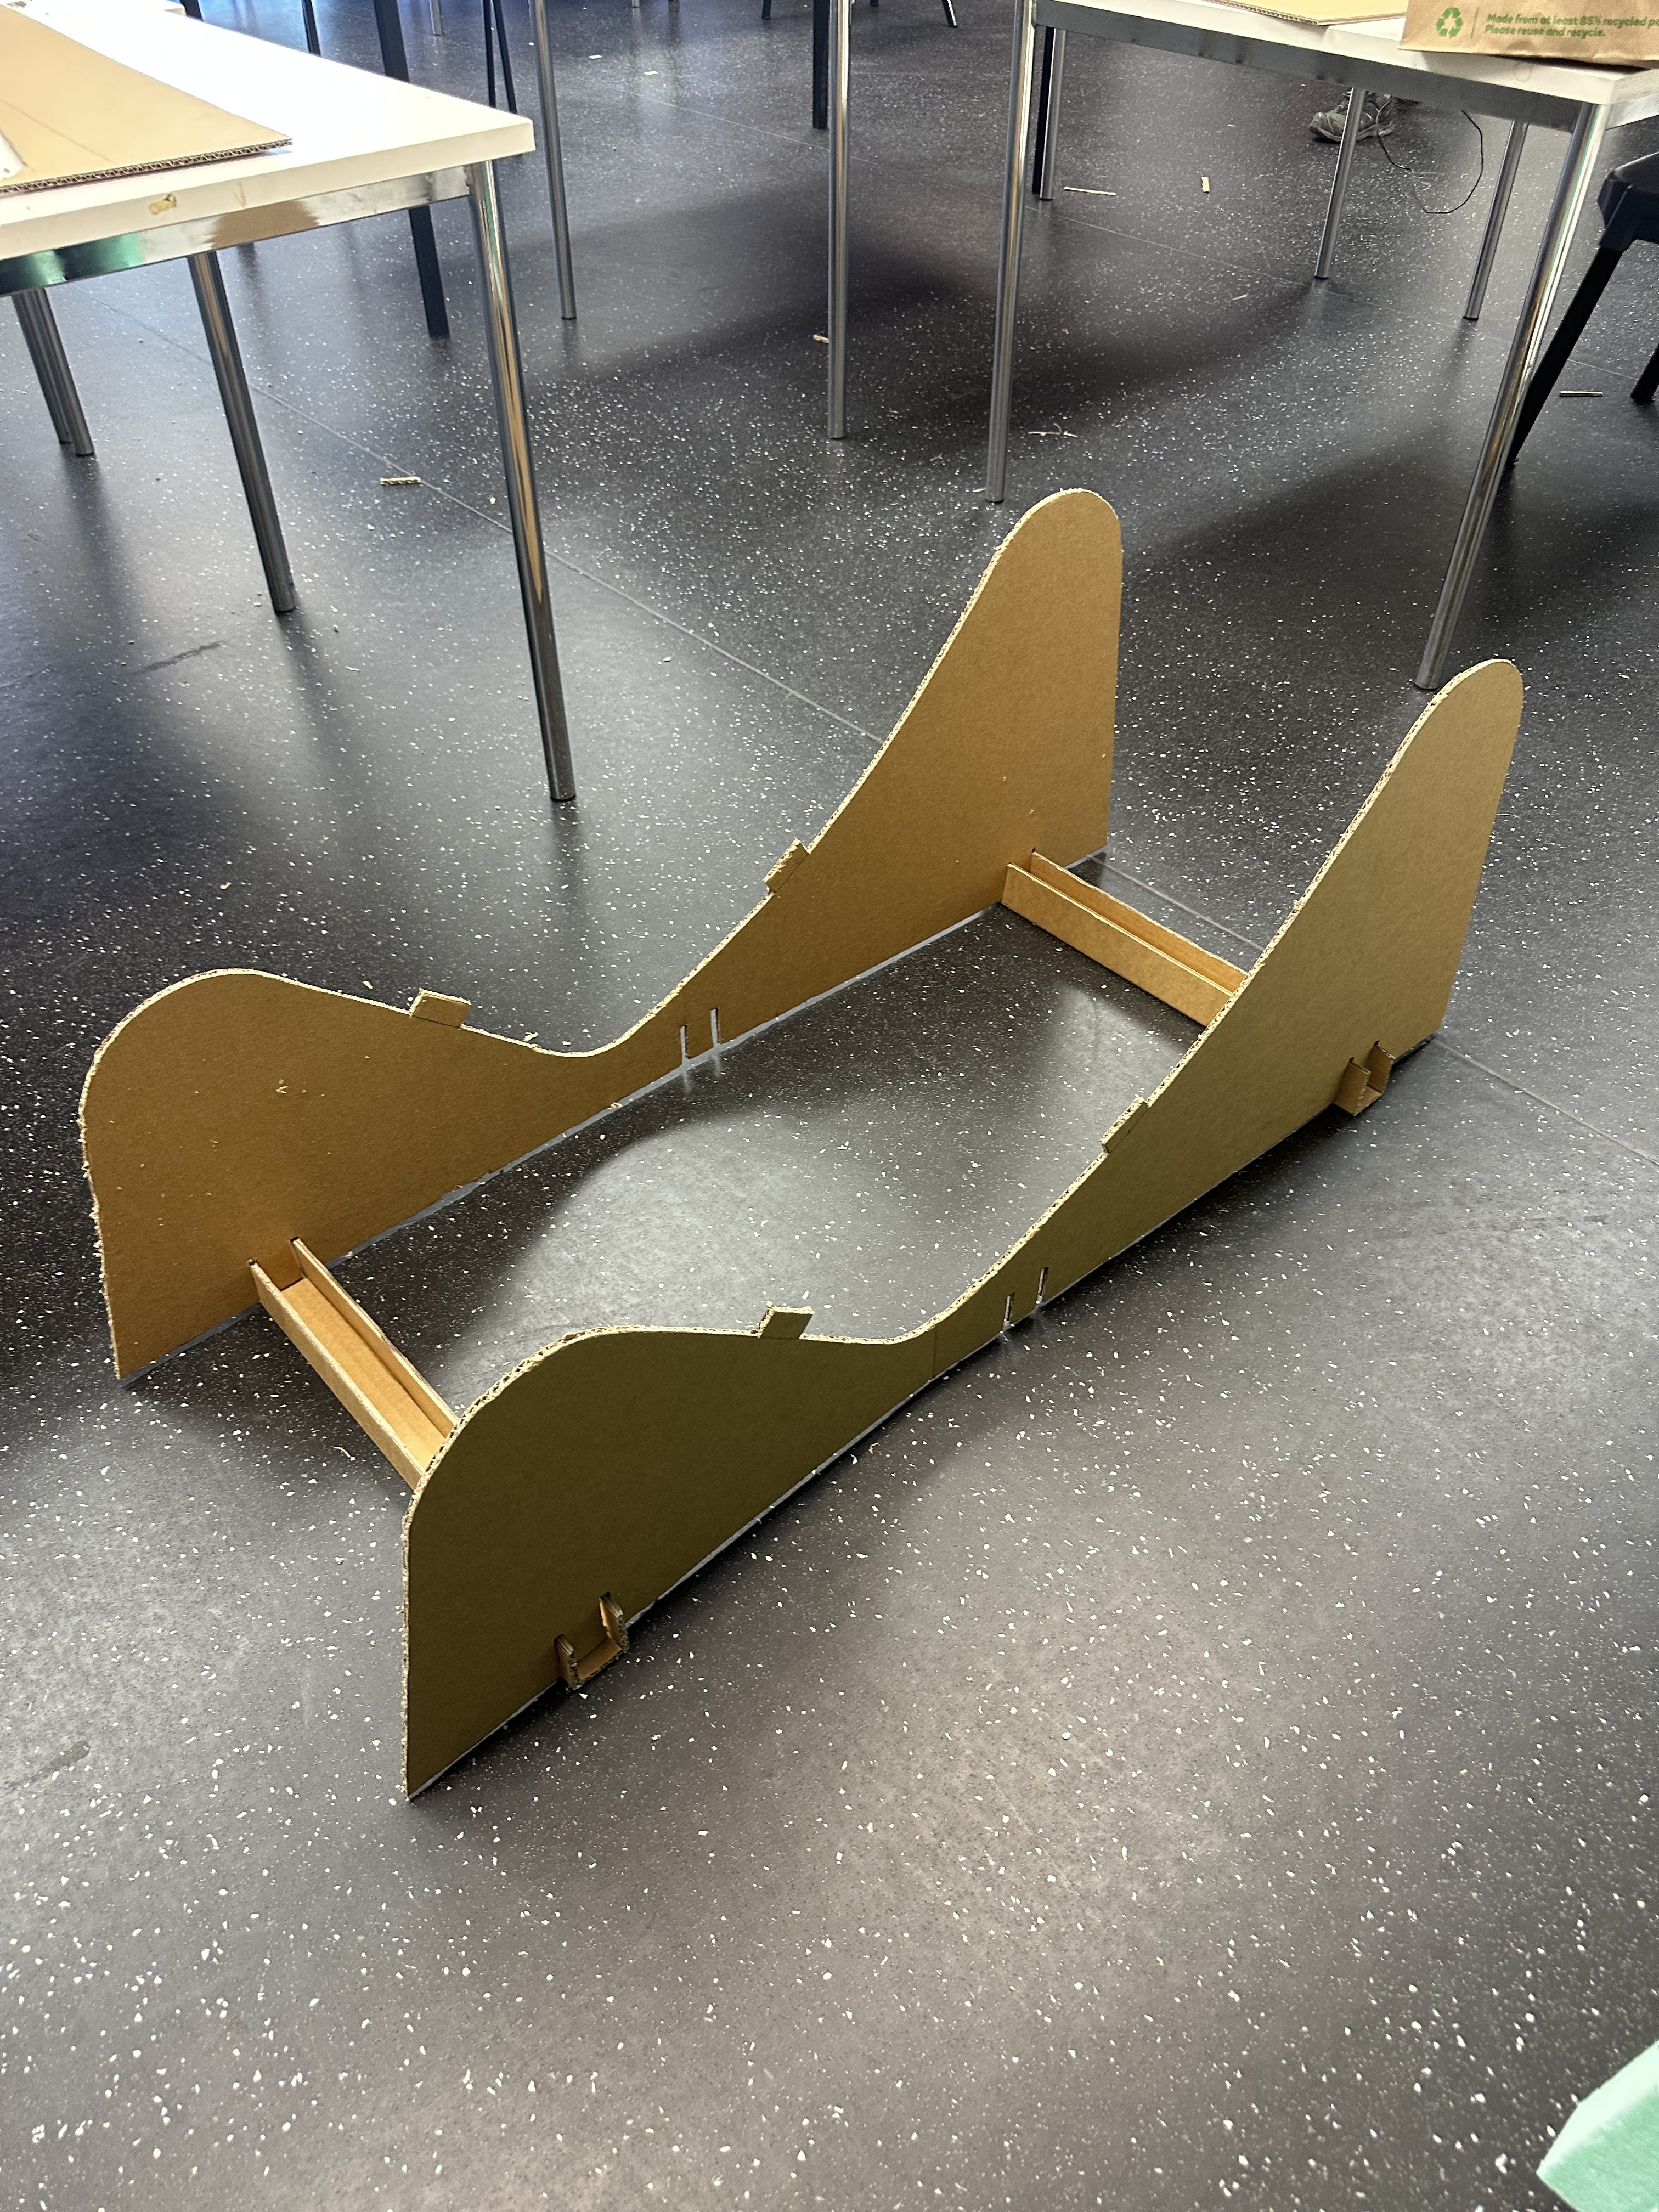
First glimpse of how the size scales in an environment. It also helped confirm the components fit together perfectly, which they did.
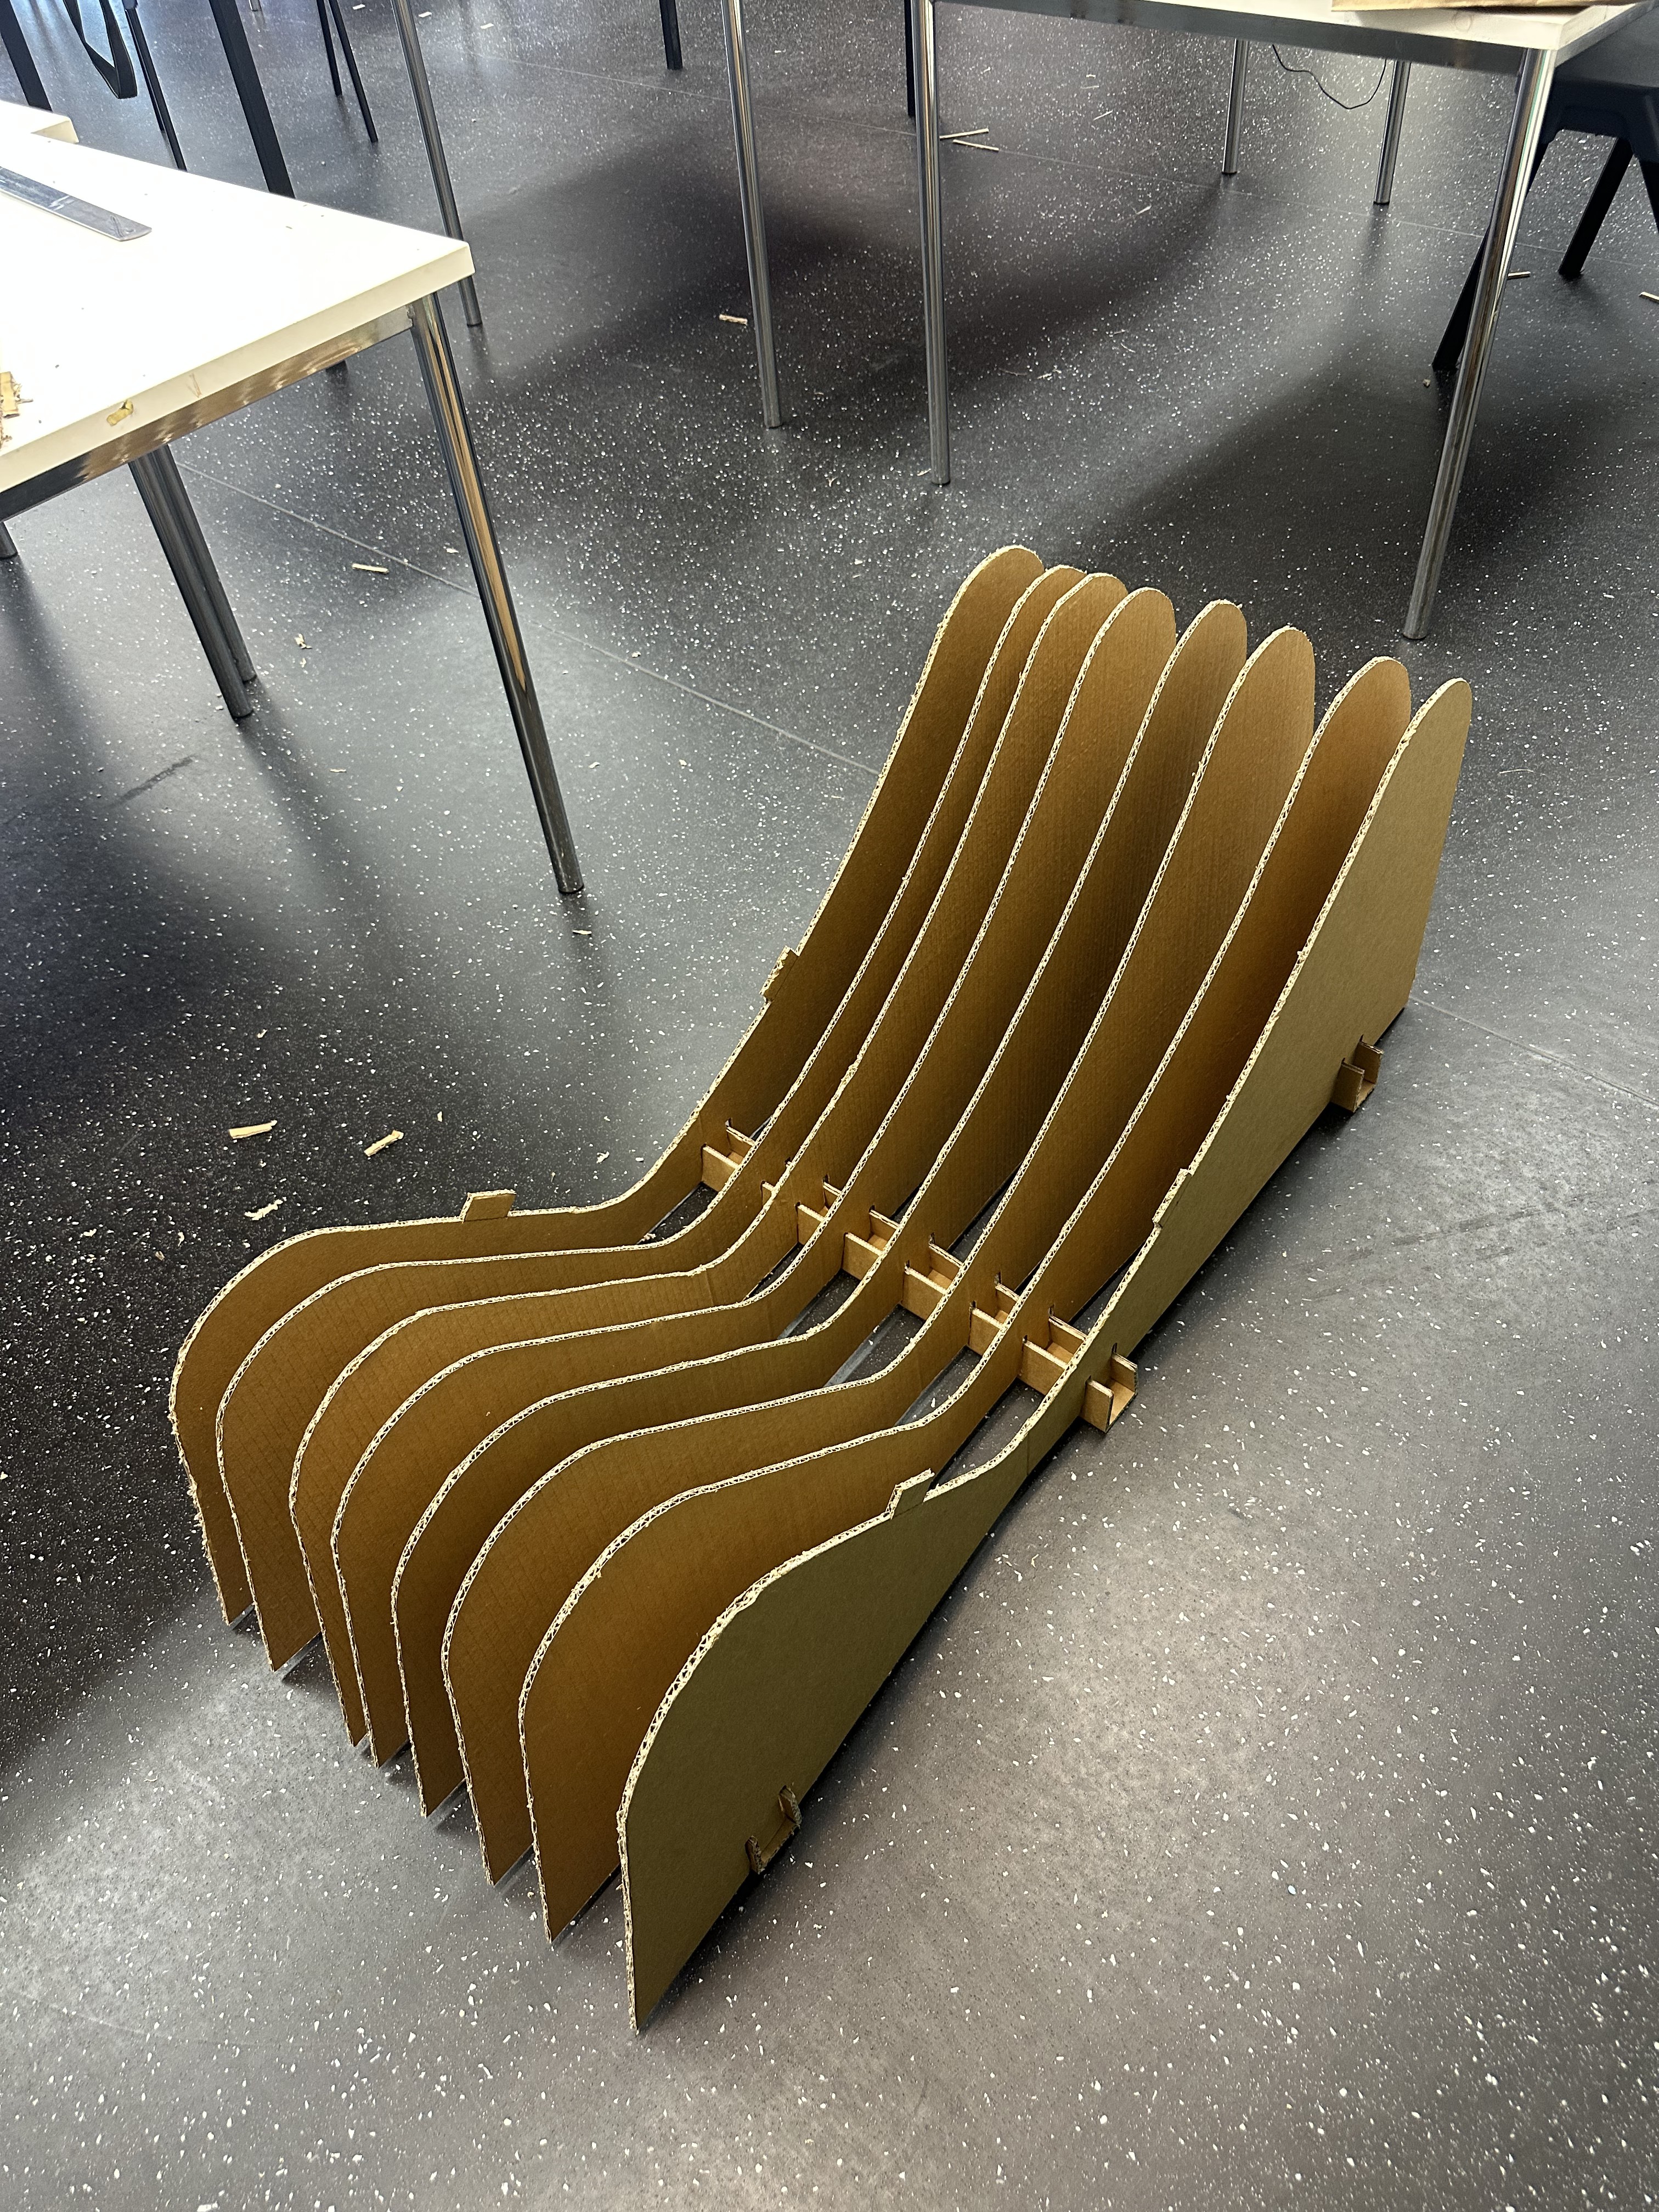
Placing the remaining vertical sections, the form is almost complete.
Final Product
The completed Quartic Lounge Chair at 1:1 scale, constructed entirely from cardboard with no fasteners or additional materials.
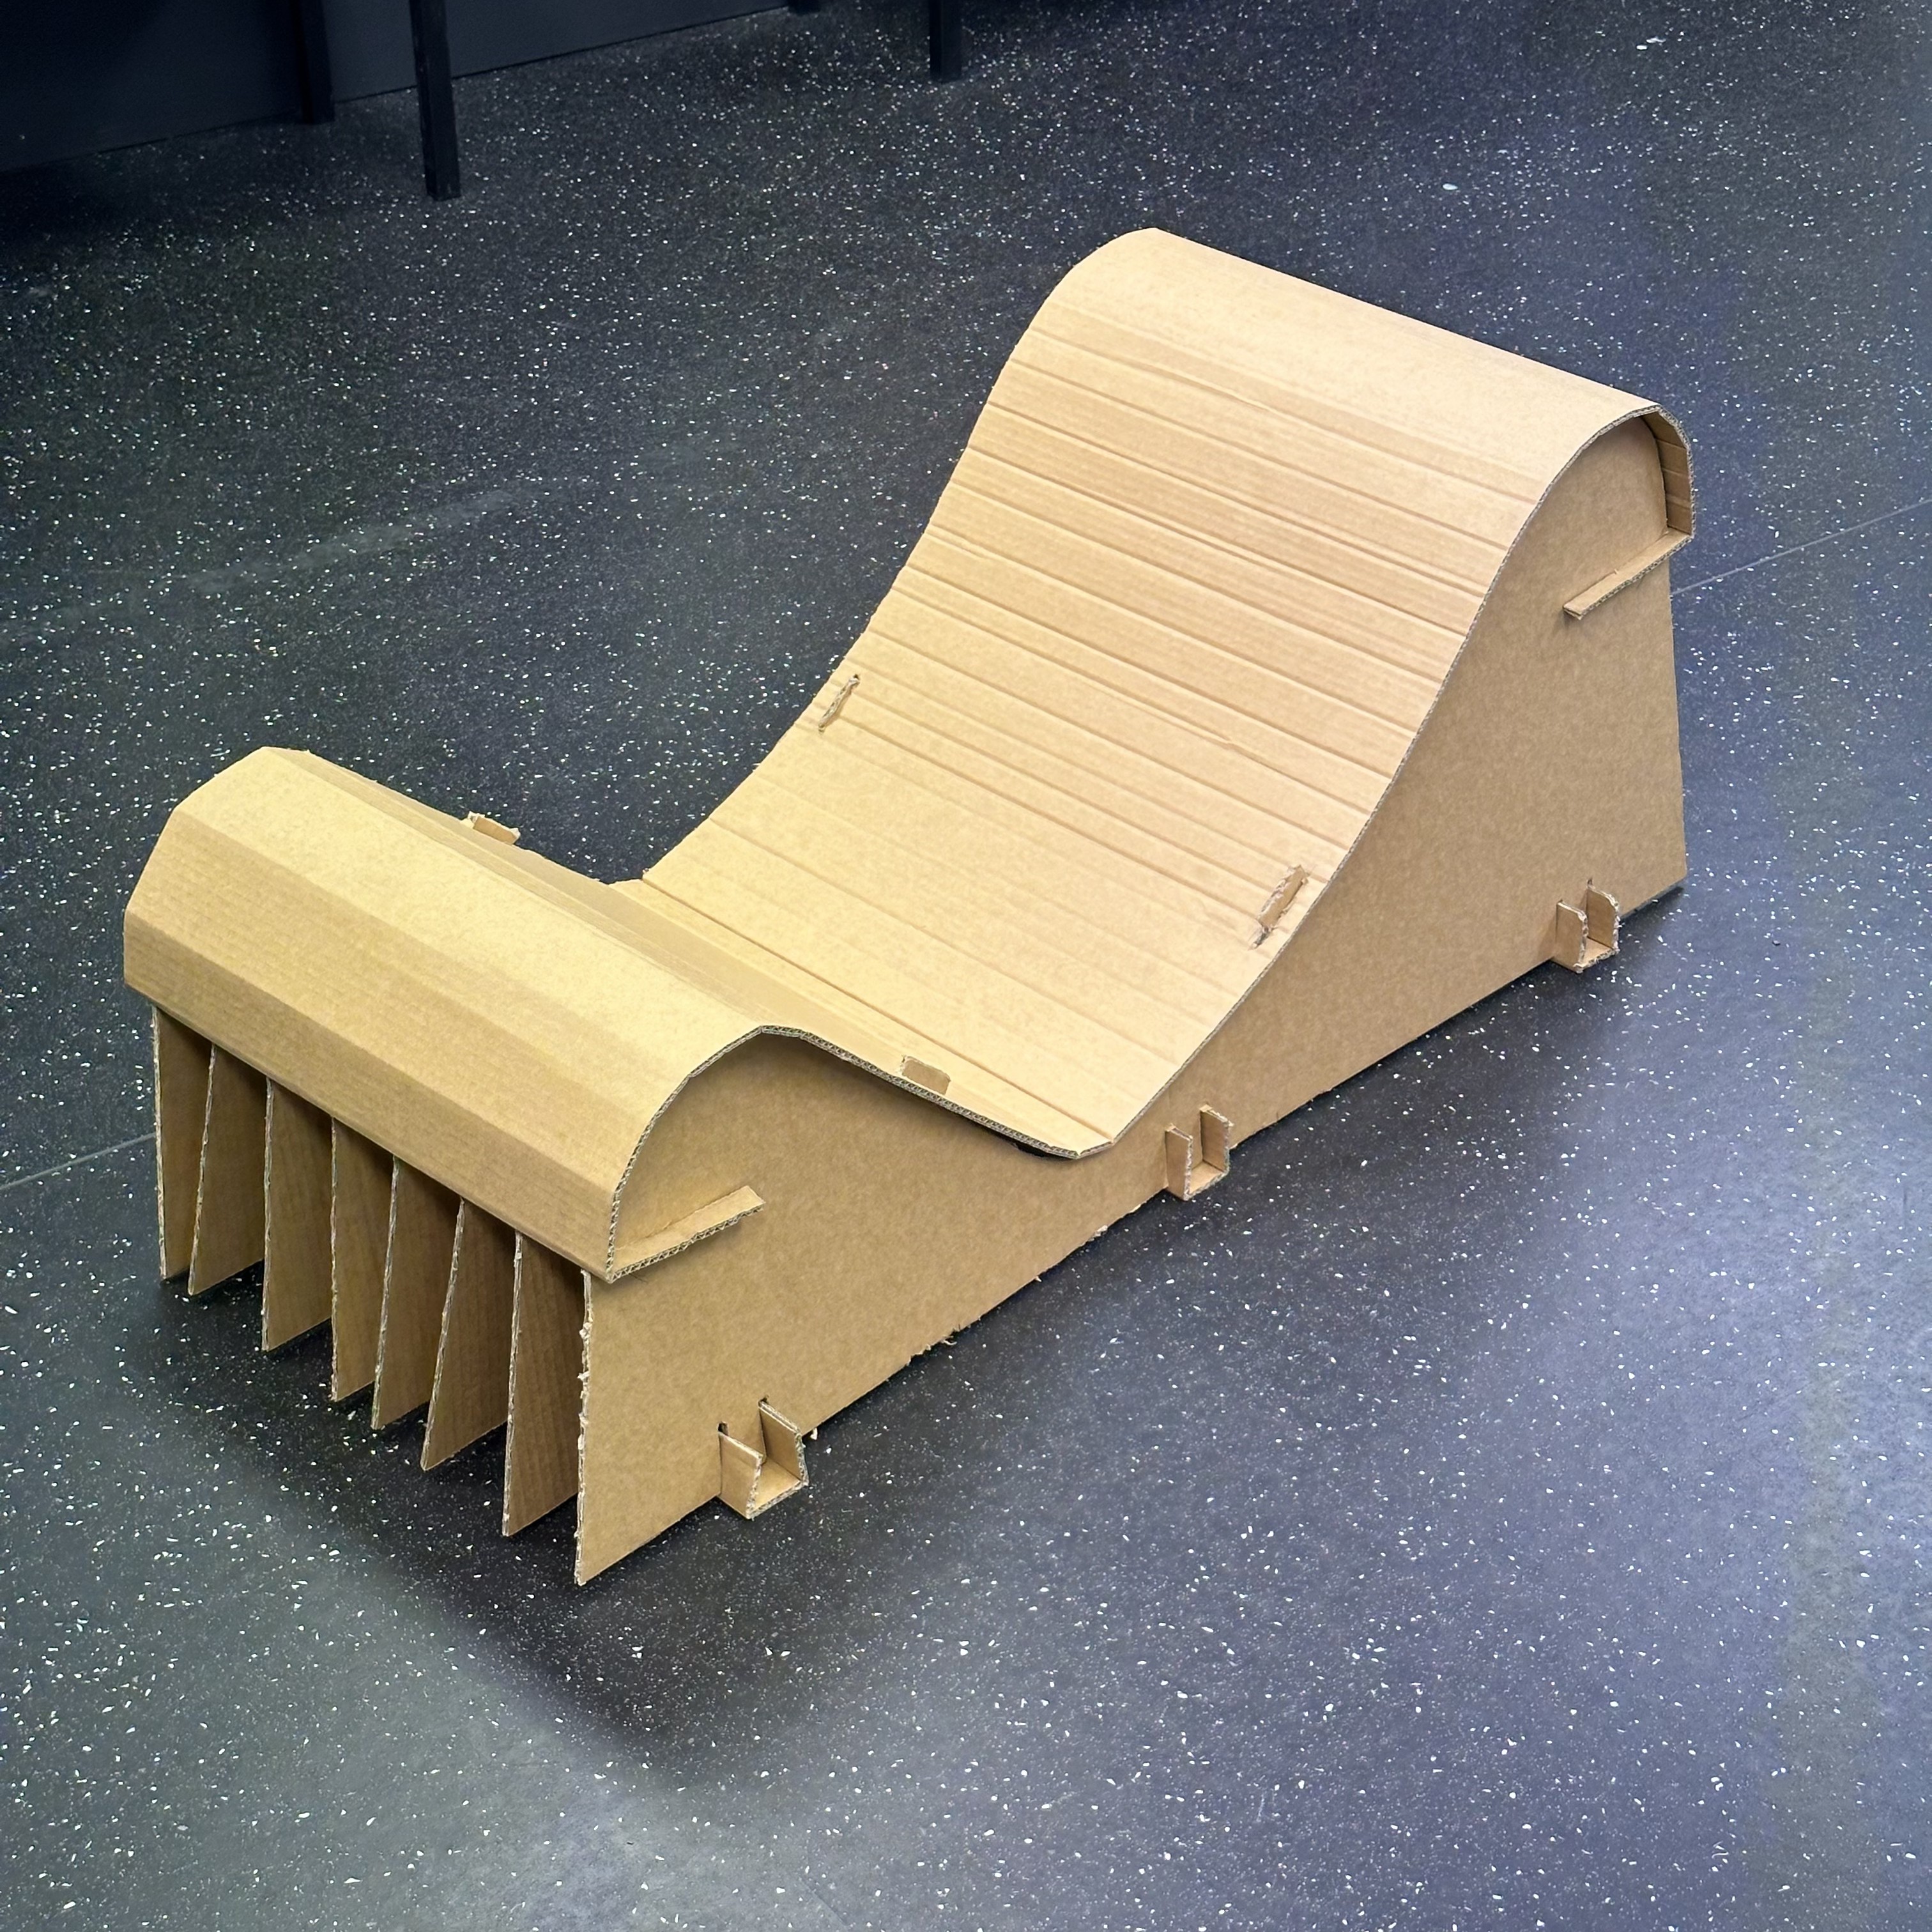
The Quartic Lounge Chair, developed entirely using cardboard, no other fasteners or materials.
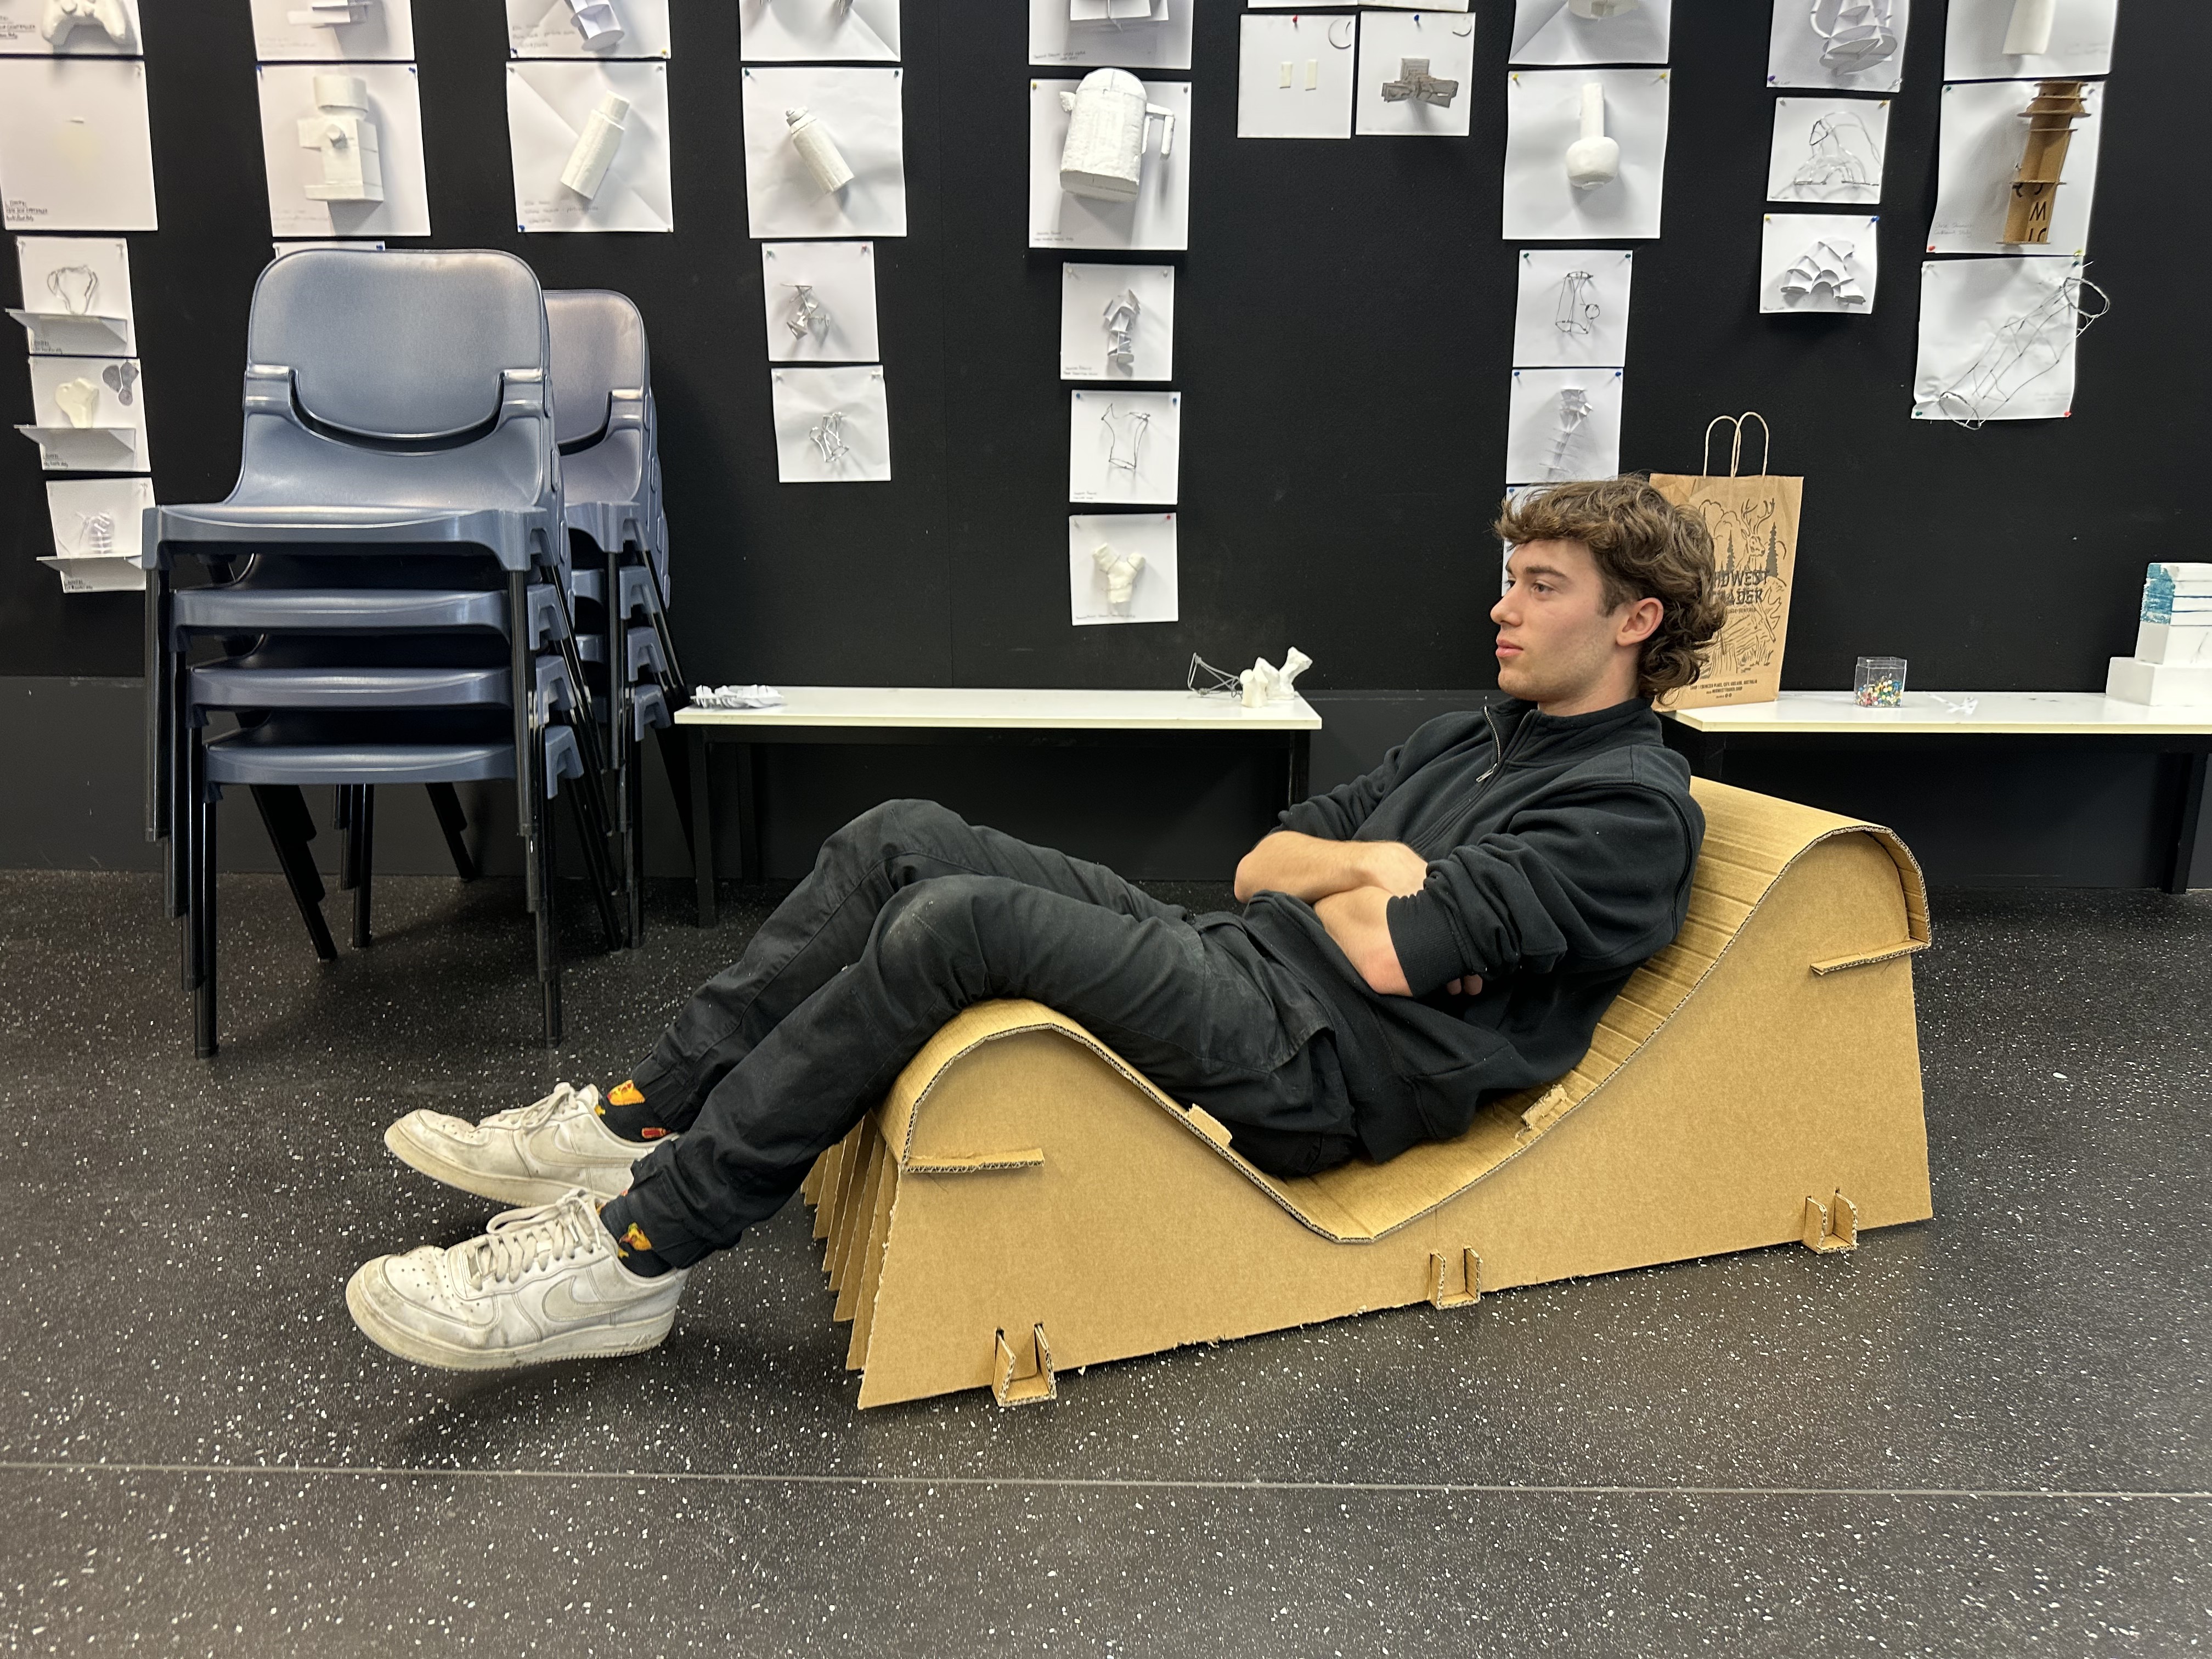
The anthropometrics are perfect. The length from your bottom to where your knees sit is ideal, and the large radius creates a smooth feeling under the leg. The slight curve to the backrest molds to the natural shape of the back, supporting 80% of it. The high knees create a unique position, mimicking that organic "weird" comfort we love in recliners.
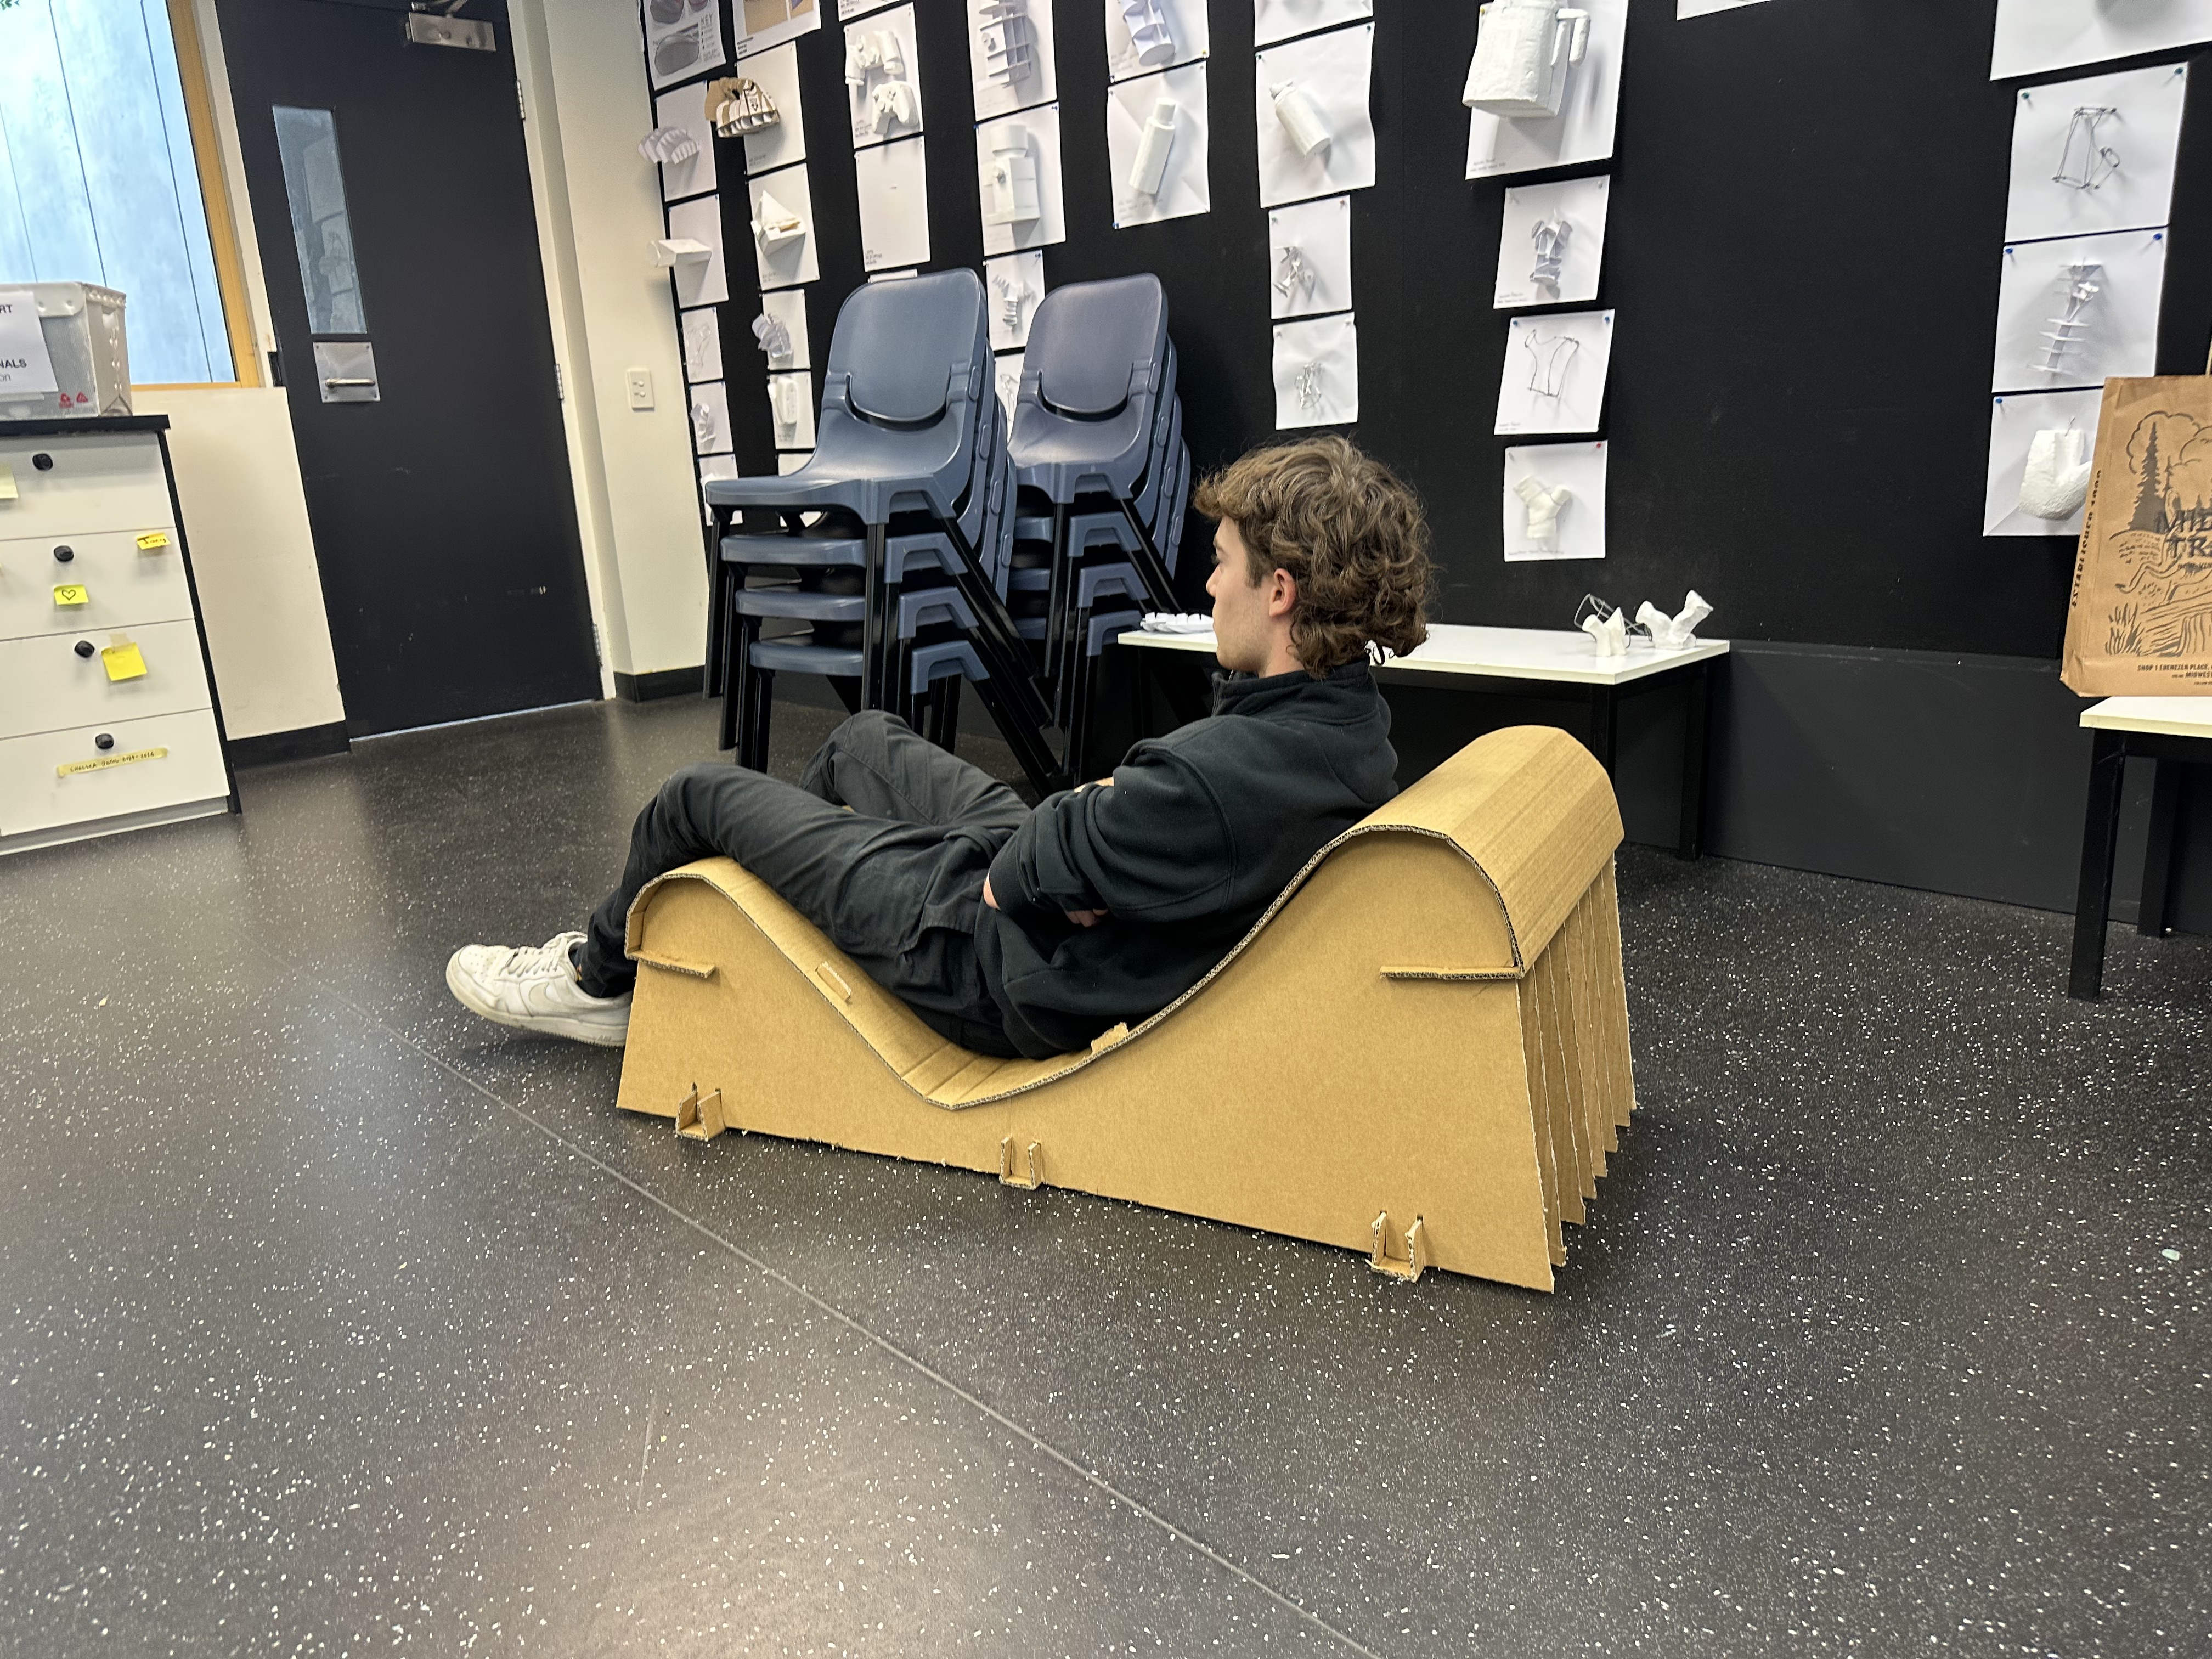
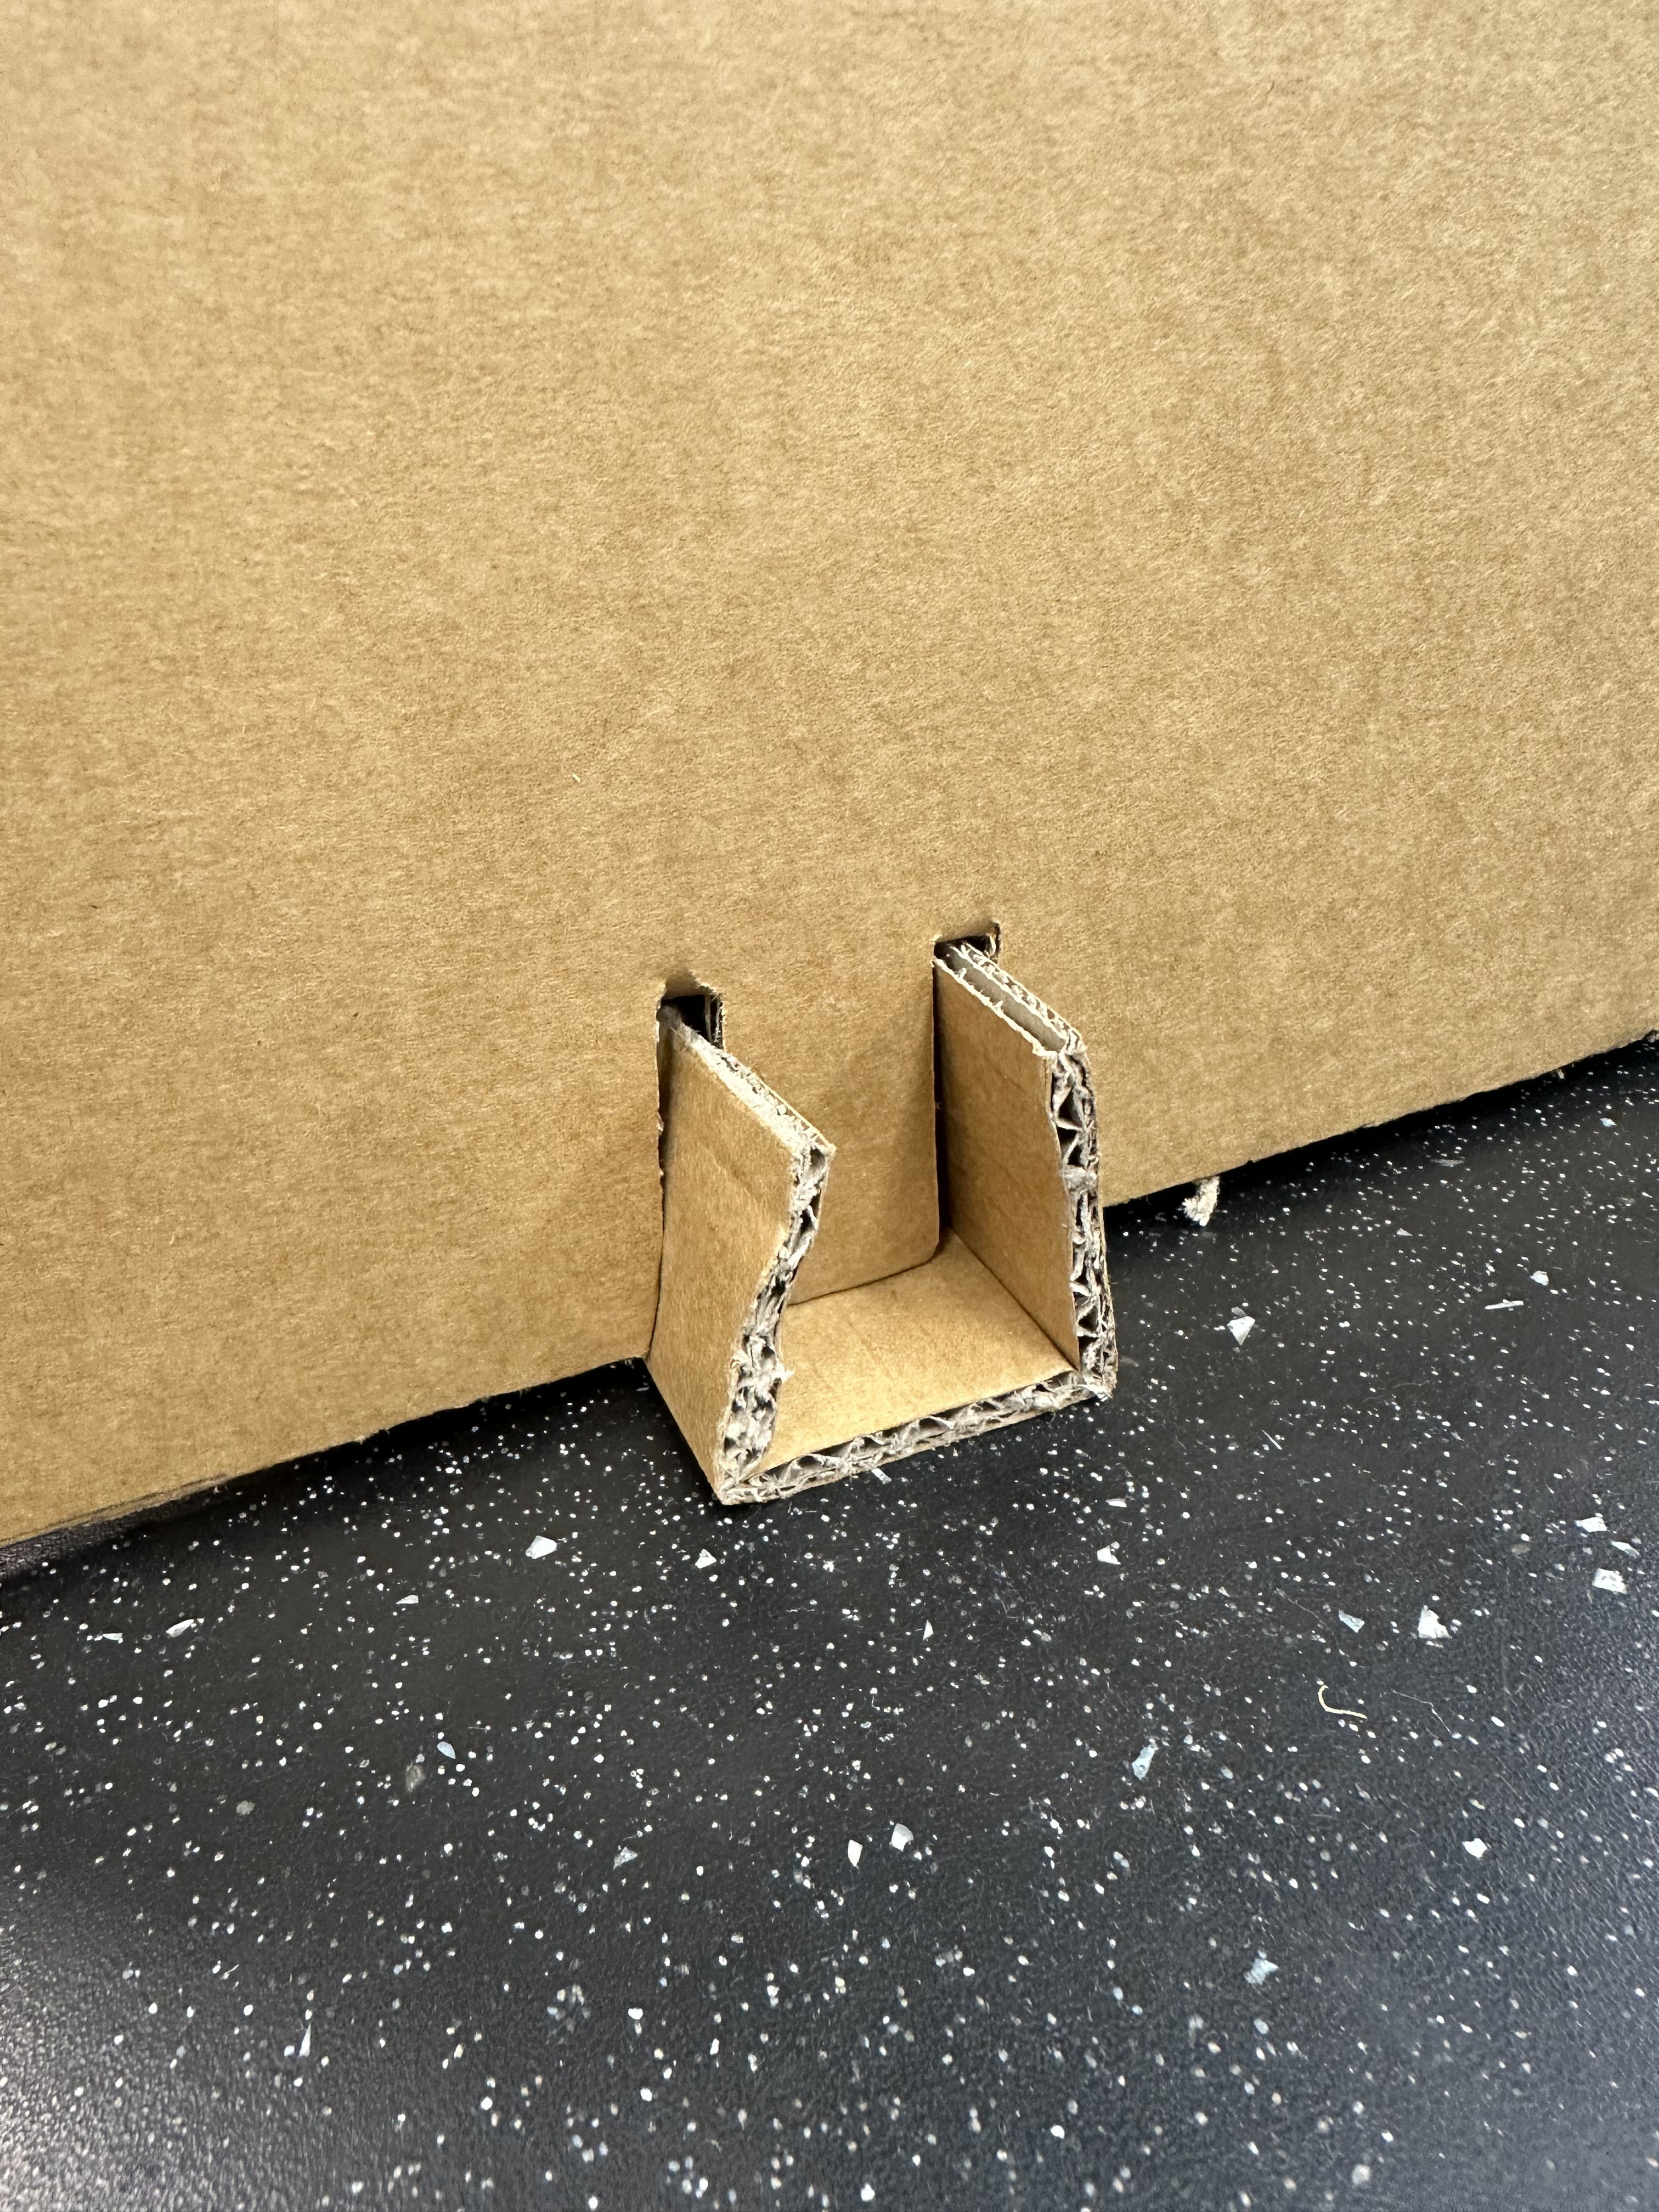
C section helping hold together the base.
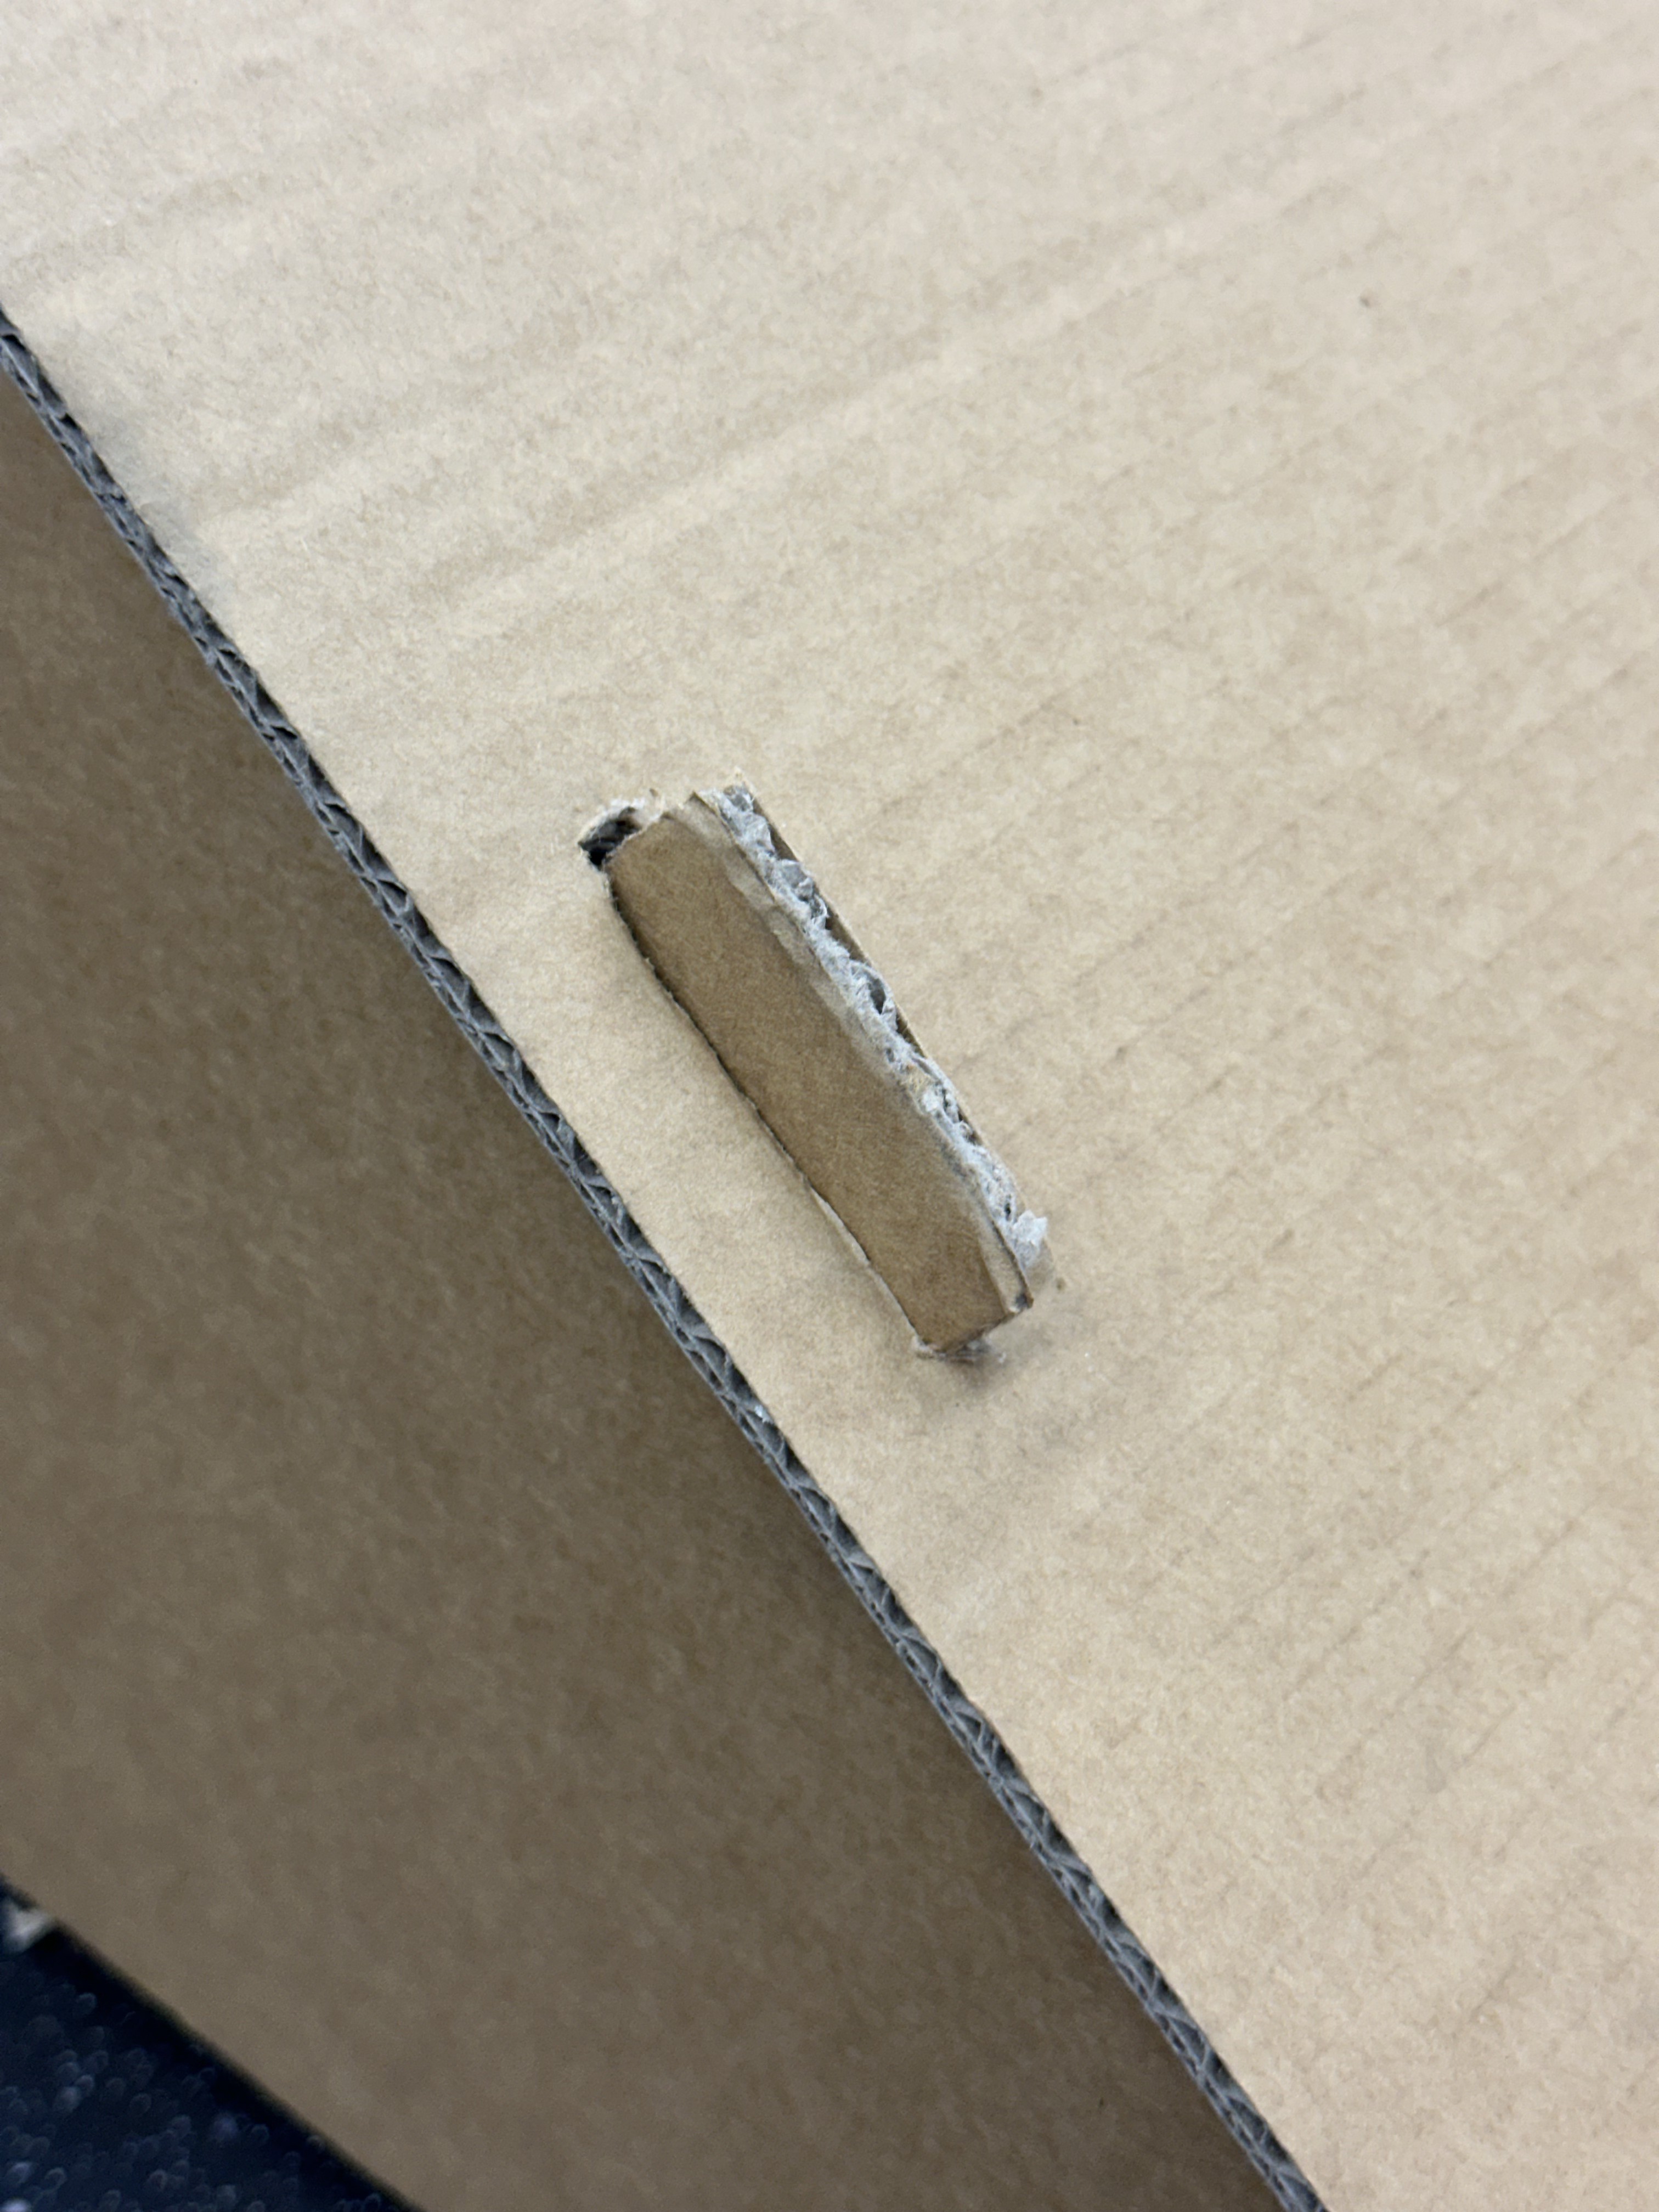
Tabs holding the sheet in place at the lowest point.
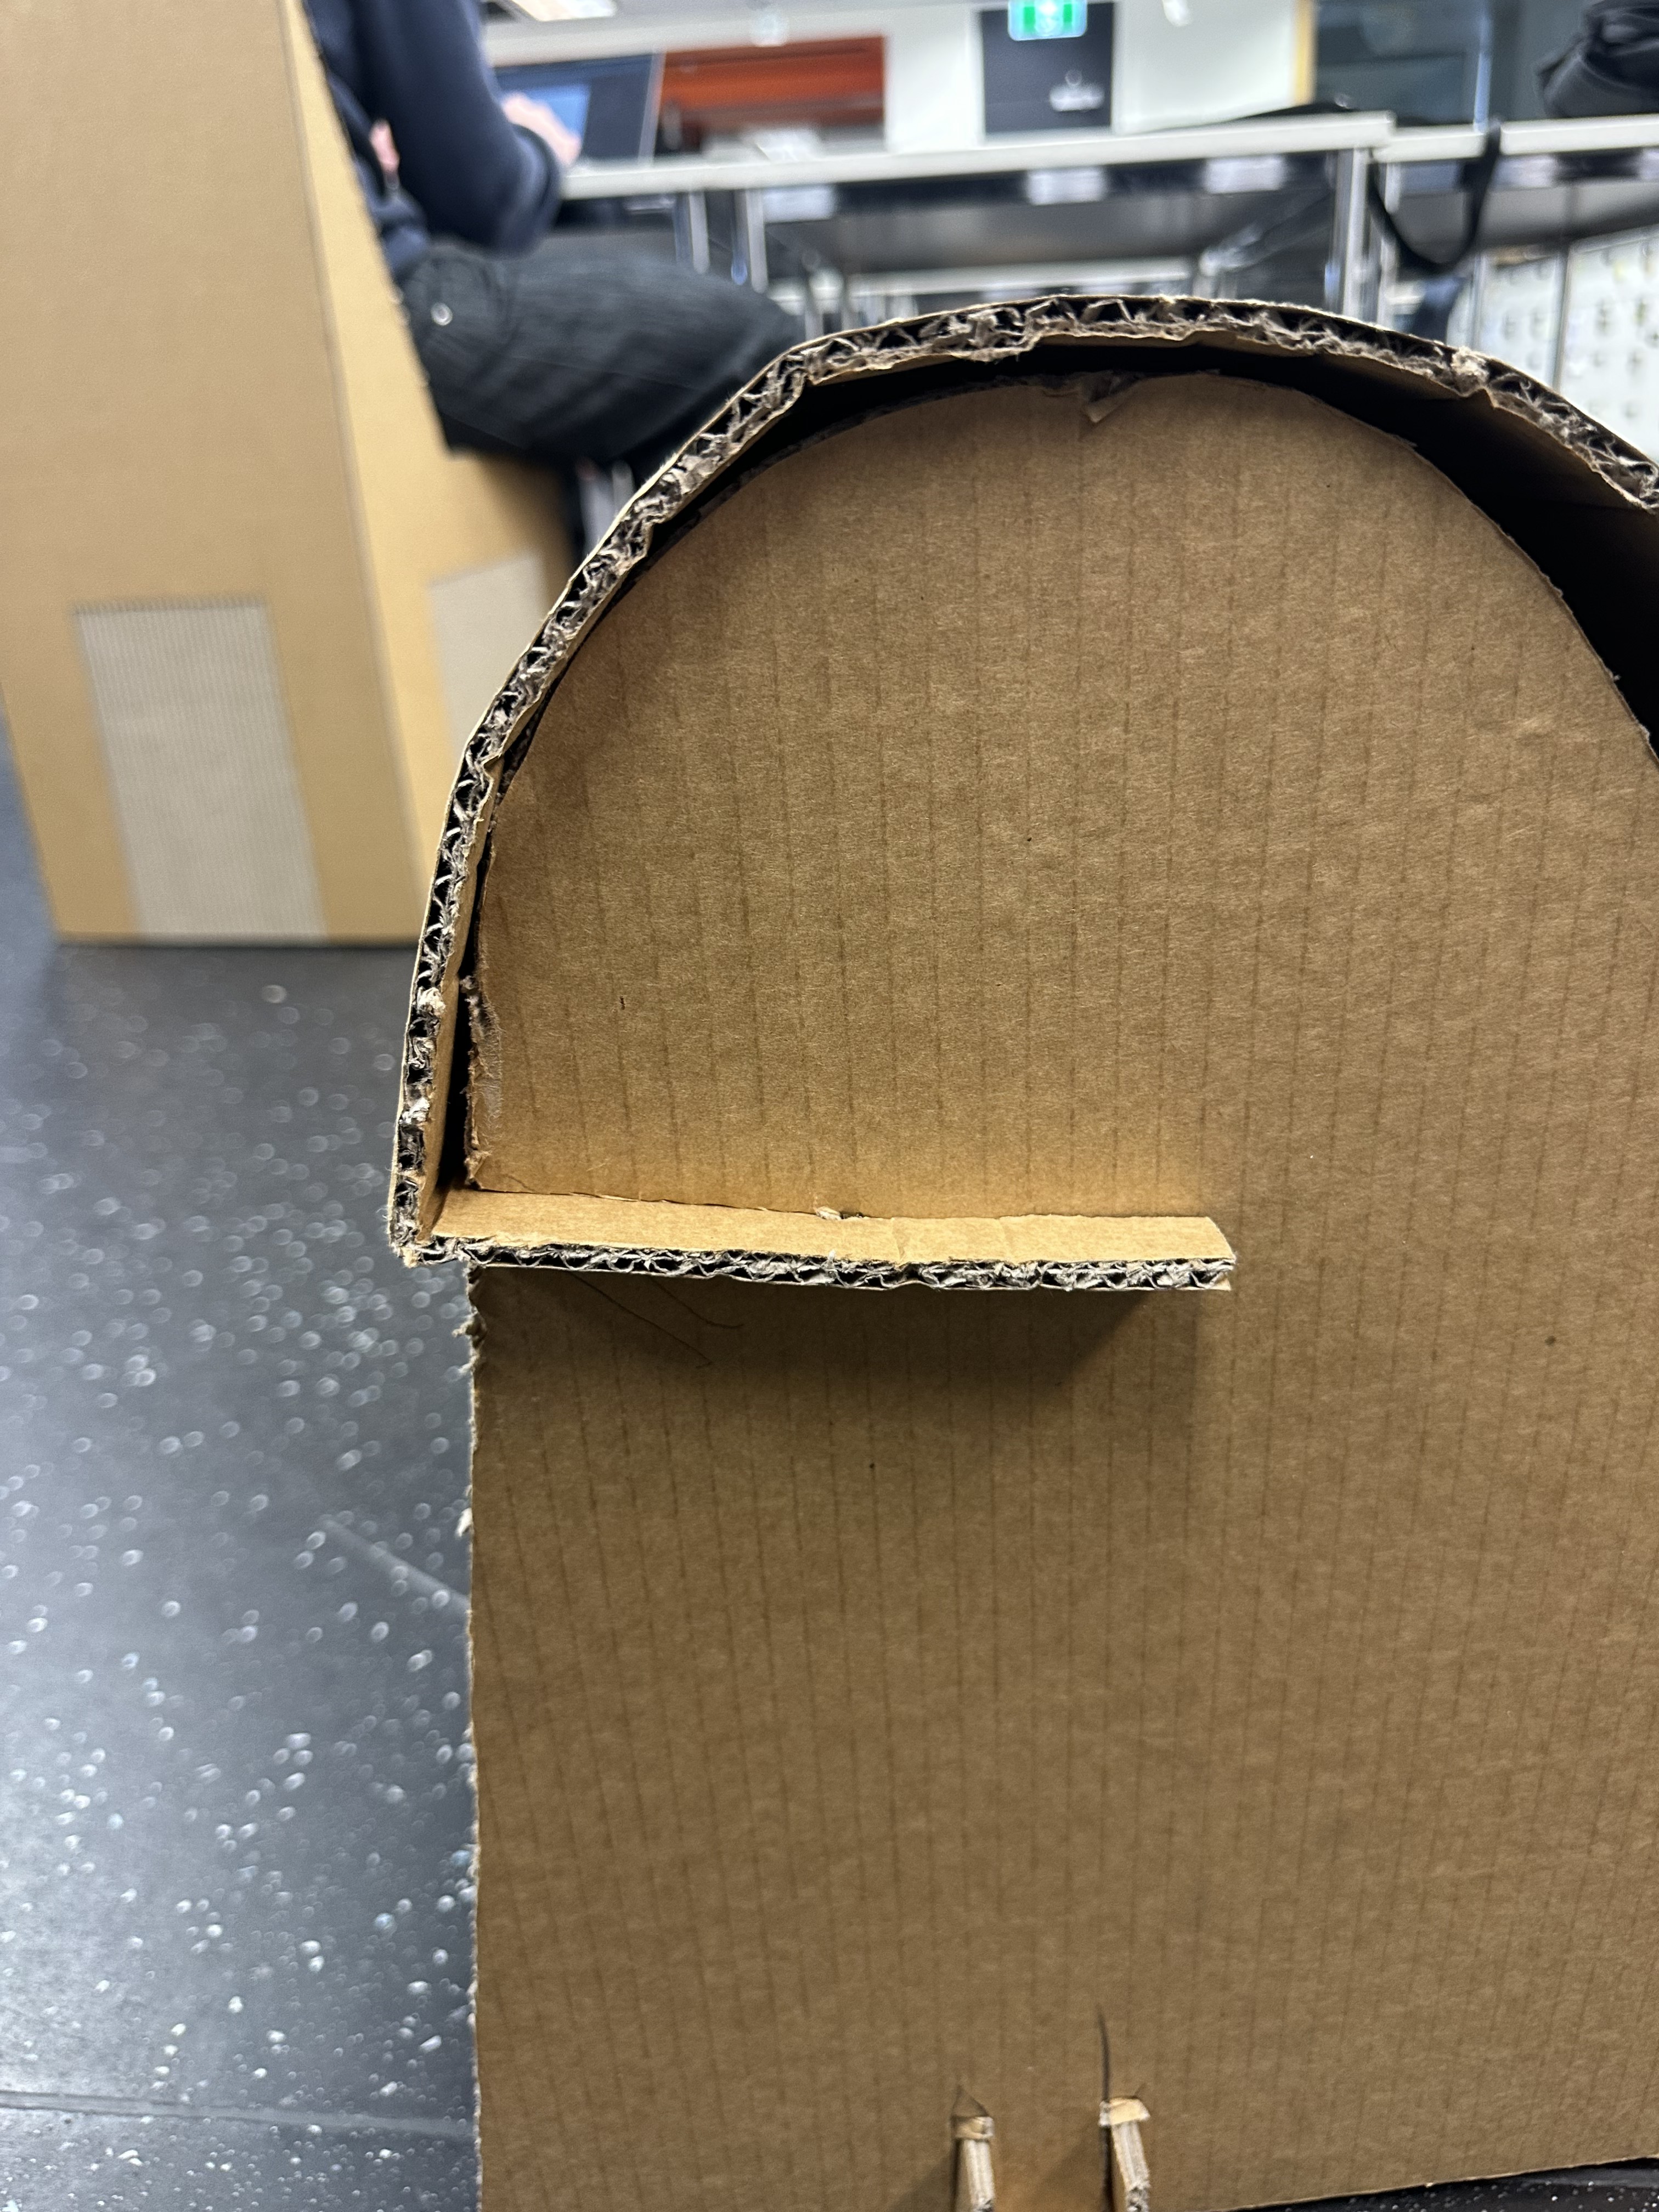
The connection point of the sheet at both ends of the chair.
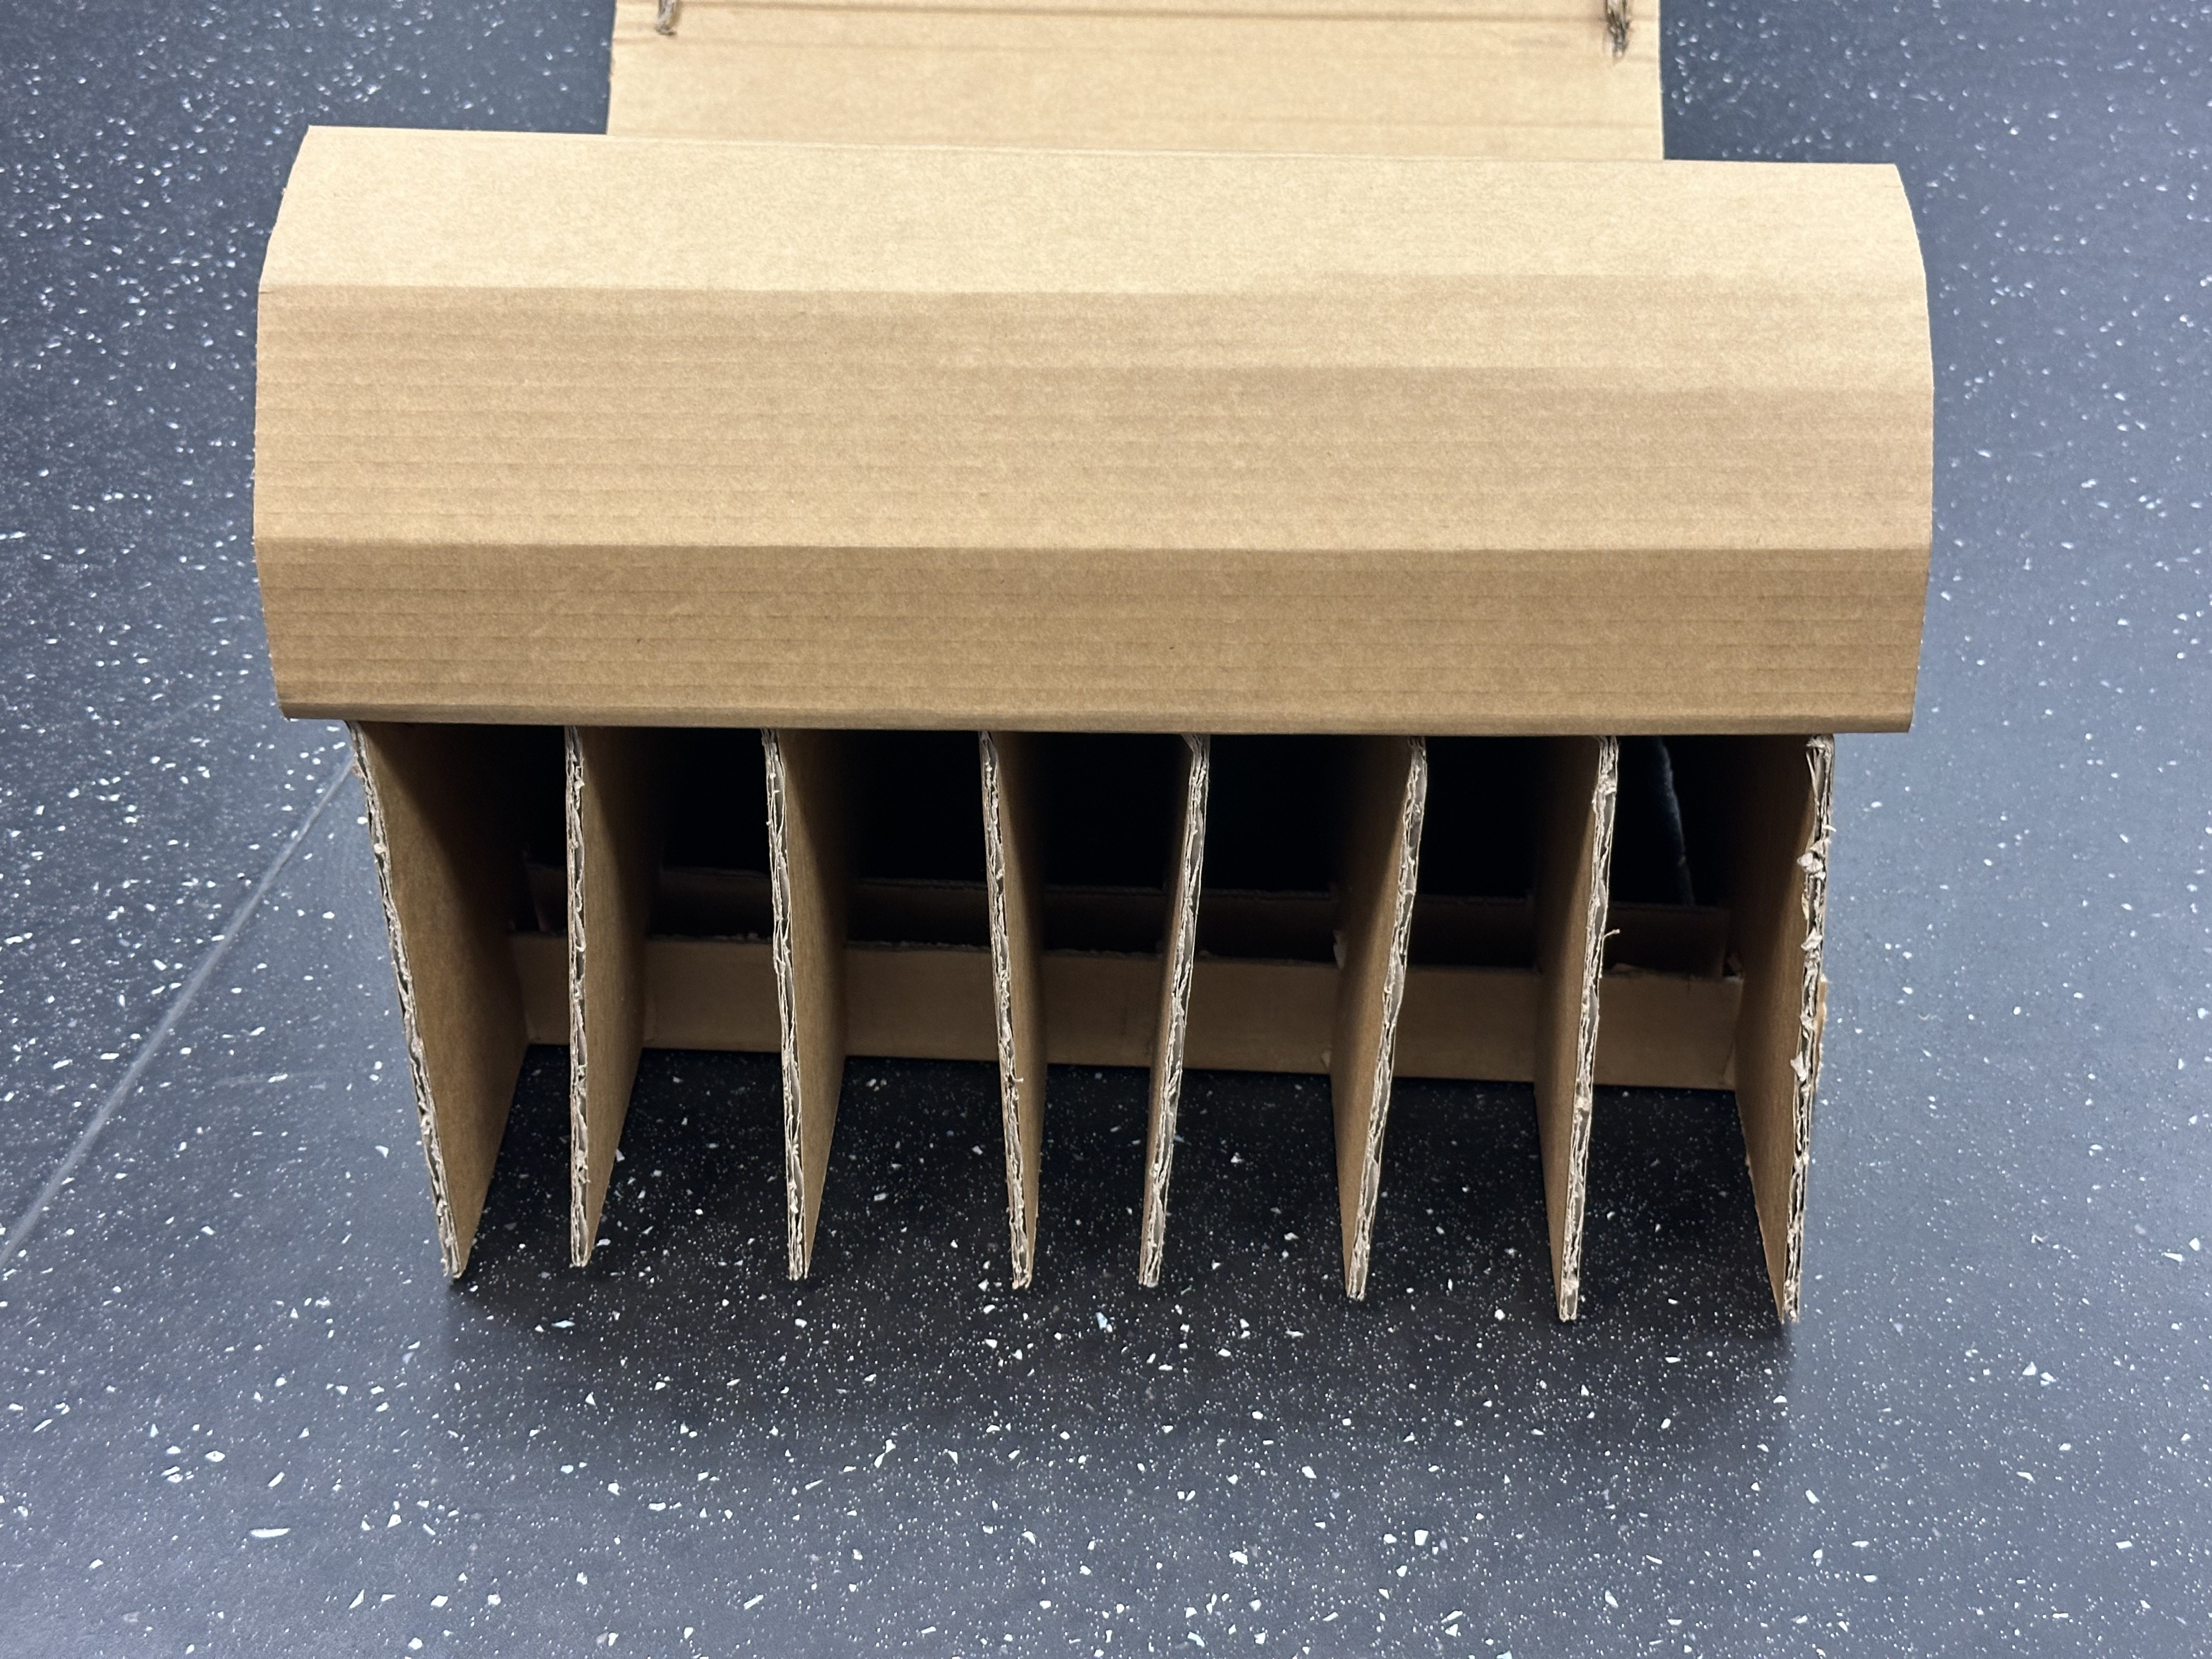
Front-on view of all 8 vertical 2D profiles.
What worked well
When creating this chair at 1:1 scale, the best thing I could do was take my time during the build process. Taking my time ensured I didn't accidentally waste cardboard or mess up my sketching. I also separated it across 2 days, allowing me to sleep and reflect on day one and come back with a fresh mind for day two. It was during that reflection I remembered I needed to add the tabs on the last 2 planes. If I hadn't taken my time, that feature wouldn't have made it to the final product and would have had a major negative impact.
Unexpected challenges
The main challenge I faced was evenly spacing and holding all 8 vertical planes in position. To compensate, I integrated an evenly spaced slotwork into the ends of the draped sheet, helping align all the planes evenly with approximately 60mm spacing. This didn't just help aesthetics, it also physically held the planes securely and produced an even weight distribution.
Next time
Next time I would make the backrest longer to account for the head. This may be possible by reducing the number of vertical planes to give me more cardboard for the extended backing.
Overall
The best part of this product is how comfortable it is. The use of large smooth radii and lifting the knees up to chest height really conveyed the feeling I wanted with this chair. Additionally, having 8 vertical planes made it feel very solid when you sit on it, ensuring you're not going to break through or collapse, a psychological reassurance this chair genuinely produces.
Final Reflection
A reflection on the full cardboard chair project, from research through to the finished product.
Most rewarding part
The outcome turned out to be a stable product that a human can actually interact with and not crumple under weight. Additionally it turned out to feel comfortable, which is something I needed this style of chair to have. Another rewarding thing was applying all the knowledge I developed over the course about design principles and elements and being able to actually see that reflected in my own work.
How my understanding evolved
I would never have been able to develop a chair using just cardboard, but due to doing exercises like the planar activity, those skills were developed and allowed me to transfer them to cardboard. My concept around structure improved the most, as I now actually believe even the most flimsy materials can be transformed into stable and functional products if used correctly.
Challenges faced
The main challenge for me was working with a material that is hard to work with. My background is with harder materials like timber, plastic and metal, and using cardboard that doesn't cut as smoothly, I found it challenging to maintain quality throughout the build.
What I would improve
In the future I would consider making the back longer to compensate for a headrest, which would most likely mean removing some verticals to make up for the extra cardboard usage. Additionally, I would take more time cutting my pieces as I feel it was a bit rushed and the aesthetic quality didn't turn out to the standard I usually hold myself to.